A transaction module is the RPC class that defines a
single mainframe transaction. The RPC class is used to run the transaction
in a client application. Through the Telnet Designer, you design
the RPC class by designating the mainframe application screens,
input parameters, and target information that make up a transaction.
The following sections describe how to perform these tasks.
x
Accessing the Mainframe Application
To capture and save an application transaction, you
must open the mainframe application within Telnet Designer. Once
connected to the application, you can issue commands and navigate
the application as you normally would and use the emulation tools
available in Telnet Designer to create an RPC program.
x
Procedure: How to Access a Mainframe Application
To access
a mainframe application for an emulation session:
-
Open
the Telnet Designer.
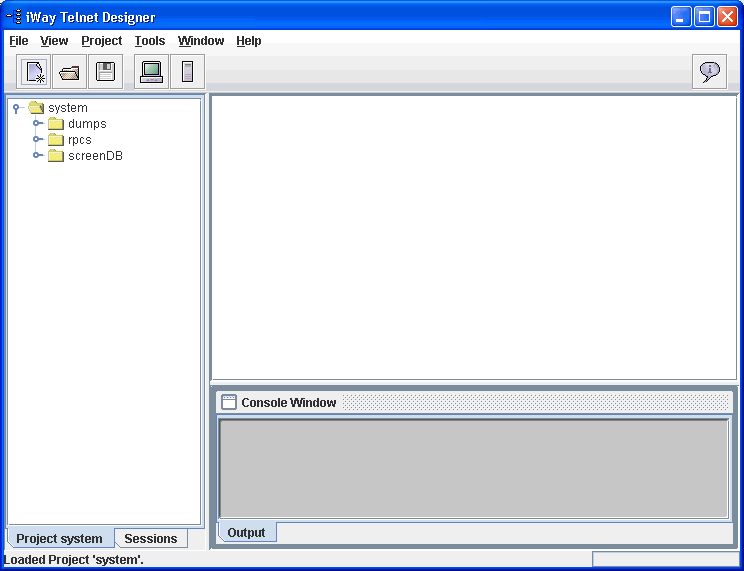
The Telnet Designer window opens, as shown in the following
image, with the Project tab active in the left pane.
-
At the
bottom of the left pane, click the Sessions tab.
A Sessions folder appears at the top of the left pane.
-
Click Tools from
the menu bar and select Emulator.
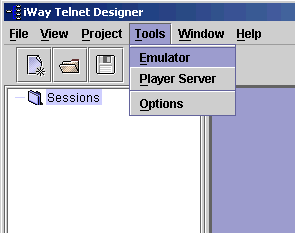
The following image shows the Sessions folder in the left
pane and the Tools drop-down list.
The
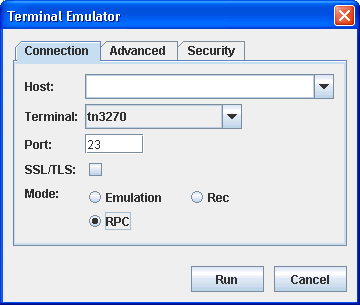
Terminal Emulator dialog box opens, as shown in the following image.
The Connection tab, where you provide information about connecting
to the mainframe, is active.
-
From
the Host drop-down list, select the mainframe you want to emulate.
-
From
the Terminal drop-down list, select the terminal type (tn3270 or tn5250)
for the emulation.
-
In the
Port field, type the port number to access the host.
-
In the
Mode field, click the RPC option button.
-
For more
emulation options, click the Advanced tab.
The Advanced tab of the Terminal Emulator opens, as shown
in the following image.
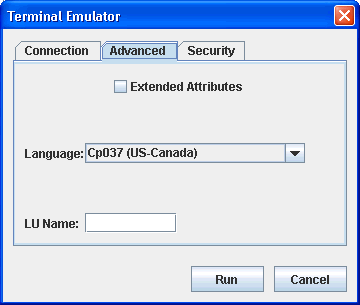
Note: The Extended
Attributes option is not operational for the RPC mode.
-
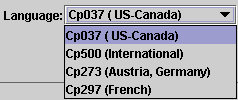
Make
a selection from the Language drop-down list, shown in the following
image. The Language selection determines the national language character set
that will be used in your emulation session.
-
If you
want to use a specific terminal name (LU) or pool name (LU pool) with
your mainframe connection, type this value in the LU Name field.

This
option allows the mainframe to dedicate specific connections and
privileges to specific telnet ports.
-
To connect
to the mainframe application and start the emulation session, click Run.
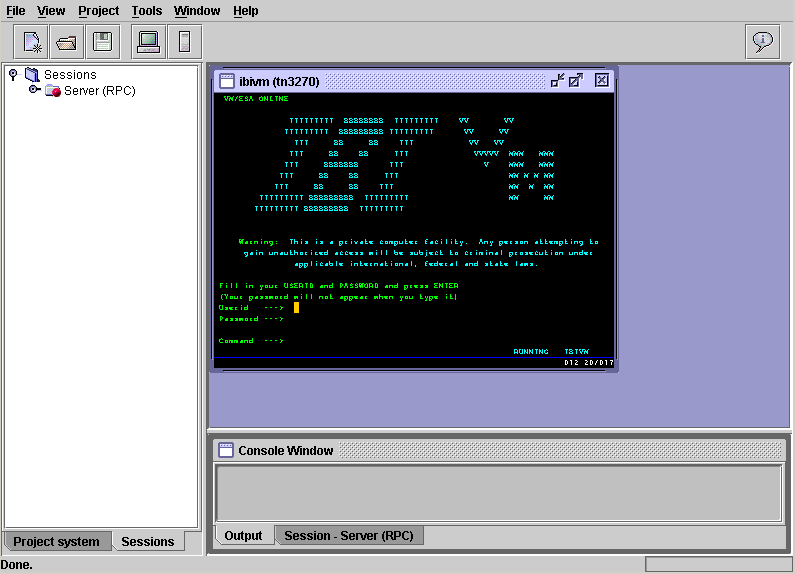
A window of the VTAM session opens in the right pane and
a folder that represents your session appears in the left pane.
The following image shows an example of the VTAM window and a session
folder named Server(RPC).
Each
session folder contains sub-folders that will hold the information
related to your emulation session. The following image shows the
left pane of Telnet Designer with the Server (RPC) session folder
and its sub-folders.
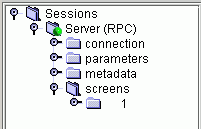
The
session sub-folders are:
connection. Contains the mainframe
application connection information, such as, host, port, type, and
language.
parameters. Contains the input fields and
data you designate for the transaction.
metadata. Contains
the designated output expected from the transaction.
screens. Contains
the information for the designated screens in the transaction.
As
you build a transaction session, these subfolders become populated
with the transaction information.
You can now begin your emulation
session, and capture the necessary screens and input and output
data, as explained in the following sections.
x
To capture an application transaction, navigate through
the application and as you proceed:
- Identify a screen
that is necessary to the transaction. When the adapter executes
the request document at run time, it recognizes these designated
screens.
- If the screen
contains required input fields (Parameters) that require values
at run time, define them to the transaction. The values will be
provided in the request document at run time.
- If the screen
contains output fields (Metadata) that you want returned at run
time in the response document, define them to the transaction.
- Continue to
navigate through the application and identify each screen and the
input and output fields that are necessary to the transaction.
- Log off the
mainframe application and save the emulation session.
The following procedures explain how to perform these tasks.
Note: If you need to include the contents or metadata
of a table as input or output in your transaction, see How to Capture the Contents of a Table.
x
Procedure: How to Identify a Screen
To identify
a screen to the transaction module:
-
Determine
the field(s) on the 3270/5250 screen that uniquely identify it from
the other application screens.
Note: You do not need to identify a blank screen.
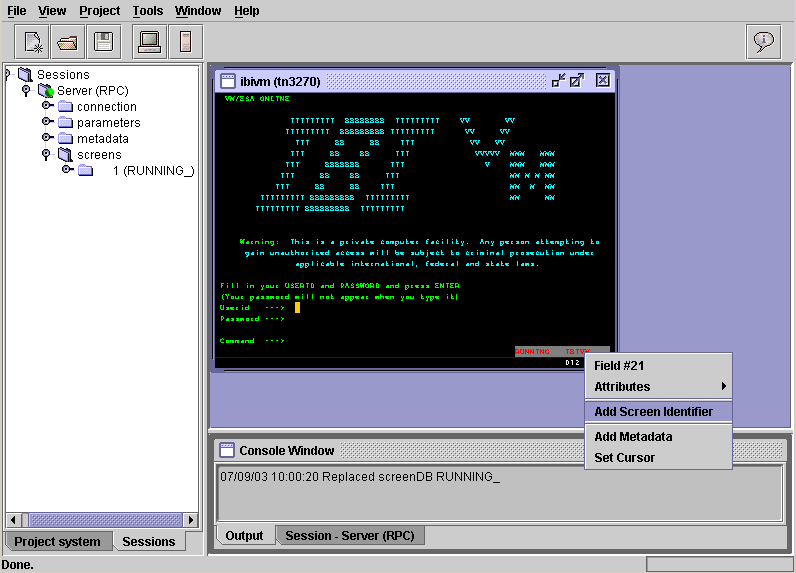
If
there are several fields, choose one to identify the screen. The
following image shows an example of a field named RUNNING selected
in the lower left of the screen.
-
Right-click
the identifying field and select Add Screen Identifier.
The Screen Identifier dialog box opens with prompts for
identifying the field, as shown in the following image.
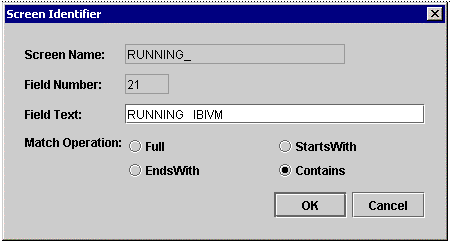
The
Screen Name and the Field Number fields are automatically populated
based on your selection.
-
In the Field Text field, type the text that uniquely identifies
this screen.
-
Select an option for Match Operation, which is the relationship of
the text you typed in the Field Text field to the complete text
of the field in the application. The options are:
Full. The Field Text entry is the complete text
of the screen field.
EndsWith. The screen field text
ends with the Field Text entry.
StartsWith. The screen
field text begins with the Field Text entry.
Contains.
The screen field text contains the Field Text entry.
For example,
if the field value is OPERATOR INSTRUCTIONS, and you enter OPERATOR
INSTRUCTIONS, the field text you entered is the full text of the
field on the screen. Therefore, select the Full Match Operation
option.
Alternatively, if you entered Instructions for that
field, select the EndsWith or Contains Match Operation option.
Note: When
a match is made, the adapter proceeds with the keystroke pressed,
such as Enter or a PF key. At run time, the screen is processed accordingly.
-
Click OK.
You have
identified the screen to the transaction module. A folder with the screen
name appears in the left pane, under the screens folder. A folder
is created for each screen identified for the session.
Now
you can define the appropriate input and output fields, if any,
on that screen.
x
Procedure: How to Define an Input Field (Parameter)
This
procedure uses an example transaction, INQY, and an example input
parameter, NUMBER, to explain how to define input parameters.
Note: It
may not be necessary to define parameters on each screen. Define only
those input parameters that are required to navigate the screen,
for example userid or password, and is different for each invocation
of the RPC request.
To define screen input parameters:
-
From
the desired formatted screen, use the cursor to select a required
input field.
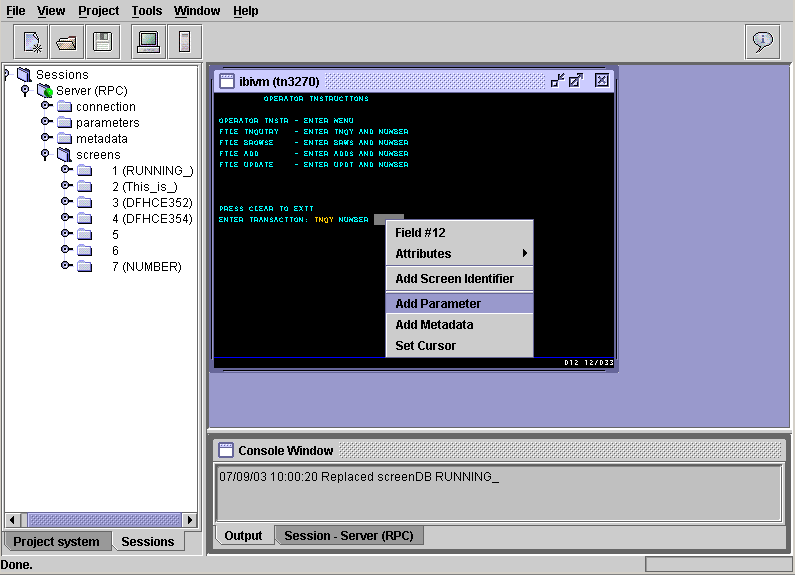
For example, to identify the ENTER TRANSACTION field of
the IBIVM Operator Instructions window, enter the INQY transaction.
-
Right-click
and select Add Parameter from the drop-down
list, as shown in the following image.
The Add Parameter
dialog box opens and prompts you for a parameter name, as shown
in the following image.

-
Type
a name that appropriately identifies the input parameter, for example,
Account.
-
Click Ok.
-
Repeat
these steps for the remaining fields that you want to define as input
parameters.
A folder
with the parameter name appears in the left pane, under the parameters
folder. A folder is created for each parameter identified for the session
x
Procedure: How to Define an Output Field (Metadata)
To define
the output fields that you want returned by the transaction module
as part of the answer set:
-
From
the desired formatted screen, use the cursor to select a desired
output field.
-
Right-click
and select Add Metadata from the drop-down
list
The Add Metadata dialog box opens and prompts you to enter
a name, as shown in the following image.

-
Type
a name that appropriately identifies the output metadata.
-
Click OK.
-
Repeat
these steps for the remaining fields that you want returned as output.
A folder
with the output field name appears in the left pane, under the metadata
folder. A folder is created for each output field identified for
the session
x
Procedure: How to Capture the Contents of a Table
There
are times when the mainframe application consists of a screen that
displays multiple rows of data, such as an inquiry or broBSE program.
The iWay Emulation Adapter (3270/5250) allows you to capture the
screen once for any number of records that make up that table. For
example, a MENU CICS transaction broBSE function that displays a
number of records.
To retrieve all of the records if a table:
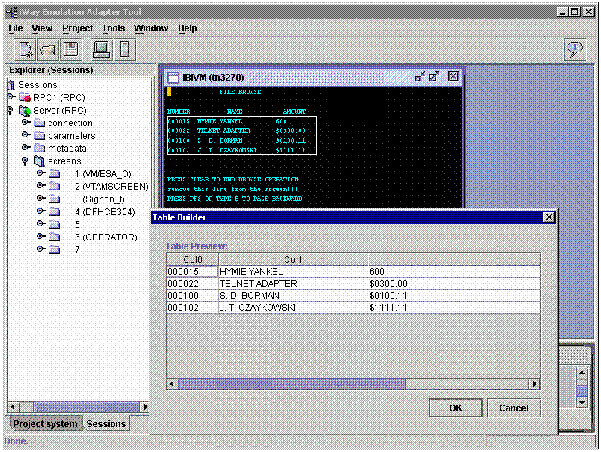
-
Click
the cursor to the immediate left of the first column of the first
record (left corner of the table) and drag it to the immediate right
of the last column of the table.
The Table Metadata window opens, displaying the contents
of the table in a row and column format. An example of this window
is shown in the following image.
-
If you
want to modify the name of a column, double-click it and make the
appropriate change.
-
Click OK to
save the table. The table metadata and output information are automatically
saved.
When
you run RPC program, the output of the program will contain a record-like
answer set with all of the information displayed as columns.
x
Procedure: How to Save the Transaction Session
When
you are finished identifying screens, input, and output field, save
the transactions session, as follows:
-
Log off
the mainframe application.
Note: The transaction module signs off the application
in the same manner.
-
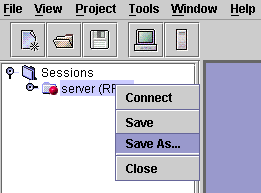
Right-click
the server (RPC) icon under the Sessions
folder and select Save As from the drop-down list.
The following image shows the session drop-down list.
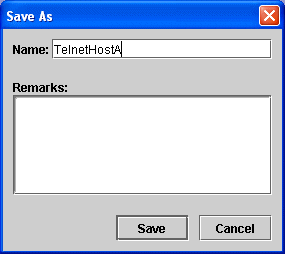
The
Save As dialog box opens and prompts you to type a name for the
save document, as shown in the following image.
-
Type
a name for the session, for example, TelnetHostA.
-
If needed,
enter comments in the Remarks field.
-
Click Save.
The requested XML document is saved to
TelnetInstalDir\projects\system\rpcs
where:
- TelnetInstalDir
Is the directory into which the emulator product is installed.
- system
Is the name of your project. System is the default project name.
The XML
request document can be used to generate web services as explained
in Creating XML Schemas and iWay Business Services.
The new document
appears in the left pane under the Sessions folder, as shown in
the following image.

x
The RPC application can be tested immediately against
the mainframe online application. Depending on the connection parameters,
it can be tested against a prerecorded mainframe session in which
there is no connection to the mainframe.
Testing allows you to verify that you have correctly identified
all the required screens and parameters to run the RPC, and that
the desired metadata is returned from your application. If you are
unable to successfully complete the RPC test, review the transaction and
confirm that all the necessary input data is properly assigned,
along with the navigation of the transaction through the various
screens.
x
Procedure: How to Unit Test the RPC
To test
an RPC:
-
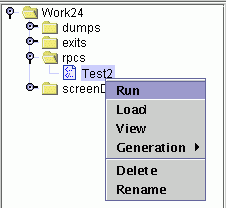
In the
left pane, expand the rpcs node and right-click the RPC you want
to test.
Note: Be sure you are working in the desired project.
-
From
the drop-down list, select Run.
The following image shows the left pane of Telnet Designer
with an example of an RPC program node and its drop-down list.
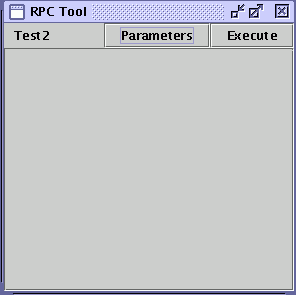
The RPC Tool window
opens in the right pane, as shown in the following image:
-
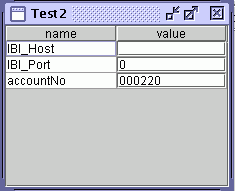
Click Parameters to
enter the parameter data expected by the RPC application.
The following is an example of the parameters table in
which you can enter the test values.
-
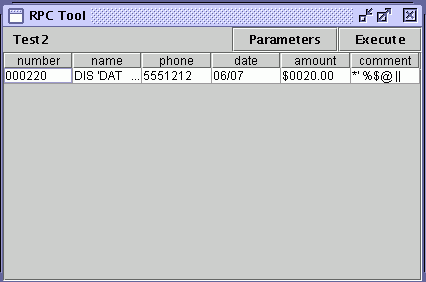
Click Execute.
The program runs the CICS MENU transaction to return Account, Address,
and Amount information.
The following image shows an example of test results where
the program returns the information for the record with account
number 000022.
The RPC
has been tested successfully. You can now generate a Java program from
the RPC.
x
Generating the RPC Program
You can generate an RPC program of your emulation session,
a Java program for use as a standalone Java client, or as a service
to be imported into the iWay Emulation Adapter.
x
Procedure: How to Generate the RPC Program
To generate
an RPC program:
-
In the
left pane of Telnet Designer, click the Project system tab.
-
Expand
the system folder and then, expand the rpcs subfolder.
-
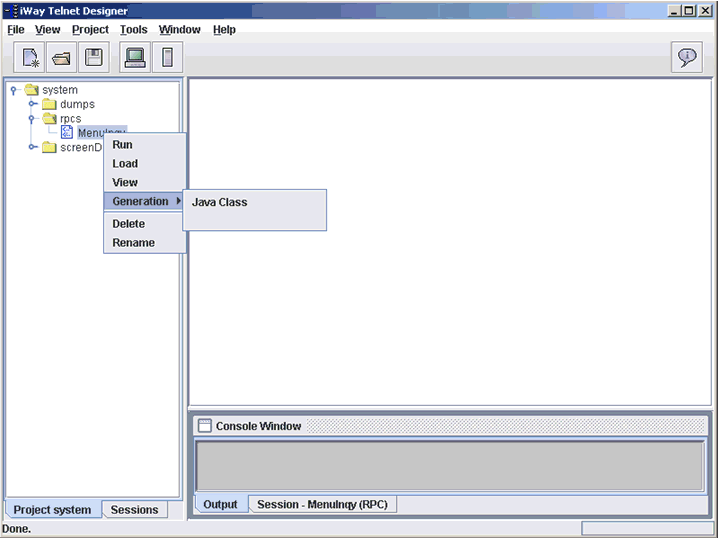
Right-click
the RPC design project, for example, MenuInqy, and select Generation.
The following image shows the expanded rpcs subfolder and
the drop-down list of the project.
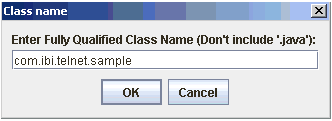
To generate a Java
program that can be included in your client application or run as
a stand-alone component, select Java Class and enter the fully qualified
name of the Java class you want to generate.
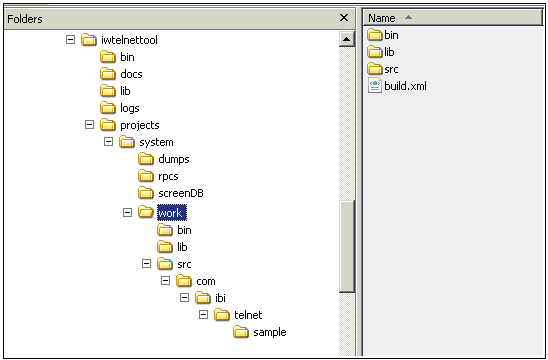
The iWay Telnet Designer
generates the class under the work subfolder of your current project.
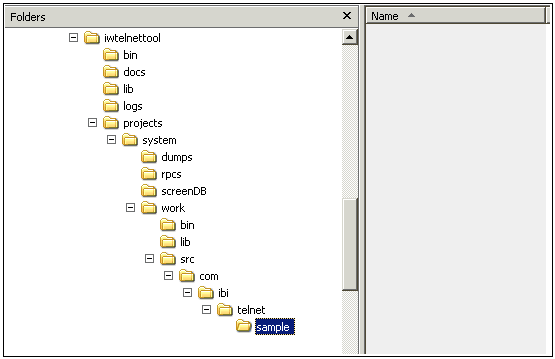
The iWay Telnet Designer
also generates artifacts that can be used to compile and run the
Java program using Apache Ant.
