Working With iWay Integration Tools (iIT)

How to:

This section describes how to import, edit, and export an Ebix using iWay Integration Tools (iIT).


Top of page

x
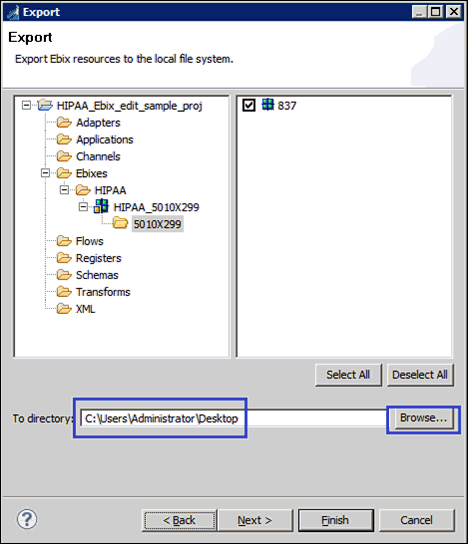
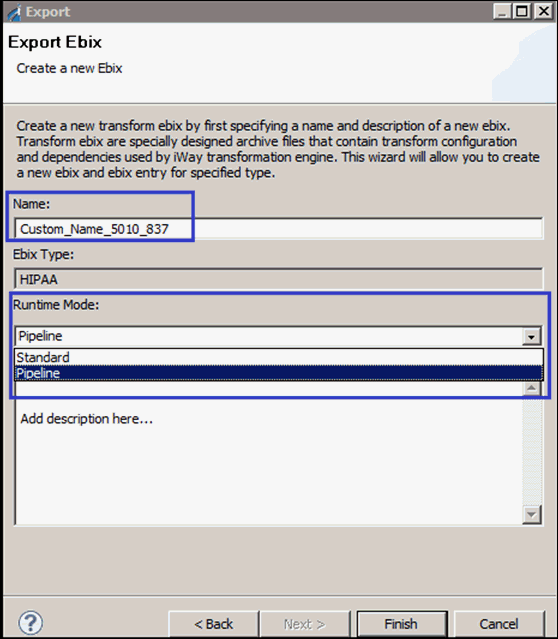
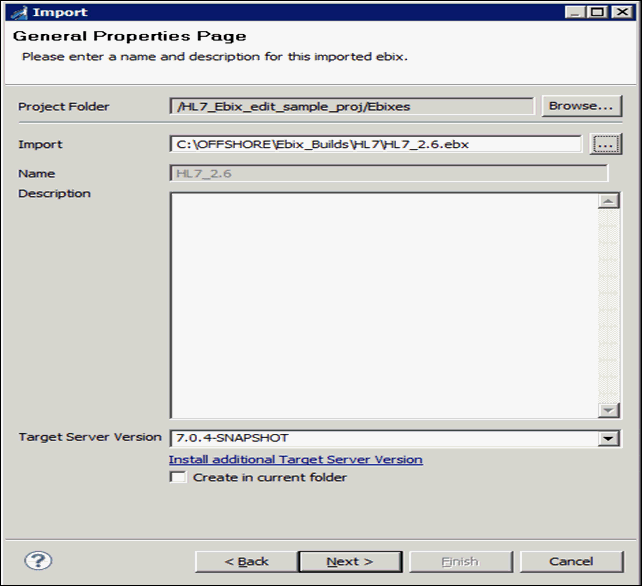
Procedure: How to Import an Ebix
  1. Start iWay Integration Tools (iIT).
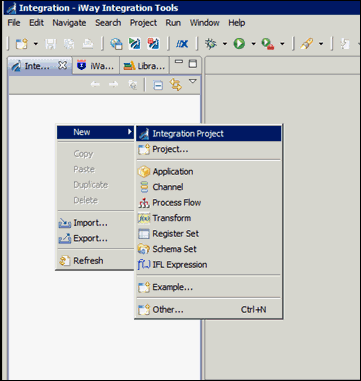
  2. Right-click the Integration Explorer pane, click New, and select Integration Project from the context menu.

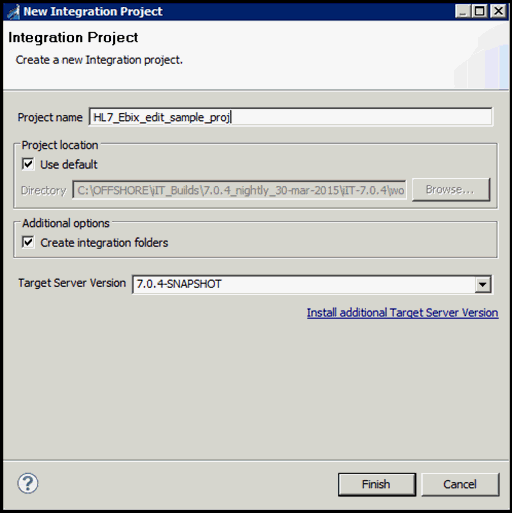
  3. Enter a new Integration Project name, for example, HL7_Ebix_edit_sample_proj, in the Project name field, and click Finish.

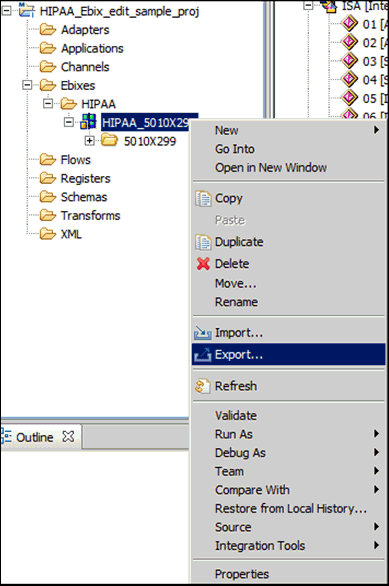
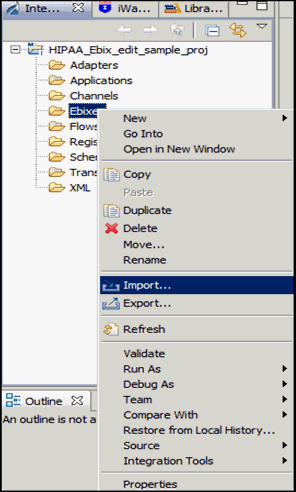
  4. Right-click the Integration Explorer pane and select Import from the context menu, as shown in the following image.

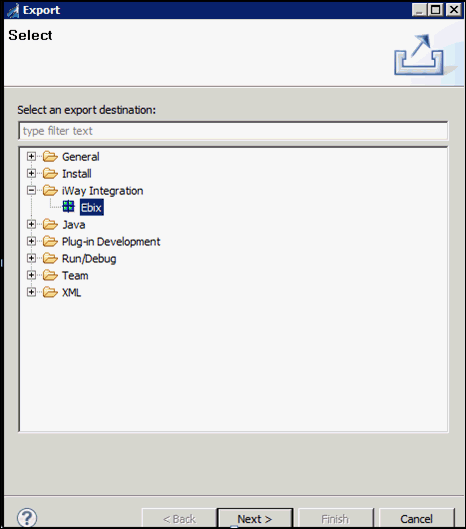
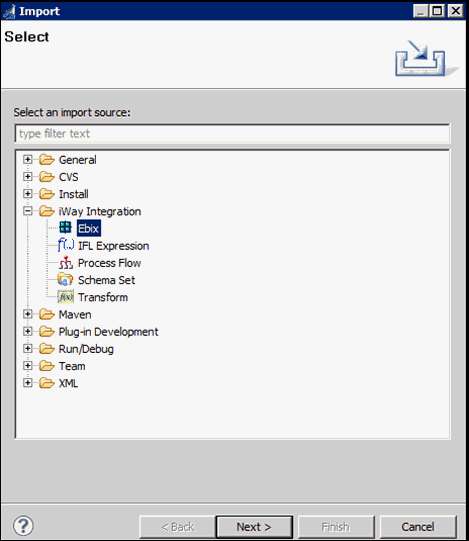
  5. In the Import wizard, expand iWay Integration, select Ebix, and then click Next, as shown in the following image.

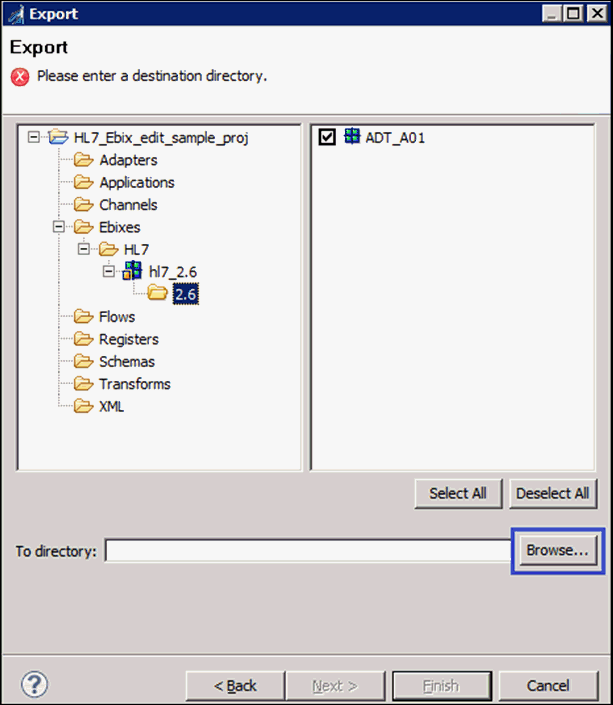
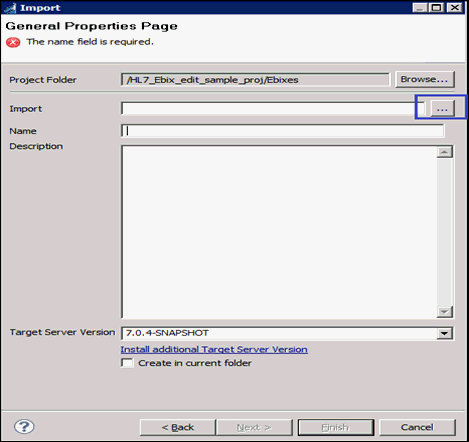
  6. Click the ellipsis button (…) 
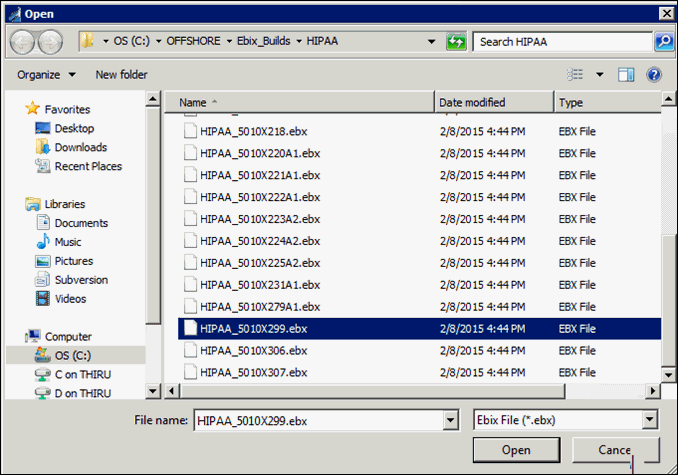
and select the downloaded HIPAA_5010X299.ebx file from the physical drive location.

  7. Click Open, as shown in the following image.

  8. Click Next, as shown in the following image.

  9. Expand the Ebix showed in the Ebix pane, select ADT_A01 from the Ebix Entries pane, and then click Finish.

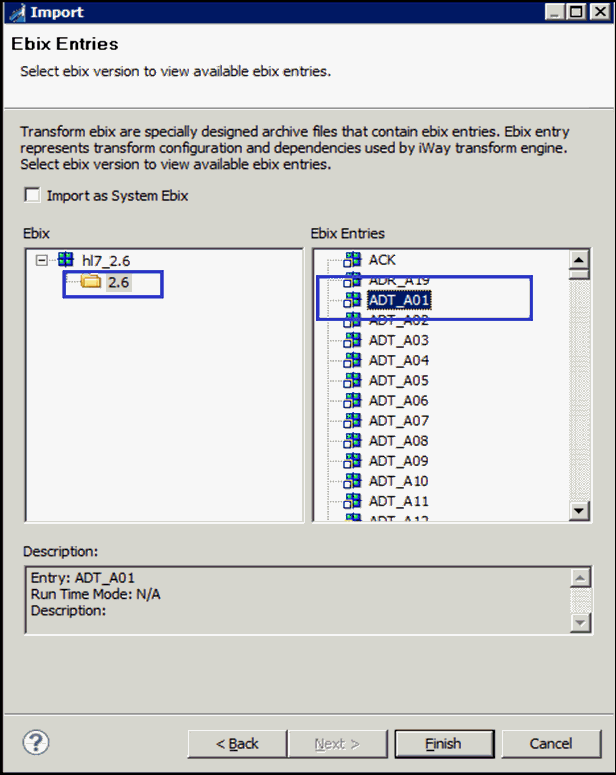
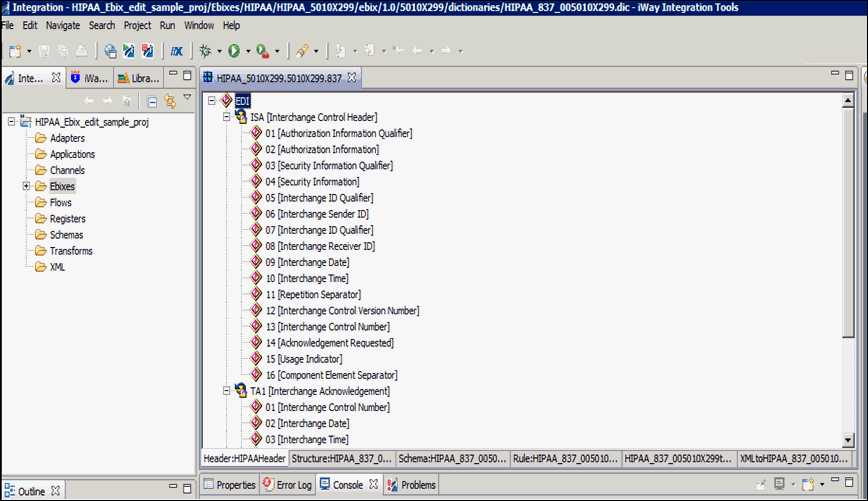
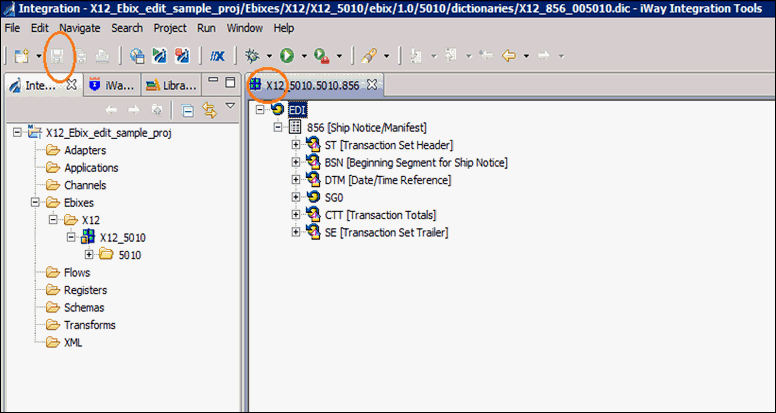
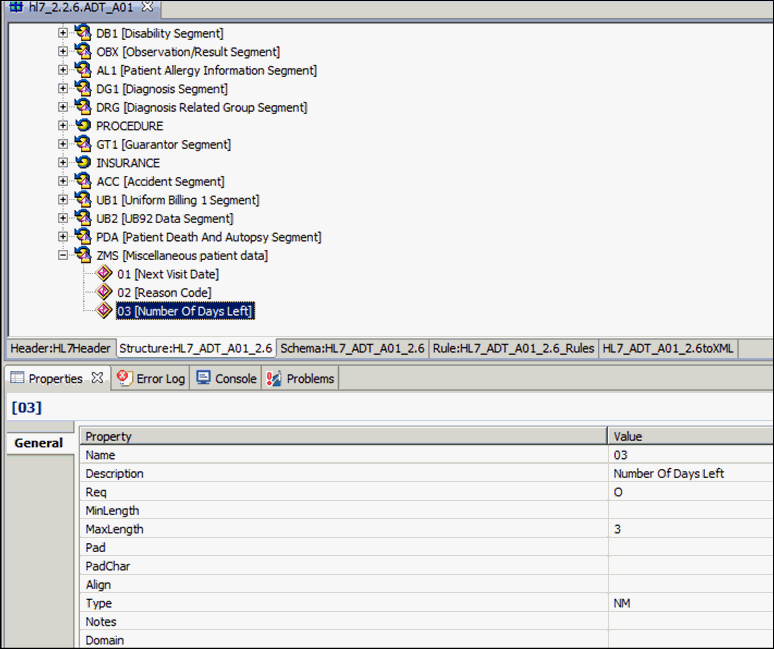
    Your iWay Integration Tool interface should resemble the following image:


Top of page

x
Procedure: How to Edit an Ebix
  1. Click the HL7_ADT_A01_2.6 tab to open the HL7 Ebix structure.
  2. Right-click the ADT_A01 [Admit/Visit Notification (Event A01)] element, select Add, and then click Segment, as shown in the following image.

    You screen should resemble the following image.

  3. Provide valid segment name (for example, ZMS) and description (for example, Miscellaneous patient data) by double-clicking on the value field of its property, as shown in the following image.

    You screen should resemble the following image.

  4. Right-click ZMS [Miscellaneous patient data] to add Data Elements in it, select Add, and then click Data Element, as shown in the following image.

  5. Right-click the newly created Data Element and select Properties.

  6. Change the Name field value to 01, Description value to Next Visit Date, MaxLength value to 8, and the Type value to DT, as shown in the following image.

    Note: Use Backspace to delete existing values in the value field.

  7. Repeat step 4 to create the following two data elements:
    • Reason Code
    • Number Of Days Left
  8. Input the following values into their respective parameters in the second data element (Reason Code) under the ZMS segment.

    Parameter

    Value

    Name

    02

    Description

    Reason Code

    Req

    O

    MaxLength

    3

    Type

    ST

    Domain

    GEN, RVW, CRD, FOL

  9. Input the following values into their respective parameters in the third data element (Number Of Days Left) under the ZMS segment.

    Parameter

    Value

    Name

    03

    Description

    Number Of Days Left

    Req

    O

    MaxLength

    3

    Type

    NM

    Your iWay Integration Tool screen should resemble the following image.


Top of page

x
Procedure: How to Export an Ebix

To export an Ebix:

  1. Right-click the hl7_2.6 Ebix from the Integration Explorer window and select the Export option from the context menu, as shown in the following image.

  2. Expand the iWay Integration folder, select Ebix, and then click Next, as shown in the following image.

  3. Expand the iIT project (for example, HL7_Ebix_edit_sample_proj) from the Export wizard and expand Ebixes, HL7, HL7_2.6, select the 2.6 folder from the left pane of Export wizard, and then select the ADT_A01 check box on the right pane, as shown in the following image.

  4. Click Browse and choose a folder location to store the Ebix, and then click Next, as shown in the following image.

  5. Provide a valid name for the Ebix in the Name field, select Pipeline from the Runtime Mode drop-down list, add a description (optional), and then click Finish, as shown in the following image.

    Your exported Ebix is available in the specified location.


iWay Software