This section describes how to install the iWay Application
Adapter for Salesforce.
Note: Currently, installing the iWay Application Adapter
for Salesforce is a manual process. In the next release of iWay
Service Manager (iSM), installing the Salesforce adapter will be
automated.
x
Procedure: How to Install the iWay Application Adapter for Salesforce
To
install the adapter:
-
Copy the installation files for the iWay Application Adapter
for Salesforce to the following directory:
iway_home\lib
where:
- iway_home
Is the root installation directory for iWay Service Manager
(for example, iWay7).
For more information,
see iWay Application Adapter for Salesforce Installation Files.
-
Ensure that you have added the public IP address of each server
that is used to run iWay Service Manager to the Salesforce trusted
IP addresses group.
For more information, see How to Add a Public IP Address to the Salesforce Trusted IP Addresses Group.
Note: You
can view your current IP address by executing the ipconfig command
from a command console. However, this may not be the address that
your service provider exposes to the Internet. To verify your address,
access the following URL:
http://whatismyipaddress.com/
-
Ensure that your Salesforce user account is API Enabled and
has a password that does not expire.
For more information, see How to Configure Your Salesforce User Account.
-
If required, obtain your Salesforce security token from the
Salesforce setup.
For more information, see How to Obtain a Salesforce Security Token.
This
is only required if you are going to connect to Salesforce from
an IP address that is not included in the Salesforce trusted IP
addresses group.
Note: It is strongly recommend that
you do not use the Salesforce security token when defining a target
using iWay Explorer.
x
Procedure: How to Add a Public IP Address to the Salesforce Trusted IP Addresses Group
To
add a public IP address to the Salesforce trusted IP addresses group:
-
Log on to the Salesforce web console.
-
Click Setup.
The Personal Setup page opens.
-
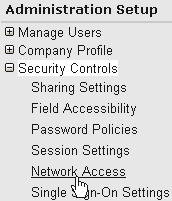
In the left pane, expand Security Controls and click Network
Access.
The Network Access page opens.
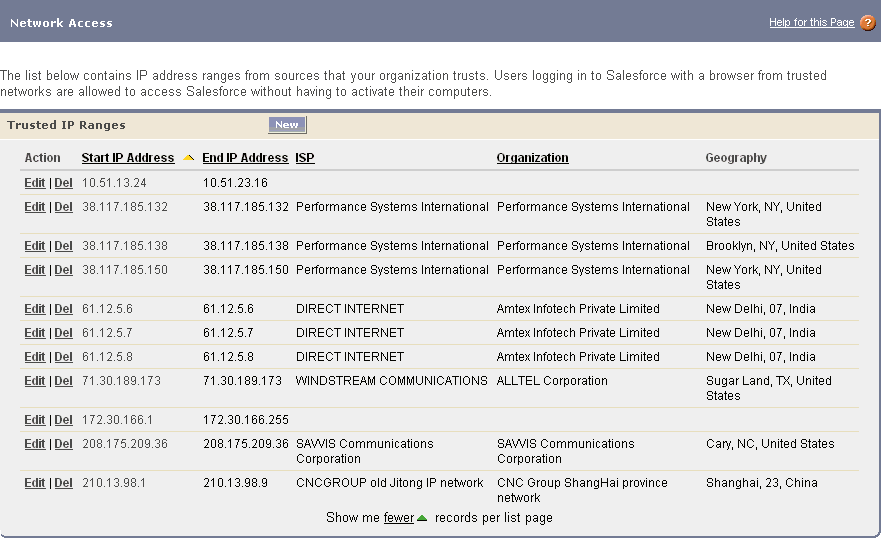
-
Click New.
The Network Access - Trusted IP Range Edit page opens.
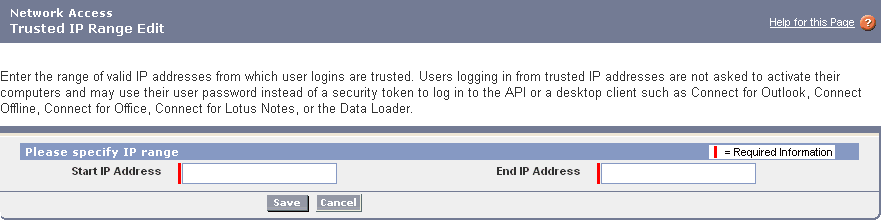
-
Enter a range of valid IP addresses that you want to add to
the Salesforce trusted IP addresses group.
-
Click Save.
x
Procedure: How to Configure Your Salesforce User Account
To
configure your Salesforce user account:
-
Log on to the Salesforce web console.
-
Click Setup.
The Personal Setup page opens.
-
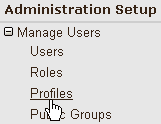
In the left pane, expand Manage Users and click Profiles.
The User Profiles page opens.
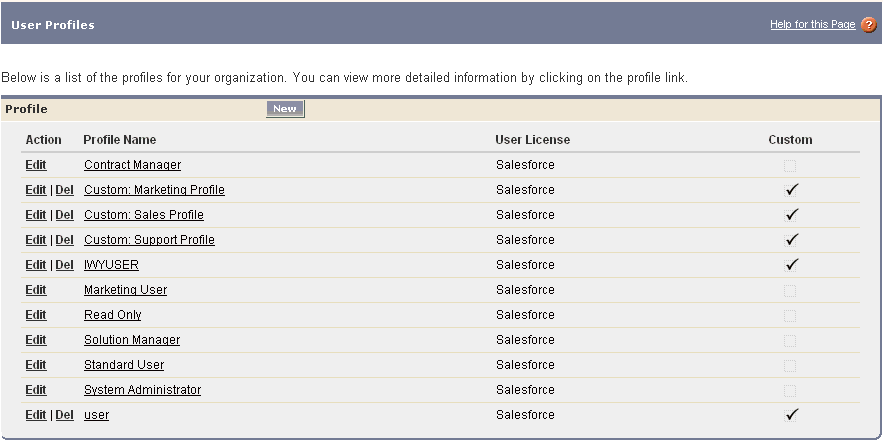
-
Click Edit to the left of the existing
profile name.
The Profile Edit page opens.

-
Scroll down to the Administrative Permissions section and ensure
that the API Enabled and Password
Never Expires options are activated.
Note: API access may incur increased usage of your
salesforce.com account.
-
Click Save.
x
Procedure: How to Obtain a Salesforce Security Token
To
obtain a Salesforce security token:
-
Log on to the Salesforce web console.
-
Click Setup.
The Personal Setup page opens.
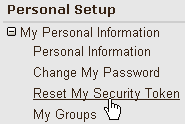
-
In the left pane, expand My Personal Information and
click Reset My Security Token.
The Reset Security Token page opens.
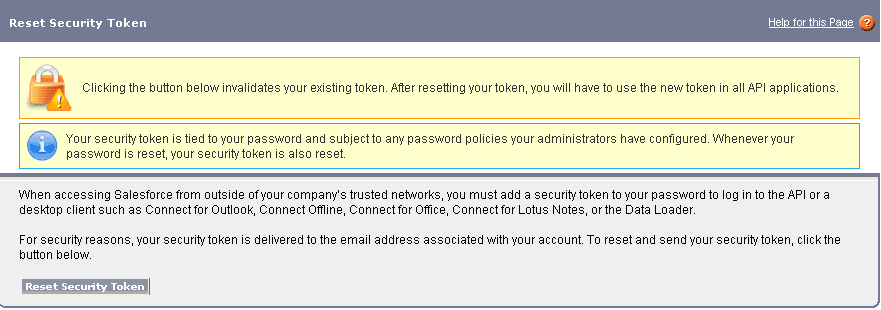
-
Click Reset Security Token.
The following page opens.

Your
new security token is sent to the email address that is associated
with your Salesforce user account. Note that after you reset your
security token, your existing security token is no longer valid.