Securing a Component Interface

How to:

You must configure security for the Component Interface before you can begin to test.

For information on configuring security for PeopleSoft VersionĀ 8.1x in two- and three-tier mode, see How to Configure Component Interface Security for PeopleSoft Version 8.1x. For information on configuring security for PeopleSoft VersionĀ 8.4 or higher, see How to Configure Interface Security for PeopleSoft Version 8.4 or Higher.


Top of page

x
Procedure: How to Configure Component Interface Security for PeopleSoft Version 8.1x

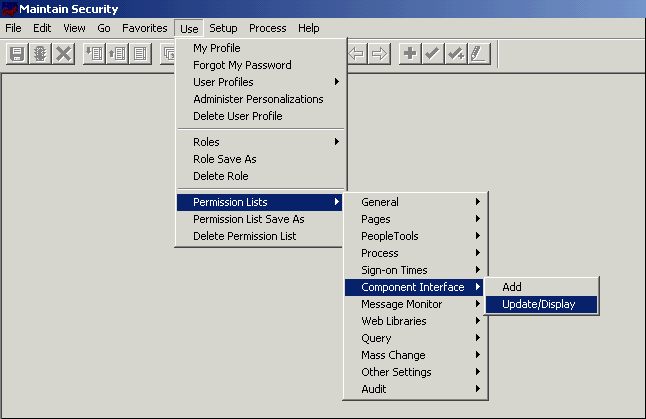
The following image shows the Maintain Security window with the Use menu expanded.

To configure Component Interface security:

  1. From the Use menu, select Permission Lists, Component Interface, and then click Update/Display.

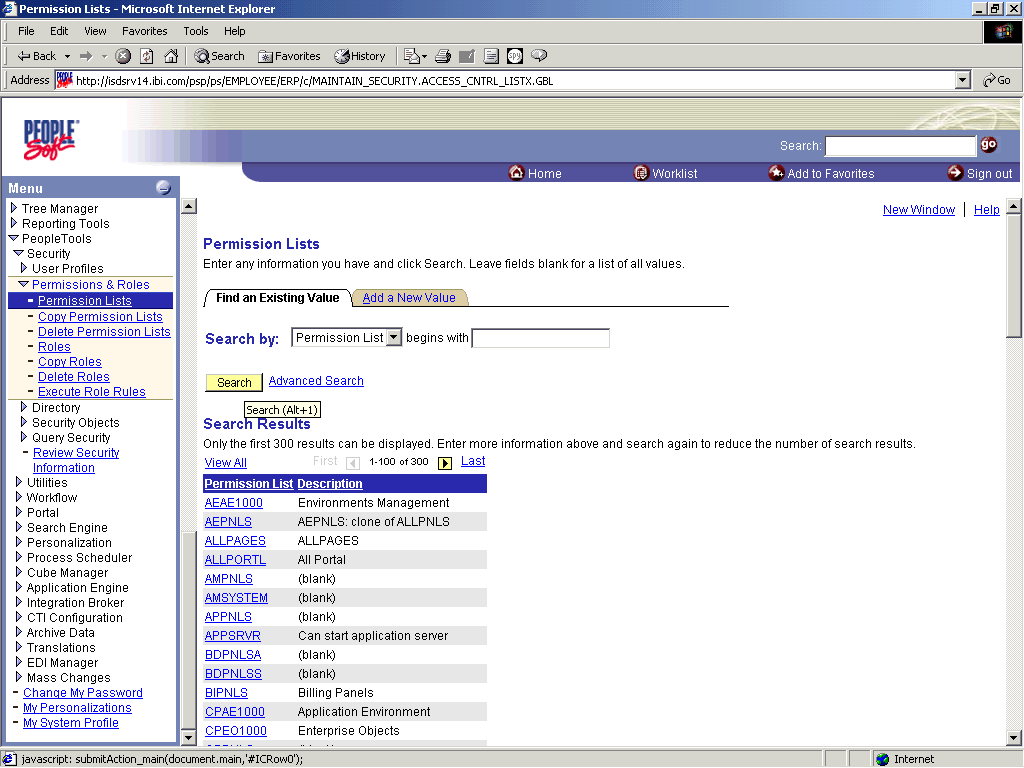
    The Update/Display Permission Lists dialog box opens as shown in the following image. It contains a Permission List field, Permission List and Description information, and OK, Cancel, Search, Detail, Use Query, and New Query buttons.

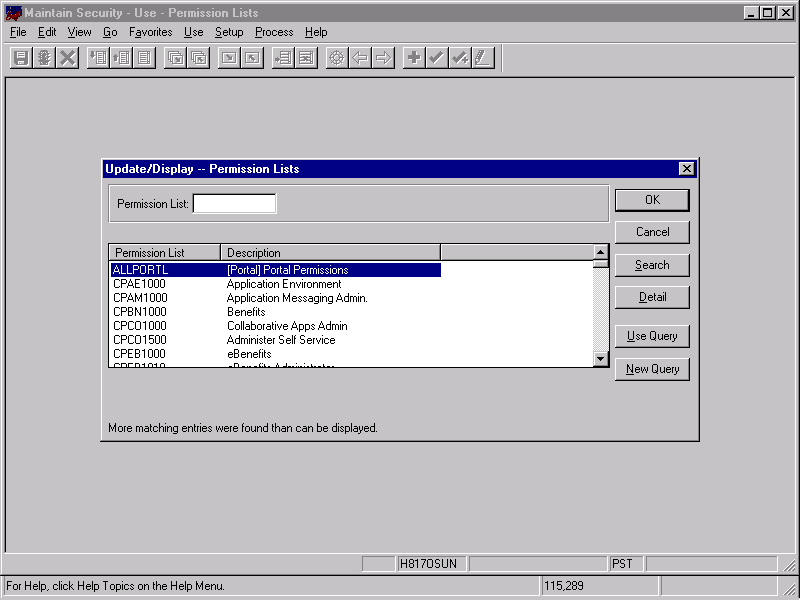
    Before Security can be set, you must identify the permission list or lists.

  2. Select the relevant permission list and click OK.

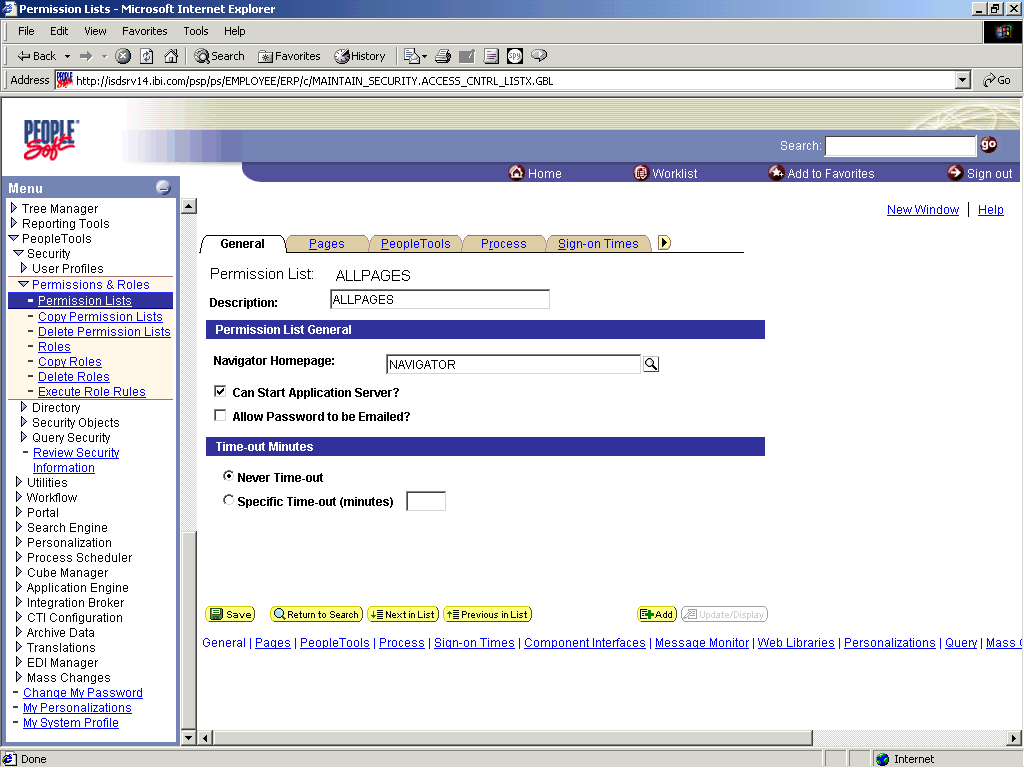
    For information on permission lists, see the PeopleBooks documentation.

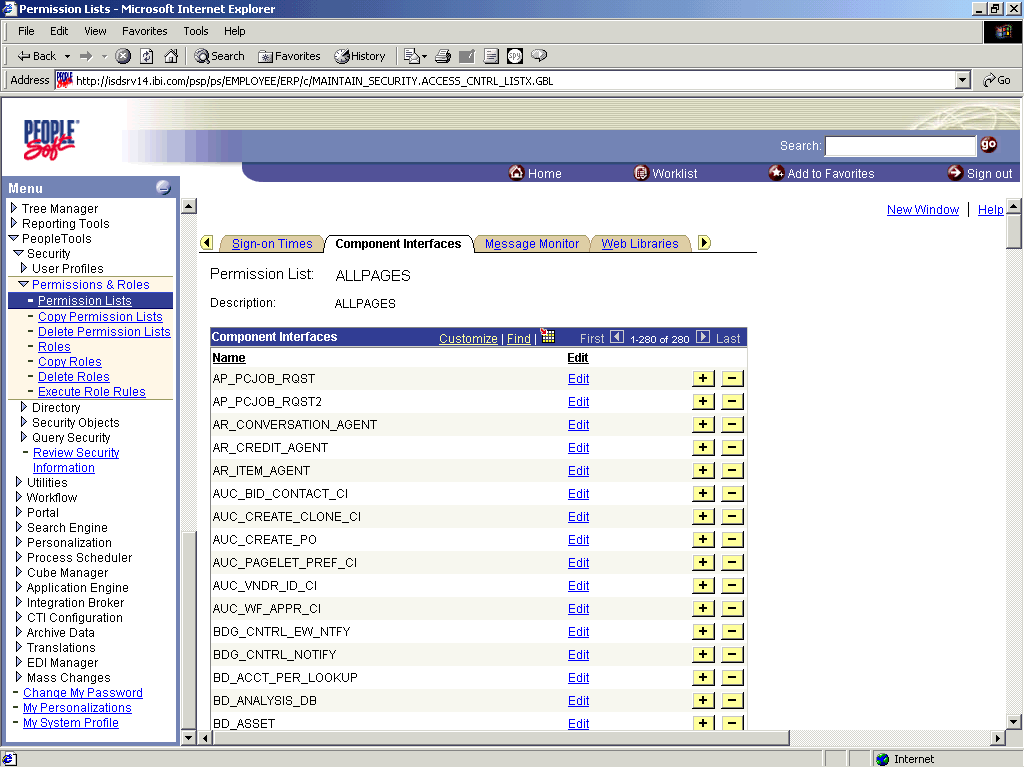
    The following image shows the Permission Lists pane and contains information about the ALLPORTL permission list in the Name column. The Component Interface tab is active.

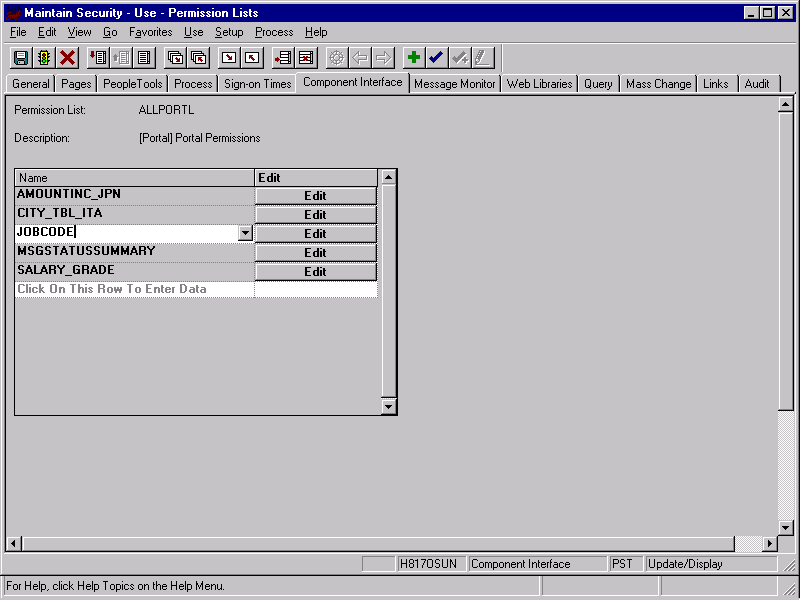
  3. To insert the new Component Interface you created, click Click On This Row To Enter Data.
  4. When the Edit button appears, click Edit.

    When you select the Component Interface, all available methods appear, including user-defined methods. You can then specify whether this particular Permission List must have Full or Partial Access.

    The following image shows the ALLPORTL Permission List with full access to all methods (Get, Create, Save, Cancel, and Find). It also contains OK, Cancel, Full Access All, and No Access All buttons.

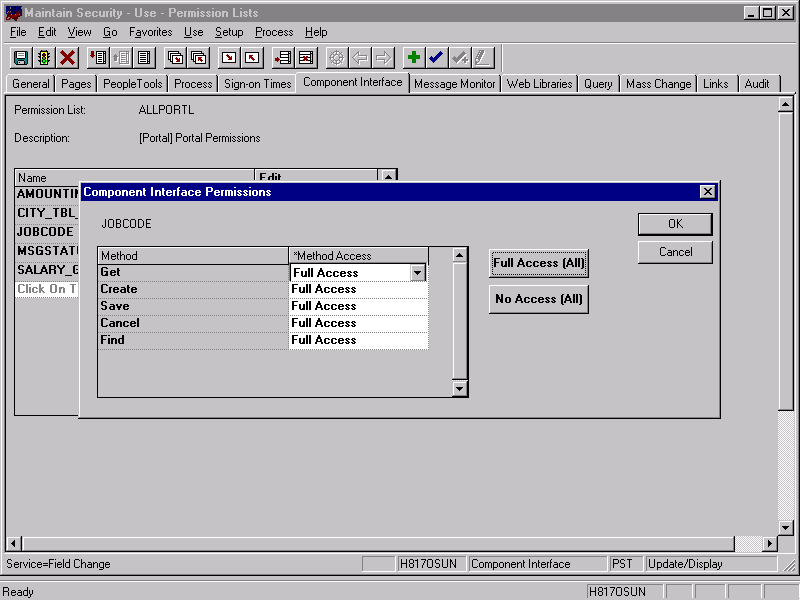
  5. To select the desired level of access, click in the Method Access column opposite the method and select from the drop-down list.
  6. Click OK.

Top of page

x
Procedure: How to Configure Interface Security for PeopleSoft Version 8.4 or Higher

The following image shows the configure component interface security window. Permissions and Roles is expanded in the left pane.

To configure interface security:

  1. Expand PeopleTools, Security, User Profiles, and Permissions & Roles and then, click Permission Lists.

    The following image shows the Permission Lists pane on the right with the Find an Existing Value tab active. You can view an existing value in the Permission List column with its associated description and search for results.

  2. Click Search.
  3. Select the relevant permission list.

    The following image shows the General tab and contains information for the ALLPAGES permission list. It contains Description and Navigator Homepage fields; check boxes for selecting Can Start Application Server? and Allow Password to be Emailed?; and options to choose between Never Time-out and Specific Time-out.

  4. To view the Component Interfaces tab, click the right arrow next to the Sign-on Times tab and click the Component Interfaces tab.

    The following image shows the Component Interfaces tab and lists component interfaces for the ALLPAGES permission list.

  5. To add a new row to the Component Interfaces list, click the plus button.

    The following image shows the Component Interfaces tab and lists component interfaces for the ALLPAGES permission list. It includes a component interface name field where you clicked the plus sign to add a row.

  6. Type the Component Interface name and click Edit.

    The following image shows the Component Interface Permissions pane for the component interface AR_ITEM_AGENT. It includes a column for the Method; drop-down lists for the Method Access corresponding to: Get, Create, Save, Cancel, and Find; and the buttons for Full Access (active) or No Access.

    1. From the drop-down lists, select the desired access level for each method.
    2. Click OK.
  7. Scroll down in the right pane and click Save.

iWay Software