Configuring iWay Data Profiler With Teradata Server Version 13.10.00.14

In this section:

How to:

This section describes how to configure iWay Data Profiler - Version 9.0.1T on a Windows system with the following configuration:


Top of page

x
Procedure: How to Prepare Teradata Environment on Microsoft Windows

To configure and use the ODBC or CLI Adapter for Teradata:

  1. Install and configure the Teradata Client components according to the Teradata Tools and Utilities Installation Guide. TeraGSS, ICU, and ODBC and/or CLI are required.
  2. The path to the ODBC or CLI libraries directory must be added to SYSTEM LIBRARY PATH prior to starting the server.

Top of page

x
Procedure: How to Create Base Tables for Teradata Database

You must first ensure that the Teradata Database is active. You can start your database if it is not running already.

To create base tables in Teradata Database using Teradata SQL Assistant:

  1. From the Windows Start menu, select All Programs, Teradata Client, and then click Teradata SQL Assistant.

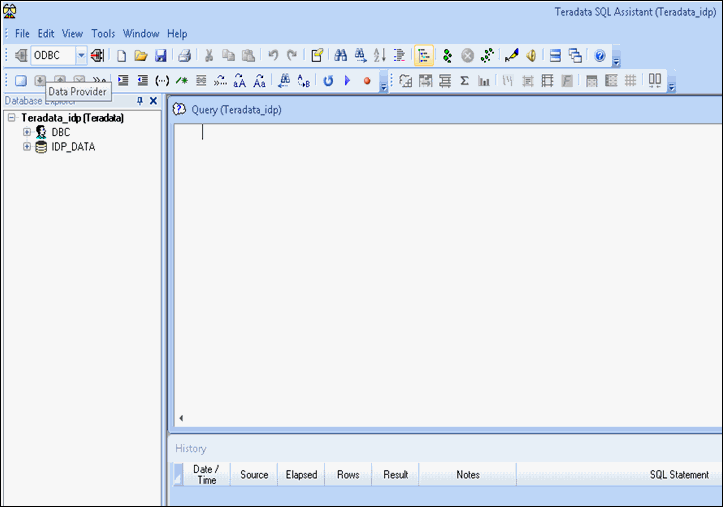
    The workspace for the connected Teradata server is displayed, as shown in the following image.
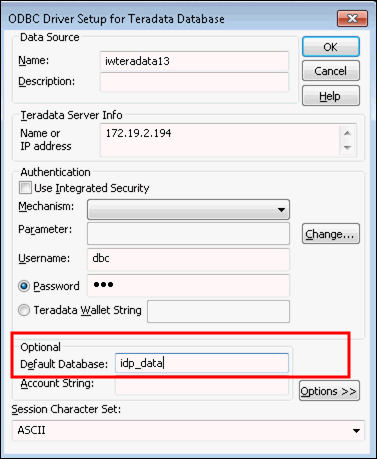
    Ensure that your ODBC Driver Setup for Teradata is configured with your database as Default Database, as shown in the following image.
  2. Click File, select Open Query, and then browse to the TERADATA_IDP.sql script file, which is located in following directory:
    <dphome>\idpweb\sql\TERADATA_IDP.sql

    where:

    <dphome>

    Is the path on the file system where iWay Data Profiler is installed.

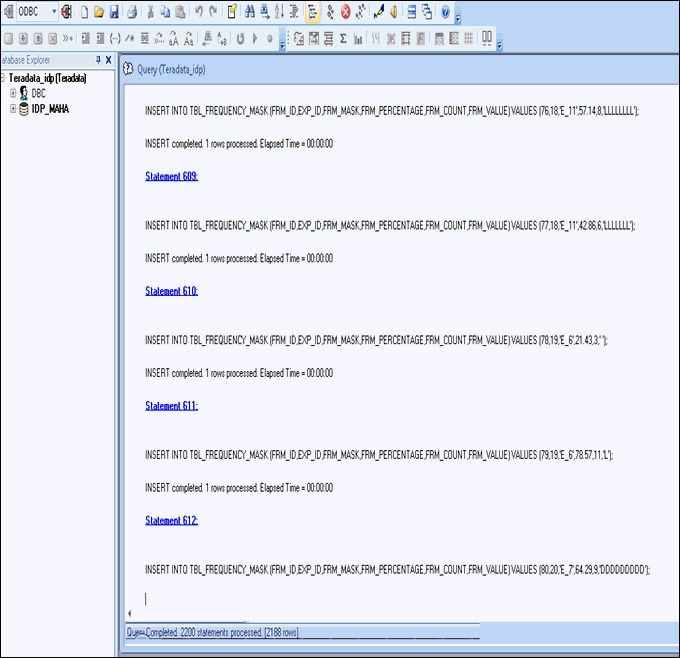
  3. Click Execute, as shown in the following image.
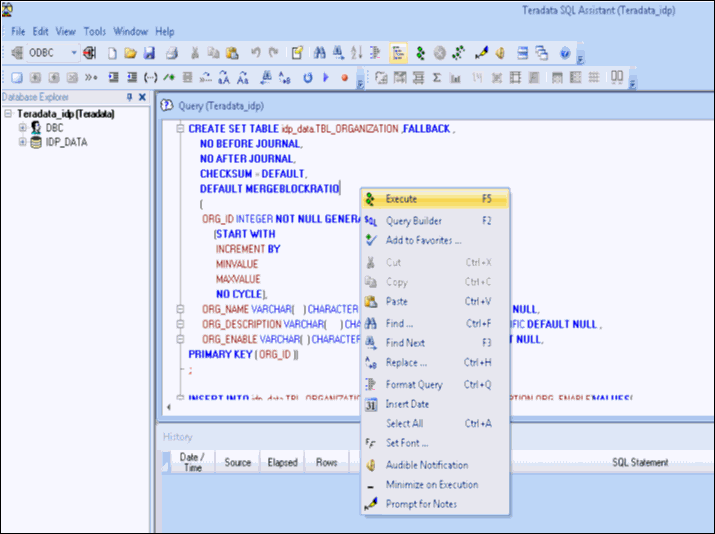
    The script is executed and the tables are generated, as shown in the following image.

Top of page

x
Procedure: How to Configure Java Services

To configure Java services:

  1. From the Windows Start menu, click All Programs, Information Builders, select WebFOCUS 80 Server, then click Web Console.

    The web console opens.

    Note: The WebFOCUS Reporting Server must be running in order to open the web console.

  2. From the workspace, navigate to Configuration/Monitor, expand Java Services, double-click DEFAULT, and ensure that it is active.
  3. In the left pane, right-click Java Services, then right-click DEFAULT, and select Properties from the context menu.

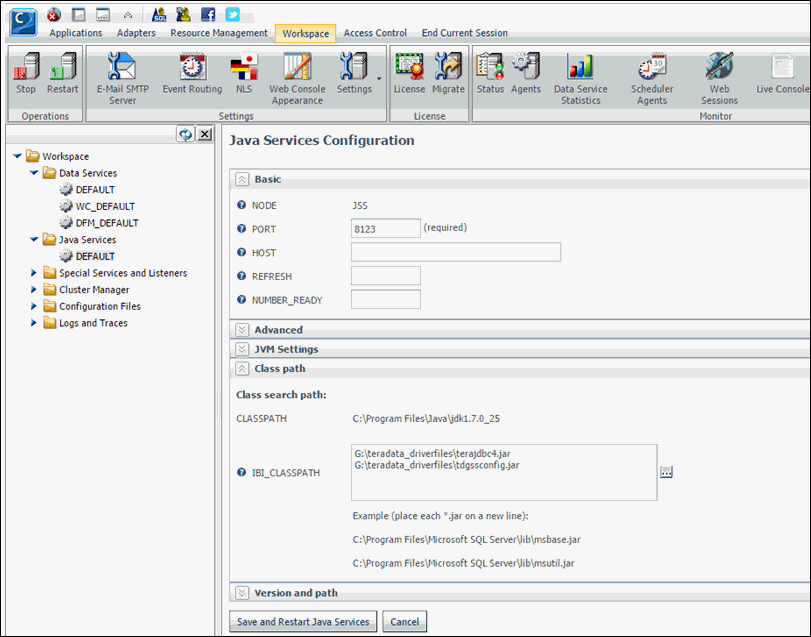
    The Java Services Configuration pane opens, as shown in the following image.

  4. Click the Class path tab.
  5. For Teradata, set IBI_CLASSPATH to:
    <dphome>\idpweb\WEB-INF\lib\terajdbc4.jar and tdgssconfig.jar

    where:

    <dphome>

    Is the path on the file system where iWay Data Profiler is installed.

  6. Click Save and Restart Java Services.

    The Java Services status changes to active.


Top of page

x
Procedure: How to Configure the Adapter for Teradata - CLI Interface
  1. From the Windows Start menu, click All Programs, select Information Builders, WebFOCUS 80 Server, then click Web Console.

    The web console opens.

    Note: The WebFOCUS Reporting Server must be running in order to open the web console.

  2. Click Adapters in the menu bar.
  3. In the left pane, expand Adapters, Available, SQL, Teradata, and then click TTUI14/13:CLI.
  4. In the left pane, right-click TTUI14/13:CLI and select Configure from the context menu.

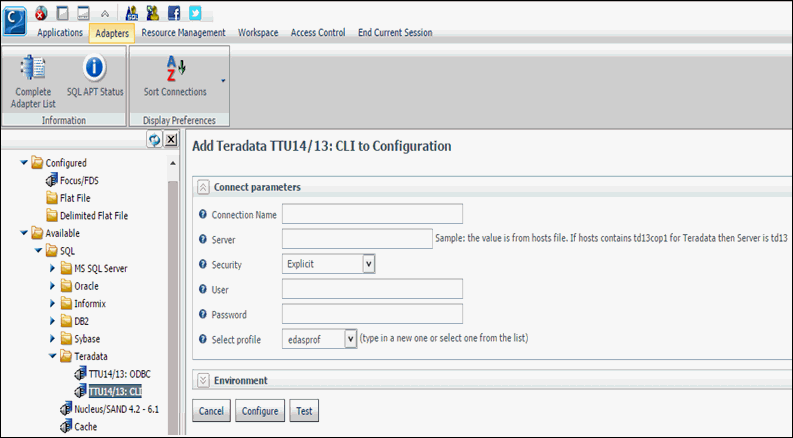
    The Add TTUI14/13:CLI to Configuration pane opens, as shown in the following image.

  5. Provide the following values for the configuration parameters:
    • Connection Name. idp
    • Server. Host Name or IP address for Teradata Server.
    • Security. Select Explicit from the drop-down list.
    • User. The user name for Teradata Server.
    • Password. The password for Teradata Server.
    • Default Database. idp_data
  6. Click Configure.

    A message is displayed indicating that the Teradata is successfully added to the configuration.

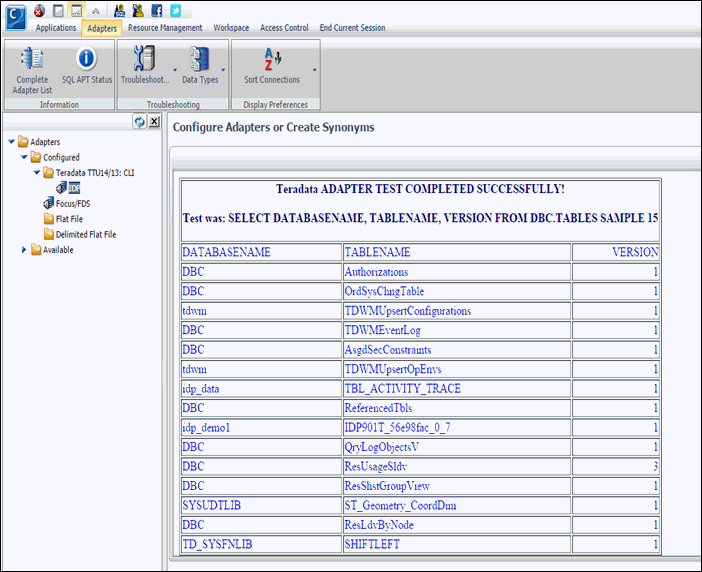
  7. To test the connection, right-click the idp connection node, under the Teradata folder, and select Test from the context menu.

    The Teradata Adapter Test Completed Successfully message is displayed, as shown in the following image.

Top of page

x
Creating Synonyms for iWay Data Profiler - Version 9.0.1T

This section describes how to create synonyms for iWay Data Profiler.


x
Procedure: How to Create Synonyms for iWay Data Profiler Version 9.0.1T

To create synonyms for iWay Data Profiler Version 9.0.1T:

  1. From the Windows Start menu, click All Programs, select Information Builders, WebFOCUS 80 Server, then click Web Console.

    The web console opens.

    Note: The WebFOCUS Reporting Server must be running in order to open the web console.

  2. Right-click the idp connection node and select Create Synonym from the context menu.
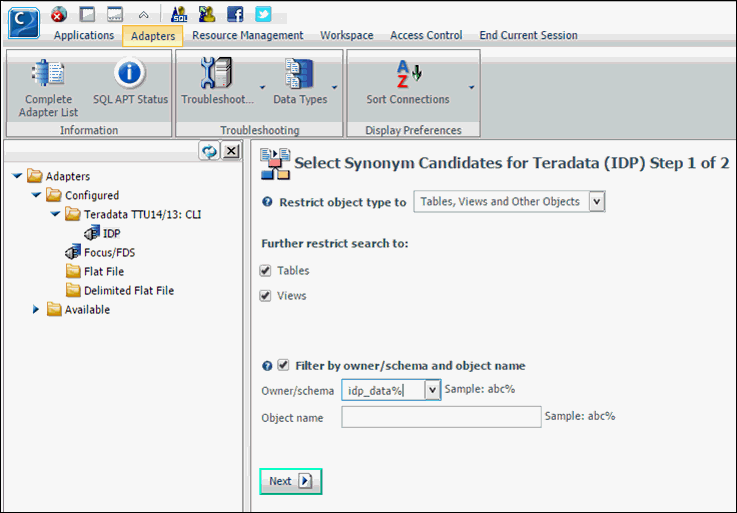
  3. Select the Tables and Views check box.
  4. Select the Filter by owner/schema and object name check box, as shown in the following image.

    Note: In the Owner/Schema field, provide your database schema name with a percent (%) symbol.

  5. Click Next.
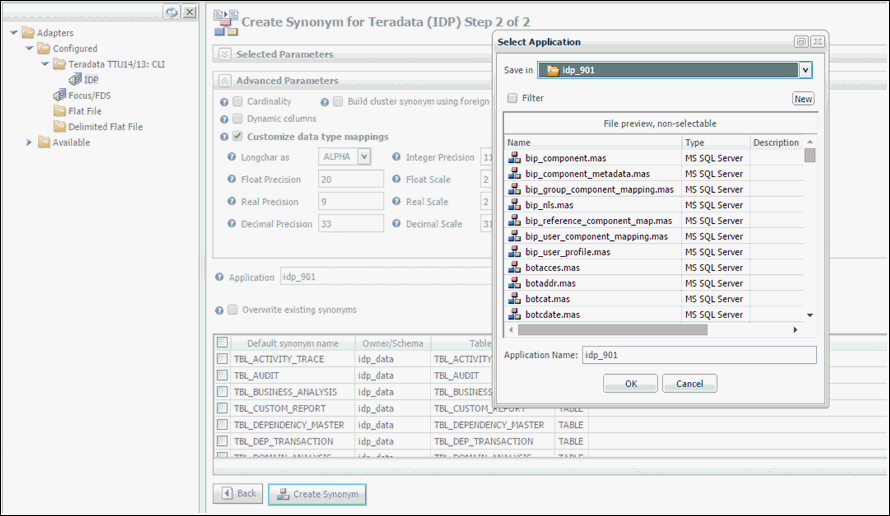
  6. Click the ellipsis (...) button in the Application field and select idp in the Select Application window, as shown in the following image.

  7. Click OK.
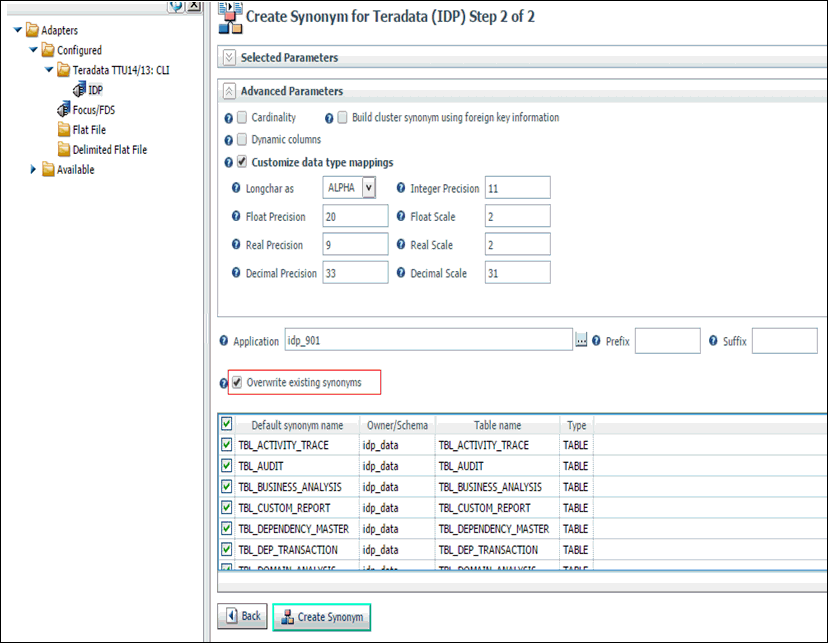
  8. Select the Overwrite existing synonyms check box and click Select All.

    Note: Clicking the Select All button selects all of the check boxes in the table.

  9. Click Create Synonym, as shown in the following image.

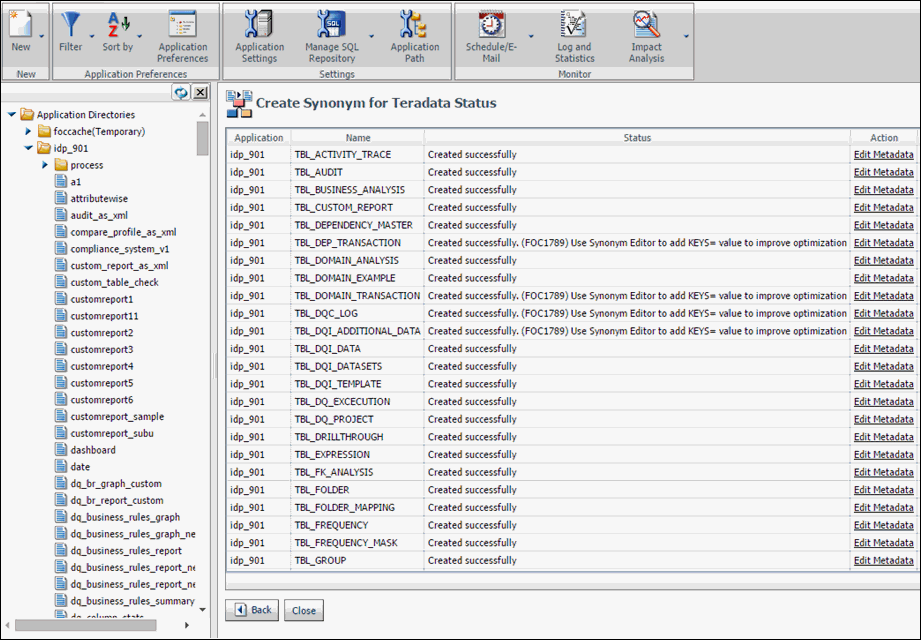
    A list of all the created synonyms is displayed, as shown in the following image.

Top of page

x
Testing Created Synonyms

The following section describes how to test the created synonyms.


x
Procedure: How to Test Created Synonyms

To test created systems:

  1. Click the Applications tab from the menu bar.
  2. Under Application Directories in the left pane, expand idp.
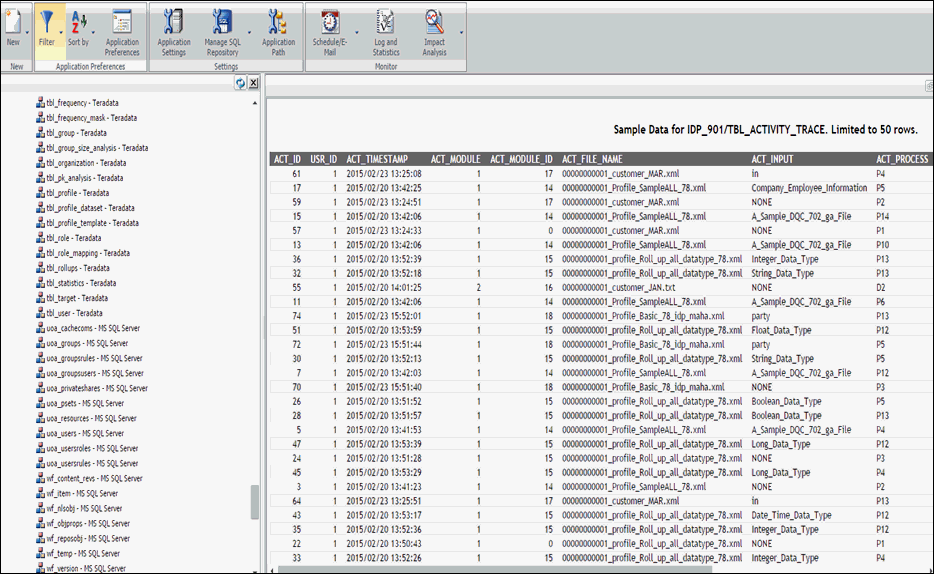
  3. Right-click any available table in the left pane and select Sample Data from the context menu to view the values in the table, as shown in the following image.

iWay Software