Configuring iWay Data Profiler With MySQL Server 5.5
This section describes how to configure iWay Data Profiler
on a Windows system with the following configuration:
- WebFOCUS Reporting
Server Release 8.0 Version 08M and WebFOCUS Client Release 8.0 Version
08
- Apache Tomcat Version
7.0.33 or higher
- Java 1.7
- MySQL Server 5.5
x
This section describes how tables are created and iWay
Data Profiler demo files are inserted in the database using the
script included in the idpweb folder. Tables can be created using
either the Command Line Interface or the Graphical User Interface.
x
Procedure: How to Create Tables and Insert iWay Data Profiler Demo Files Using the Command Line Interface
-
From the
Windows Start menu, select All Programs, MySQL, MySQL
Server 5.5, and then MySQL Command Line Client.
-
Enter the
database password and click Enter.
The MySQL prompt is displayed.
-
Enter the
following command:
mysql>\. <dphome>\idpweb\sql\mysql_idp.sql
where:
- <dphome>
Is the path on the file system where iWay Data Profiler is installed.
The
iWay Data Profiler tables are now created in the MySQL database.
x
Procedure: How to Create Tables and Insert iWay Data Profiler Demo Files Using the Graphical User Interface
-
From the
Windows Start menu, select All Programs, MySQL,
and then MySQL Query Browser.
-
Enter the
user name and password, and click Enter.
-
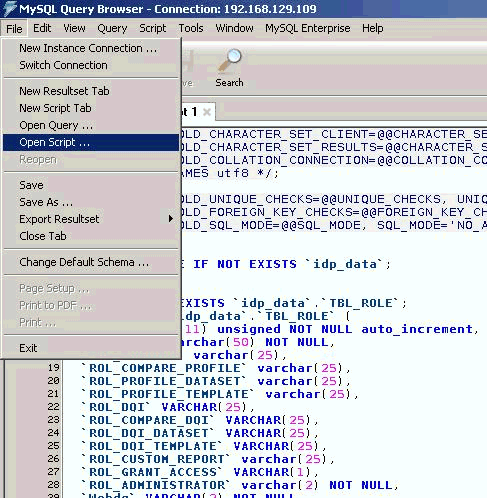
From the
File menu, select Open Script, as shown in
the following image.
The Open Script dialog box is displayed.
-
Navigate
to the following directory:
<dphome>\idpweb\sql\mysql_idp.sql
where:
- <dphome>
Is the path on the file system where iWay Data Profiler is installed.
-
Click Execute to
run the script.
The iWay Data Profiler tables are now created in the MySQL database.
x
Configuring Java Services
You must start the client workspace and ensure that
the DEFAULT listener is available before configuring Java Services.
For more information, see the WebFOCUS Installation and Configuration
documentation.
x
Procedure: How to Configure Java Services
-
From the
Windows Start menu, select All Programs, Information
Builders, WebFOCUS 80 Server,
then click Web Console.
The Web Console opens.
Note: The WebFOCUS
Reporting Server must be running in order to open the Web Console.
-
From the
Workspace, navigate to Configuration/Monitor,
expand Java Services, double-click DEFAULT,
and ensure that it is active.
-
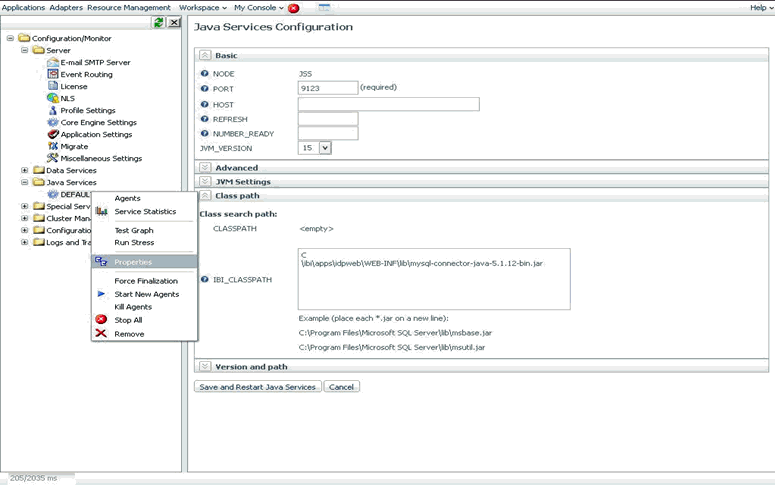
In the left
pane, expand Java Services, right-click DEFAULT,
and select Properties from the context menu.
The Java Services Configuration pane opens, as shown in
the following image.
-
Click the Class
path tab.
-
In the right
pane, set the IBI_CLASSPATH to:
<dphome>\idpweb\WEB-INF\lib\mysql-connector-java-5.1.12-bin.jar
where:
- <dphome>
Is the path on the file system where iWay Data Profiler is installed.
-
Click Save
and Restart the Java Services.
The Java Services status changes to active.
x
Creating MySQL JDBC Connections for iWay Data Profiler
This section describes how to create MySQL JDBC connections
for iWay Data Profiler.
x
Procedure: How to Create MySQL JDBC Connections for iWay Data Profiler
-
From the
Windows Start menu, select All Programs, Information
Builders, WebFOCUS 80 Server,
then click Web Console.
The Web Console opens.
Note: The WebFOCUS
Reporting Server must be running in order to open the Web Console.
-
Click Adapters in
the menu bar.
-
In the left
pane, expand Adapters, Available, SQL, MySQL,
and select MySQL (Unicode Optional).
-
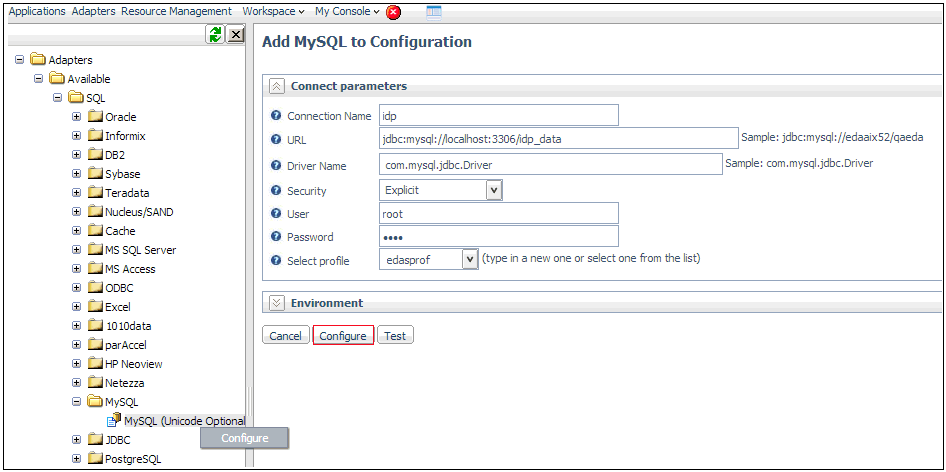
In the left
pane, right-click MySQL (Unicode Optional),
and select Configure from the context menu.
The Add MySQL to Configuration pane opens, as shown in
the following image.
-
Provide
the following values for the connection parameters:
-
Connection Name: idp
-
URL: For example,
jdbc: mysql://localhost:3306/idp_data
-
Security: Explicit
-
User: The
user name for MySQL.
-
Password: The
password for MySQL.
-
Click Configure.
A message is displayed indicating that MySQL was successfully
added to the configuration.
-
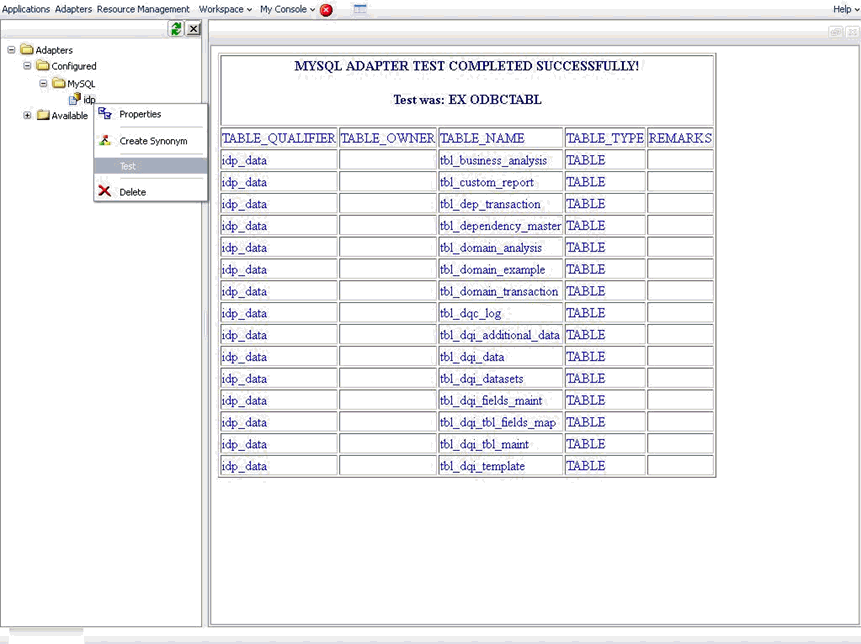
To test
the connection, right-click the idp connection
node under the MySQL folder and select Test from the
context menu.
The MySQL Adapter Test Completed Successfully message
is displayed, as shown in the following image.
x
Creating Synonyms for iWay Data Profiler
The following procedure describes how to create synonyms
for iWay Data Profiler.
x
Procedure: How to Create Synonyms for iWay Data Profiler
-
Right-click
the Connection node idp and select Create
Synonym from the context menu.
-
Select the Tables and Views check
box.
-
Click Next in
the right pane.
-
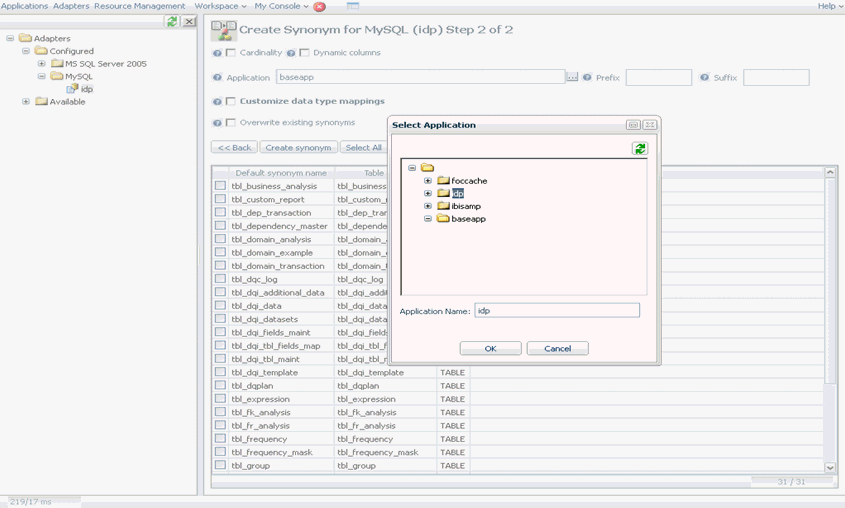
Click the
ellipsis (...) button in the Application field and select idp in
the Select Application window, as shown in the following image.
-
Click OK.
-
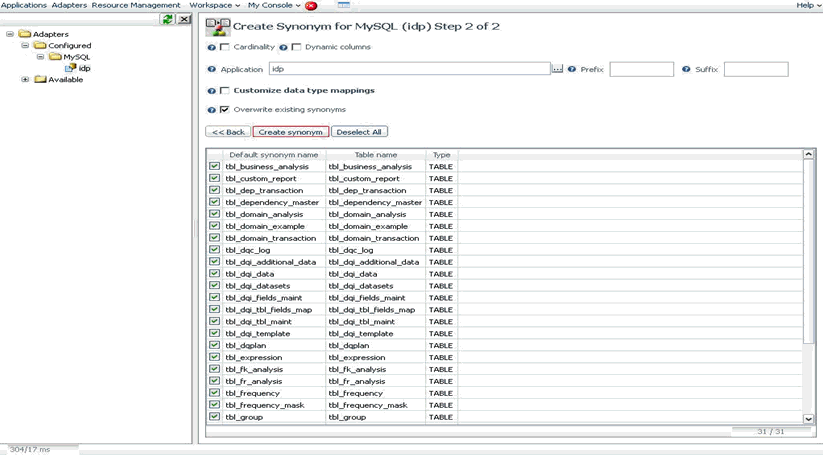
Check the Overwrite
existing synonyms check box and click the Select
All button.
Note: Clicking the Select All button selects
all of the check boxes in the table.
-
Click Create
synonym, as shown in the following image.
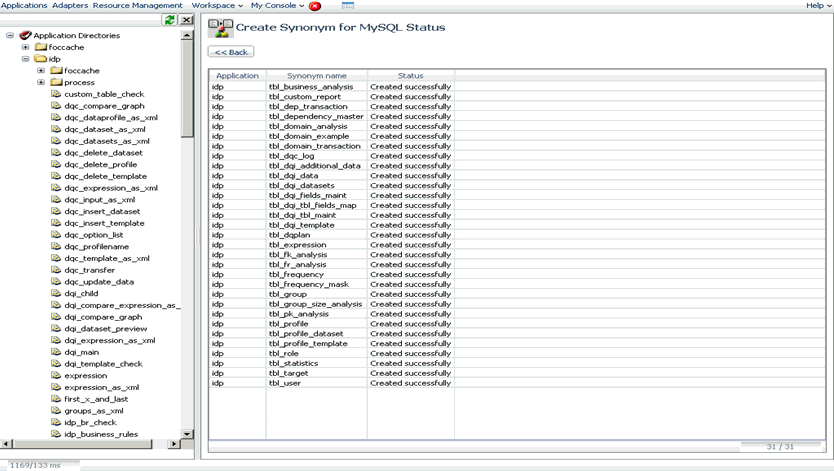
A
list of all the created synonyms is displayed, as shown in the following image.
x
The following section describes how to test the created synonyms.
x
Procedure: How to Test Created Synonyms
-
Click the Applications tab
from the menu bar.
-
Under Application
Directories in the left pane, expand idp.
-
Right-click
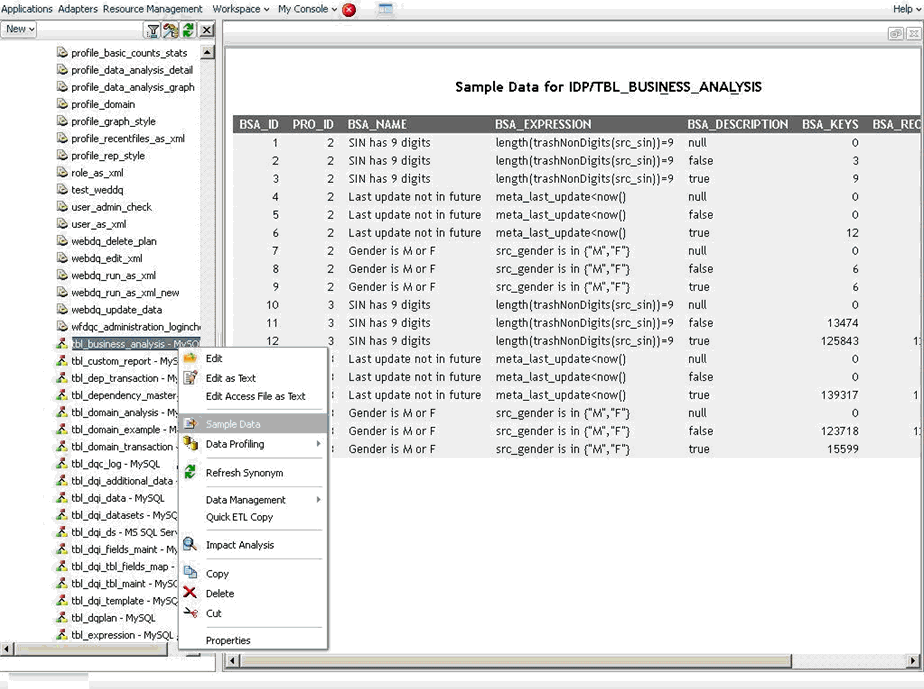
any available table in the left pane and select Sample
Data from the context menu to view the values in the table,
as shown in the following image.
