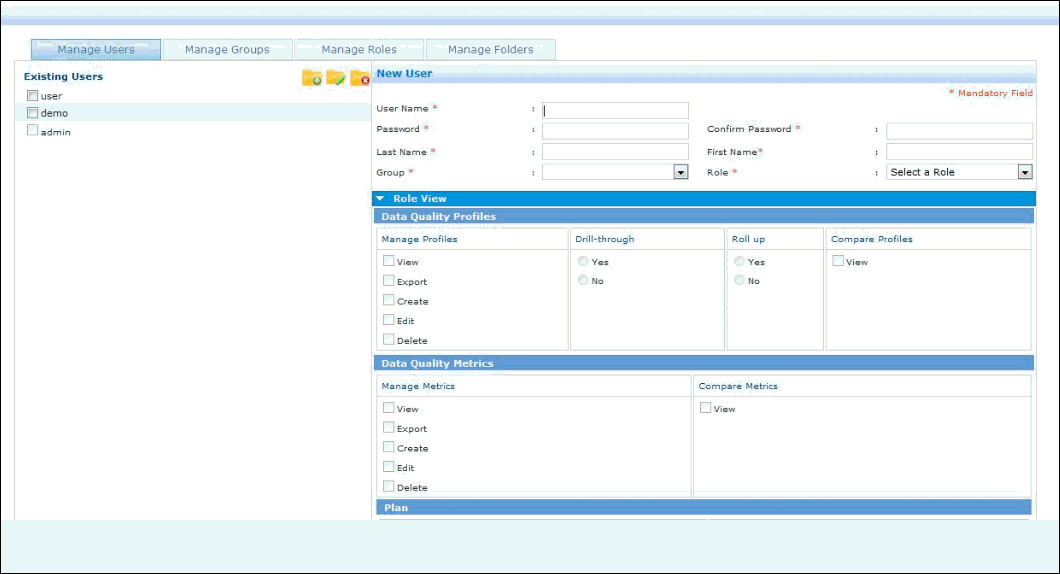
Assigning roles allows you to define authorization to specific areas in iWay Data Profiler for users and groups and set specific privileges.
To create a role:
-
Click Security Center,
under SECURITY, in the iWay Data Profiler home page.
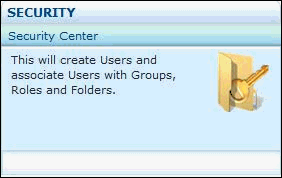
The Security Center page opens, as shown in the following image.
-
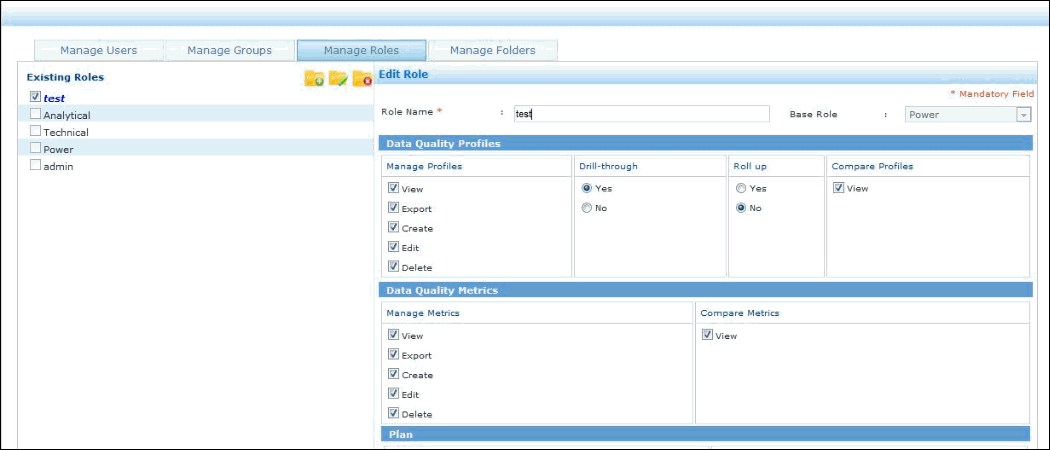
Click the Manage Roles tab.
The Manage Roles tab opens, as shown in the following image.

The left console pane contains the list of Existing Roles and the icons to create, edit, and delete roles.
-
In the top right corner of the left console pane, click
the Create Role icon.
The New Role pane opens, as shown in the following image.
The New Role pane includes various role names and permissions to limit access to the following capabilities shown below:

Note: Once the Custom Report is enabled through Server Manager, you can view the Custom Report option with privileges on the New Role page. For more information on enabling the Custom Reports, see Configuring iWay Data Profiler Properties Using the Server Manager Console in the iWay Data Profiler Installation and Configuration Guide.
-
Enter a name in the Role Name field (required) and select
the permissions according to your requirements.
The Role Name value must not exceed 50 characters. Only alphanumeric characters, spaces, and special characters, such as periods (.) and underscores (_) are allowed.
A minimum of one privilege must be granted for Data Quality Profile, Compare Profiles, Compare Metrics, and Plan.
If the Drill-through option is set to Yes, then the user assigned with this role can manage a profile with drill through capabilities. If the Drill-through option is set to No, then the user assigned with this role cannot access a drill-through profile.
If the Roll up option is set to Yes, then the user assigned with this role can manage a profile with roll up capabilities. If the Roll up option is set to No, then the user assigned with this role cannot access a roll up profile.
The Allow Folder Locations option (required) allows the user assigned with this role to provide access to other users for viewing their Data Quality Profile, Data Quality Metric, Plan, or Custom Report placed in the respective folders.
- If Allow Folder Locations is set to Private(Self), then you can only grant permission to yourself for the Profiles/Metrics/Plan/Custom Report you create. You cannot grant permission to Custom(Group) or Public(Everyone) for the Profiles/Metrics/Plan/Custom Report that you create.
- If Allow Folder Locations is set to Private(Self) and Custom(Group), then you can only grant permission to yourself and your group for the Profiles/Metrics/Plan/Custom Report you create. You cannot grant permission to Public(everyone) for the Profiles/Metrics/Plan/Custom Report that you create.
- If Allow Folder Locations is set to Private(Self), Custom(Group), and Public(Everyone), then you can grant permission to yourself, your group and Public(everyone) for the folders in Profiles/Metrics/Plan/Custom Report that you create.
If the Security Center option is set to Yes, then the user assigned with this role can manage users, groups, roles, and folders. If the Security Center option is set to No, then the user assigned with this role cannot manage users, groups, roles, and folders.
-
Click Save.
A message is displayed indicating that the new role has been successfully created.
You are returned to the Manage Roles tab.