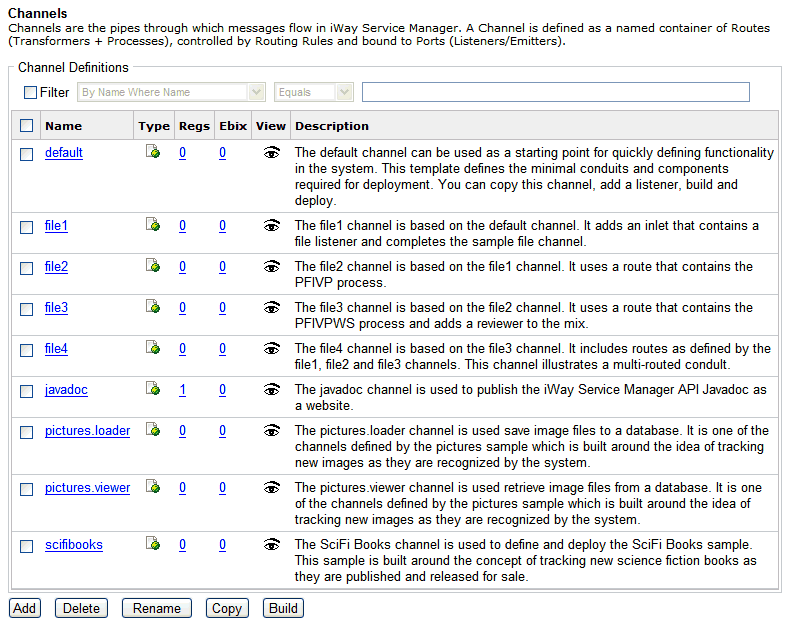
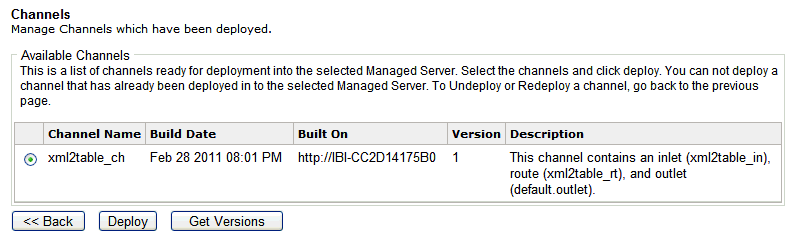
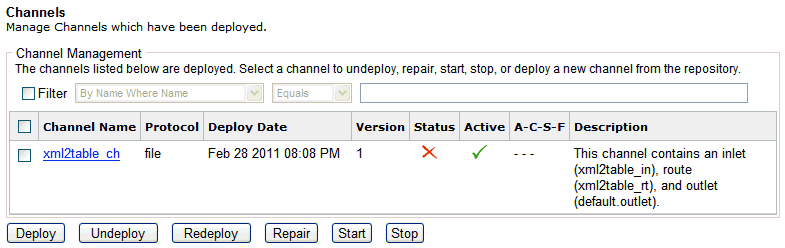
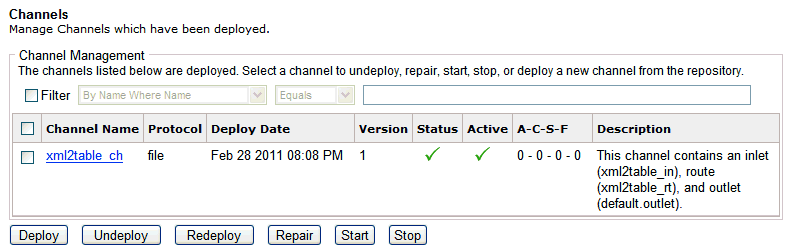
To configure a File listener using the iWay Service Manager Administration Console:
- Ensure that iWay Service Manager is started on your system.
-
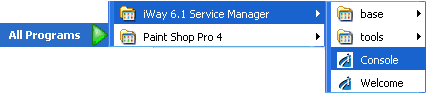
From the Windows Start menu, select All Programs, iWay
6.1 Service Manager, and then Console.
The main page of the iWay Service Manager Administration Console opens.
-
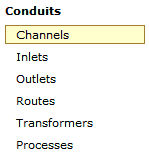
Click Registry in the top pane.

-
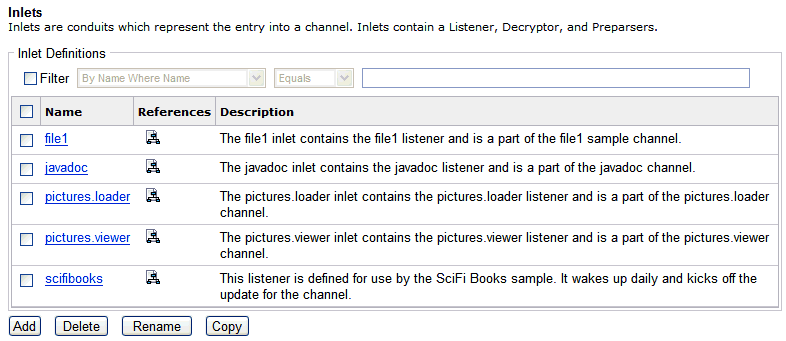
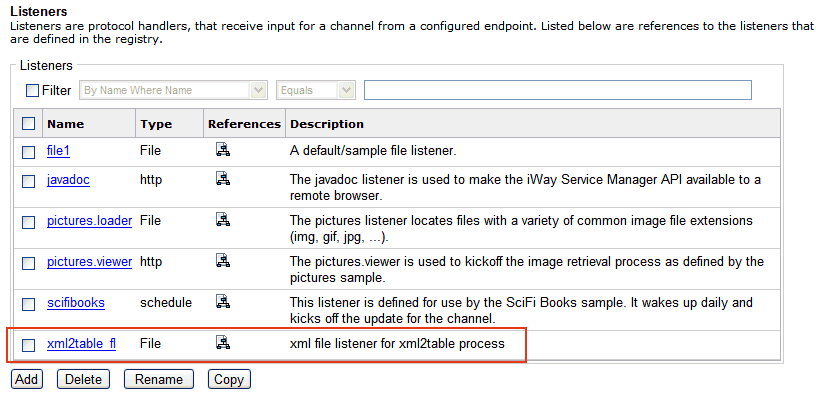
In the left pane, select Listeners.
The Listeners pane opens, as shown in the following image.
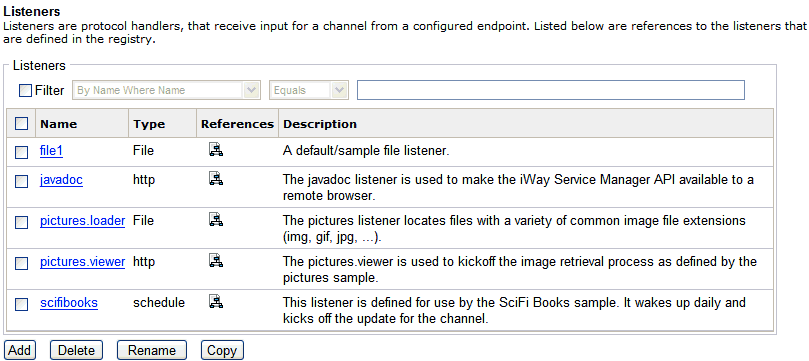
The table that is provided lists existing listeners and a short description for each.
-
Click Add.
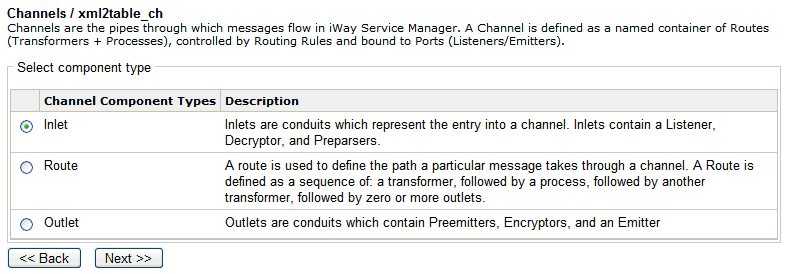
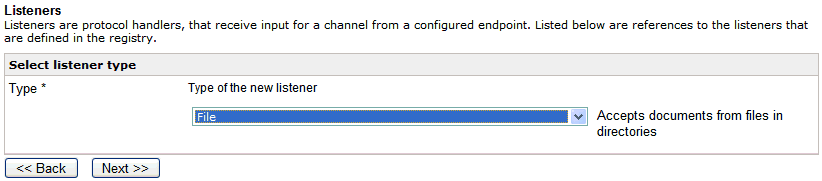
The Listener Type pane opens.
-
Select File from the Type drop-down
list and click Next.
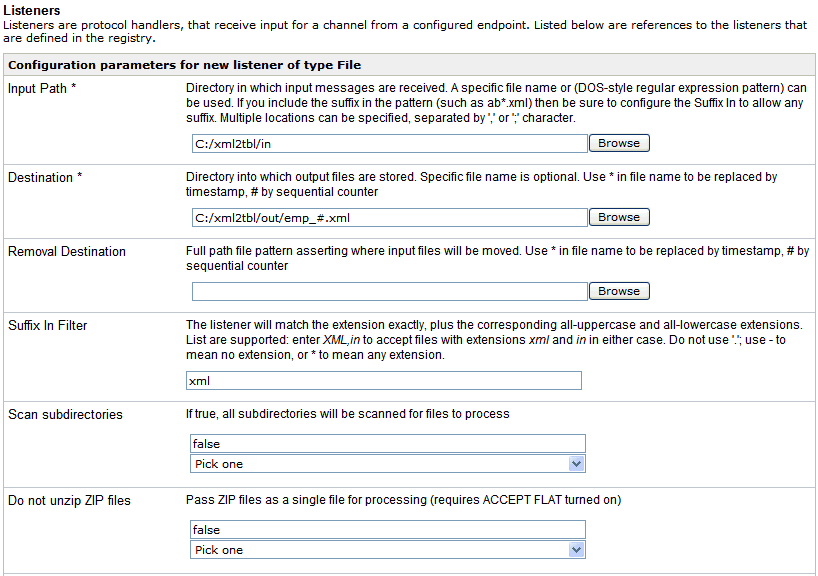
The configuration parameters pane for the File listener opens.
-
Provide the appropriate configuration properties, as
defined in the following table.
Parameter
Value
Input Path
C:\xml2tbl\in
Destination
C:\xml2tbl\out\emp_#.xml
Suffix In Filter
xml
- Accept the default values for the remaining parameters that are provided.
-
Click Next.
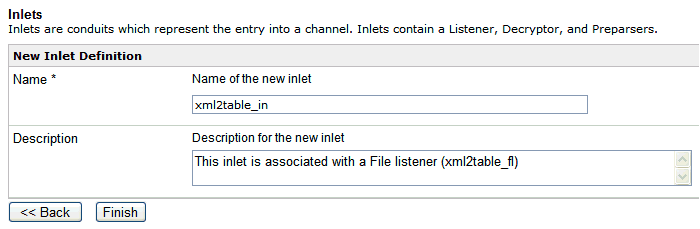
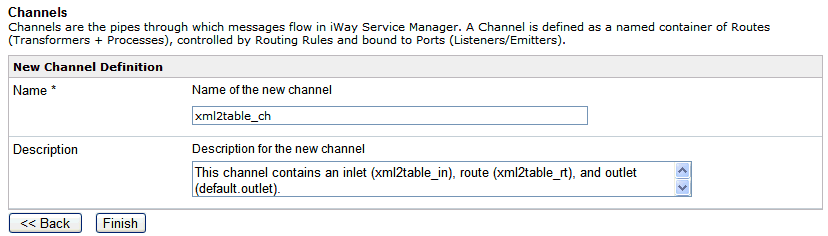
The Name and Description pane opens.
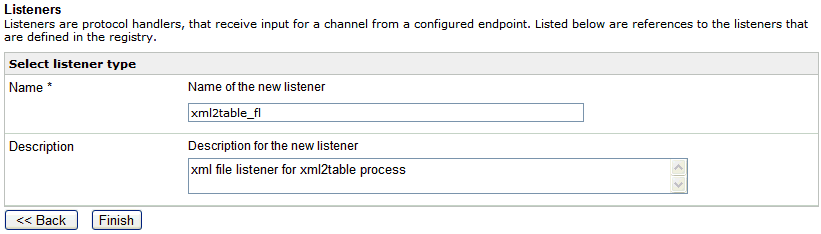
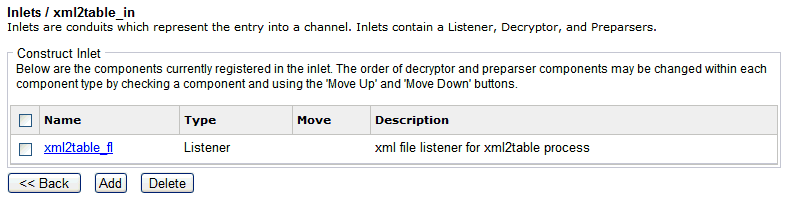
- In the Name field, type xml2table_fl.
- In the Description field, type an optional description, for example, xml file listener for xml2table process.
-
Click Finish.
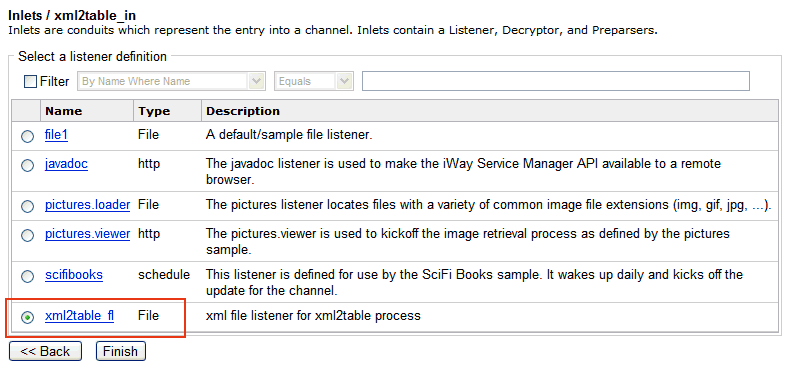
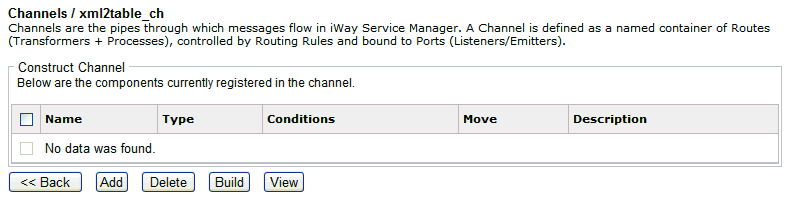
The new File listener (xml2table_fl) is added to the list in the Listeners pane.
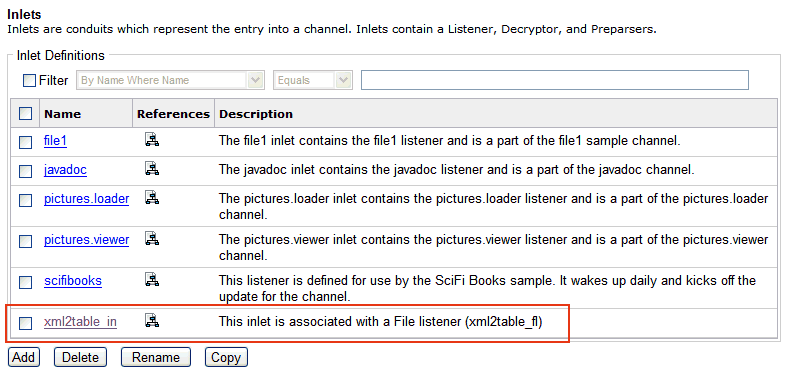
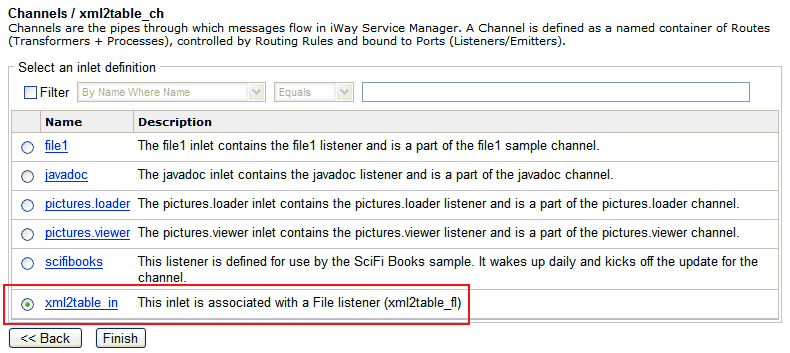
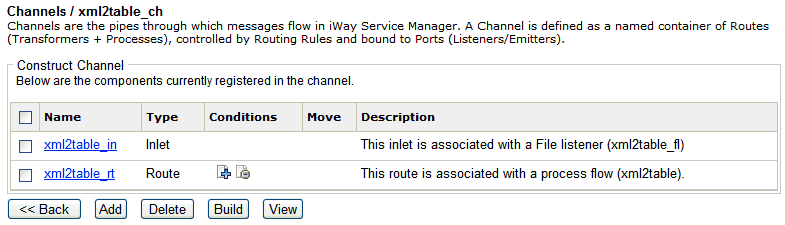
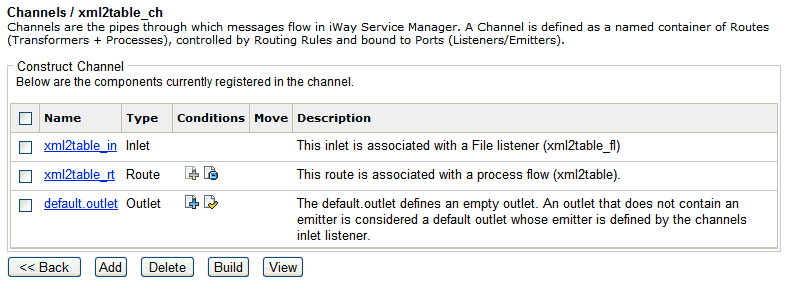
You are now ready to define an inlet and associate it with the new File listener (xml2table_fl).