In this section: |
The iWay Archive Manager is used to import components into the registry from archives or available iSM configurations. It is helpful when you are required to move components (for example, channels or an entire registry) between servers. Archives are specially designed files that contain components, metadata, and configuration information from runtime.
Note: For additional archiving recommendations, see the Release Notes or the iWay Service Manager Migration Guide.
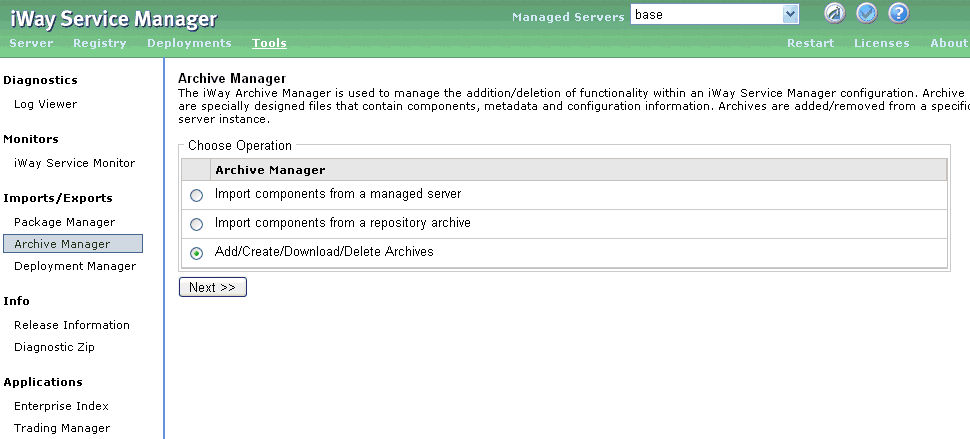
To access the Archive Manager, click Archive Manager in the left console pane of the Tools menu, as shown in the following image.

To import components from an archive file, the file must be in a predefined location within the server machine's file system. Add will take an archive from any location accessible by your browser and copy it to the appropriate directory on the server machine.
The following image shows the list of operations you can select from the Archive Manager, with the Add/Create/Download/Delete Archives button selected.

From the Archive Manager:
The list of uploaded archive files will be displayed. As shown in the following image, there are three archive files to choose from, EDA_CICS_Gateway, New_Project_Archive, and Test_GPS_Google_Map_Listener.

As shown in the following image, you will be prompted for the archive file to upload on the Archive Manager - Upload page. You may either enter the fully qualified file name or click Browse to navigate to the file’s location.

In this example the archive file Saved_SciFiBooks.zip is chosen for upload from a local directory on a system, as shown in the following image.
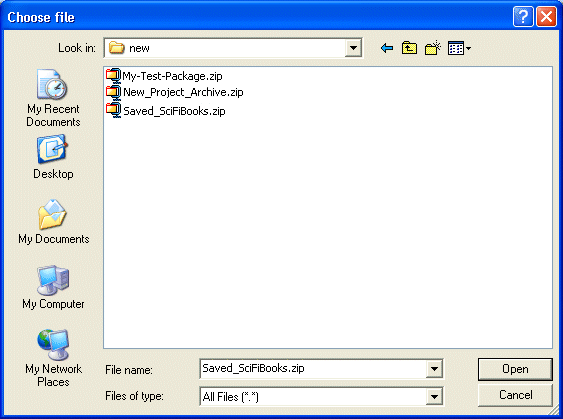
Note: The actual appearance of the Choose File window will depend on your browser.
The chosen file name will populate in the upload field, as shown in the following image.

The newly uploaded archive name is added to the list of available archives, as shown in the following image.
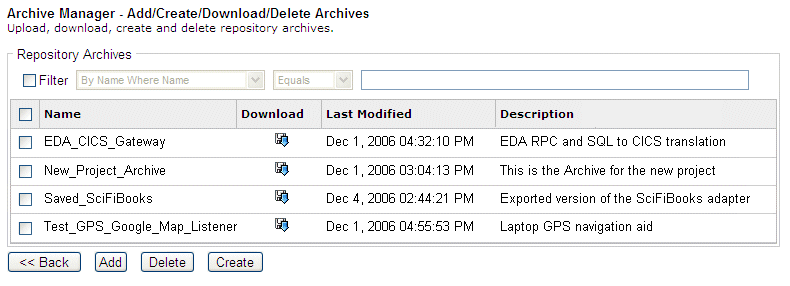
Note: At this time, the components in the archive have not been imported, but just made available to Archive Manager's import component process. You can import the archive at this time.
From the list of archive files:
This list may be filtered by criteria to minimize its length and help locate the component you are interested in. In this example, the list is not filtered and extends below the browser window, as shown in the following image.
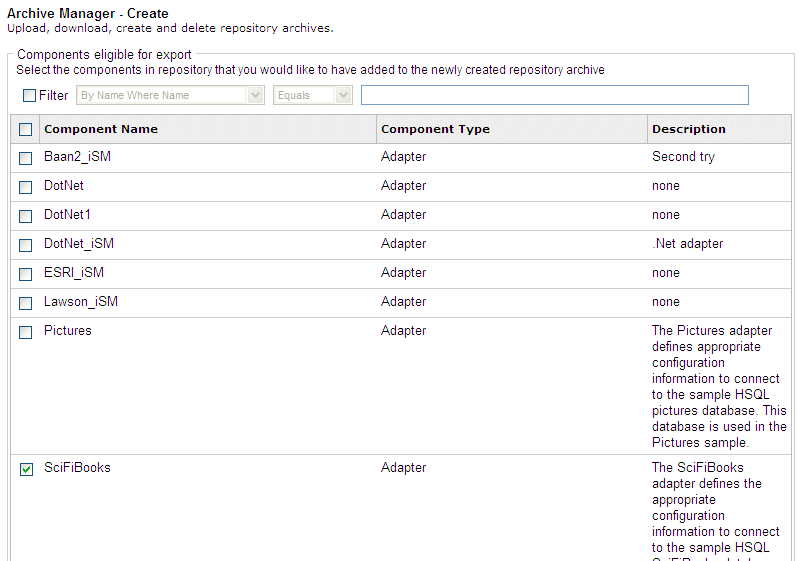
Archive file names should consist of only letters, numbers, and underscores, and begin with a letter. The following image shows that the SciFiBooks component is named Saved_SciFiBooks and its description is "Exported version of the SciFiBooks adapter."

The Repository Archives listing page displays the newly created archive, as shown in the following image.

You may wish to copy an archive file from your server to your workstation for backup, in preparation for an installation to another server, or to email it.
Another reason to download an archive is to move it from one system to another.
In the example, the following image shows three packages available for download, EDA_CICS_Gateway, New_Project_Archive, and Test_GPS_Google_Map_Listener.

The File Download dialog box is displayed, providing the option to open or save the New_Project_Archive.zip package.
Note: The dialog box and behavior for saving the file will depend on your browser.
You can use GUI to delete an archive to clean up the server or shorten the list of archive files being displayed.
In the following image, the Archive Manager - Repository Archives page shows four available packages, EDA_CICS_Gateway, New_Project_Archive, Saved_SciFiBooks, and Test_GPS_Google_Map_Listener. The Saved_SciFiBooks archive is selected for deletion.
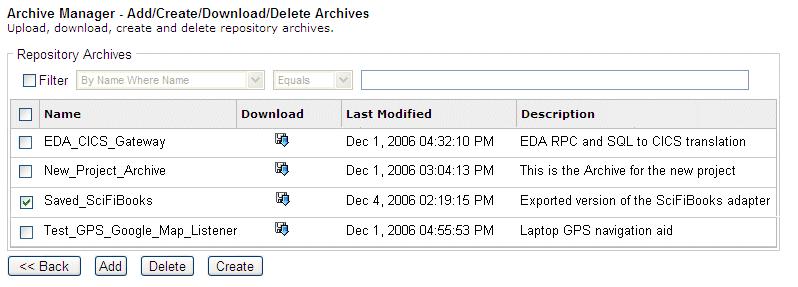
A confirmation dialog box opens, prompting you to confirm the deletion of the archive file.
Note: This deletion operation is permanent; there is no undo if you erroneously delete an archive, other than retrieving the archive file from the system’s Recycle Bin or its original source.
As shown in the following image, the screen returns to the Archive Manager - Repository Archives page listing the available archive files. The Saved_SciFiBooks package is not listed as an available archive file, confirming its deletion.

A repository archive is the primary source of components that are added to the Registry from the Archive Manager Console page.
The following image shows the Archive Manager page with the Import components from a repository archive button selected.

To import components from a repository archive:
The list of archive files in the [IWAYHOME]/etc/repository/manager/archives directory is displayed. You may apply filtering criteria to minimize the size of the list and help locate the archive of interest. The following image shows there is no filter being applied to the Test_GPS_Google_Map_Listener repository archive for import.

Note: On non-Windows platforms, to use Archive Manager, you can either upload the archive from a local machine or place the archive in the [IWAYHOME]/etc/repository/manager/archives directory. When you refresh the browser, the archive is added to the list in the Archive Manager - Import components from a repository archive page.
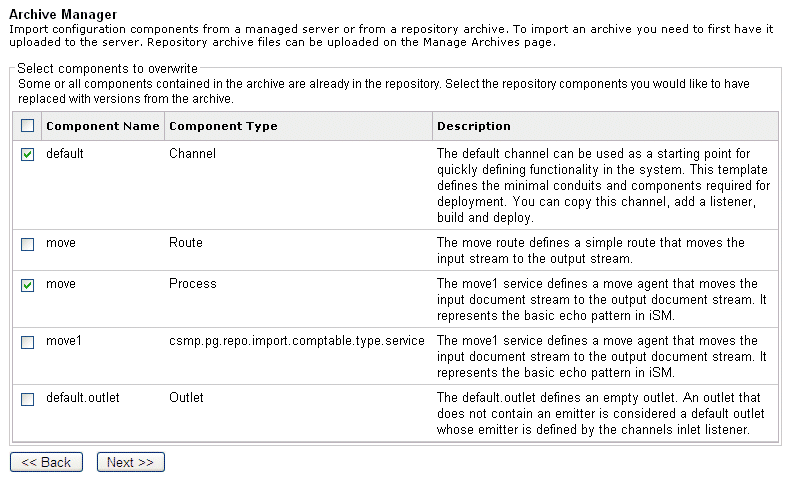
If the components stored in the archive are already present in your Registry, you will be presented with a page to selectively replace any preexisting components. As shown in the following image, two components are selected to be overwritten, the default and move components.
The results page displays the success of importing the Test_GPS_Google_Map_Listener repository archive with the default and move components overwritten, as shown in the following image.

Importing components from a managed server is useful when you are required to migrate from an earlier release of iWay Service Manager. The Registry, as configured during installation, contains the components for iWay samples only. Generally speaking, you will want to insert additional components into the Registry in preparation for constructing your channels. One source of additional components is one of your managed servers (also called configurations).
During an upgrade, you can also import components from the run-time server into the Registry to make them available for modification.
As shown in the following image, the base (default) server is the configuration source for importing components.

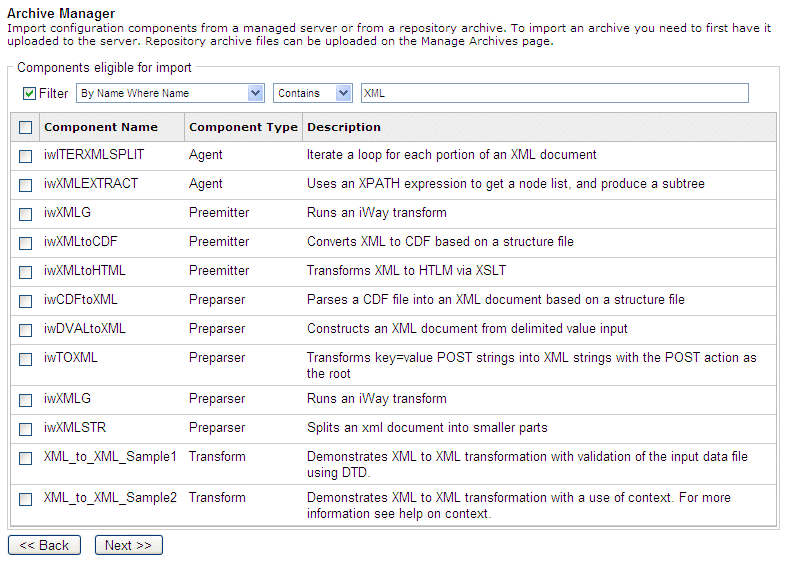
All the components within the selected configuration, filtered by the selection criteria, are listed. The base configuration contains approximately 100 components, so for this example the list was limited to components whose name contains the string XML, as shown in the following image. After applying a package, such as HIPAA, more components will be available for import into the Registry.
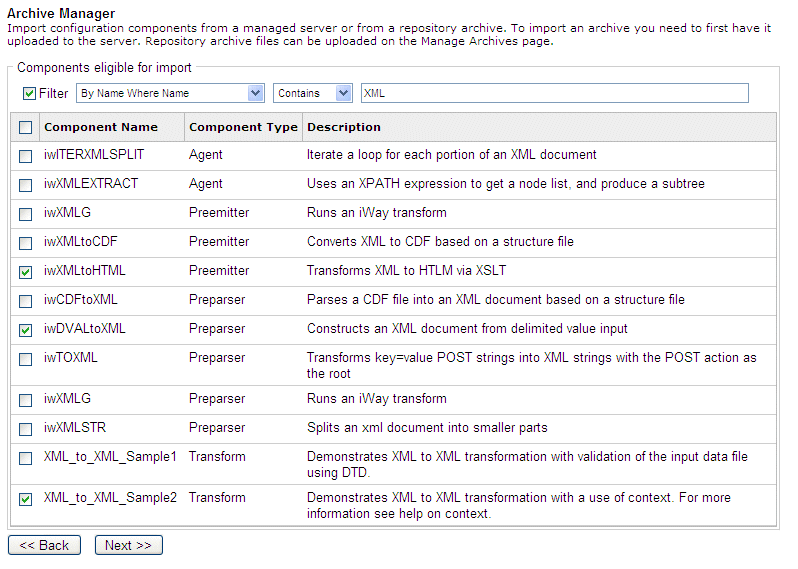
The following image shows the selection of three components to be copied to the Registry, iwXMLtoHTML, iwDVALtoXML, and XML_to_XML_Sample2.
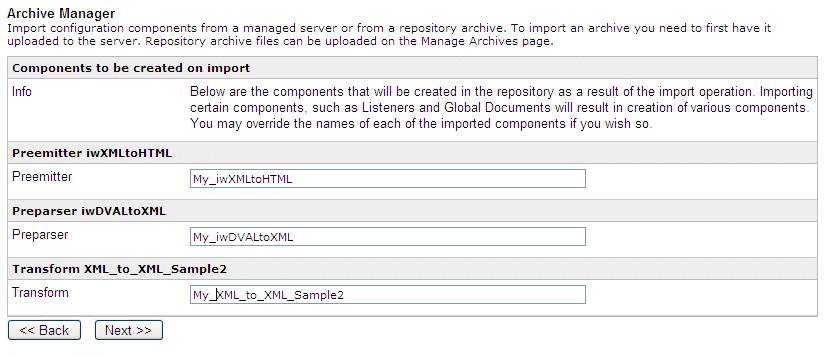
In the following image, this page allows you to rename the newly created Registry components. The components have the prefix My_ for identification and uniqueness.
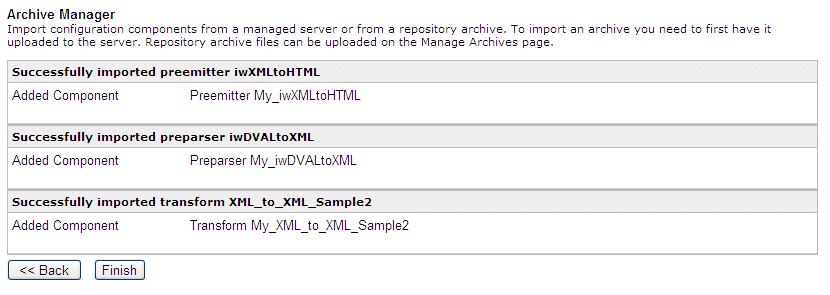
The following image shows that the preemitter, preparser, and transform components have been successfully imported.
| iWay Software |