Starting iWay Explorer

How to:


Top of page

x
Procedure: How to Open iWay Integration Tools
  1. Navigate to your local drive where you have iIT installed, and open the eclipse folder.
  2. Double-click iit.exe.

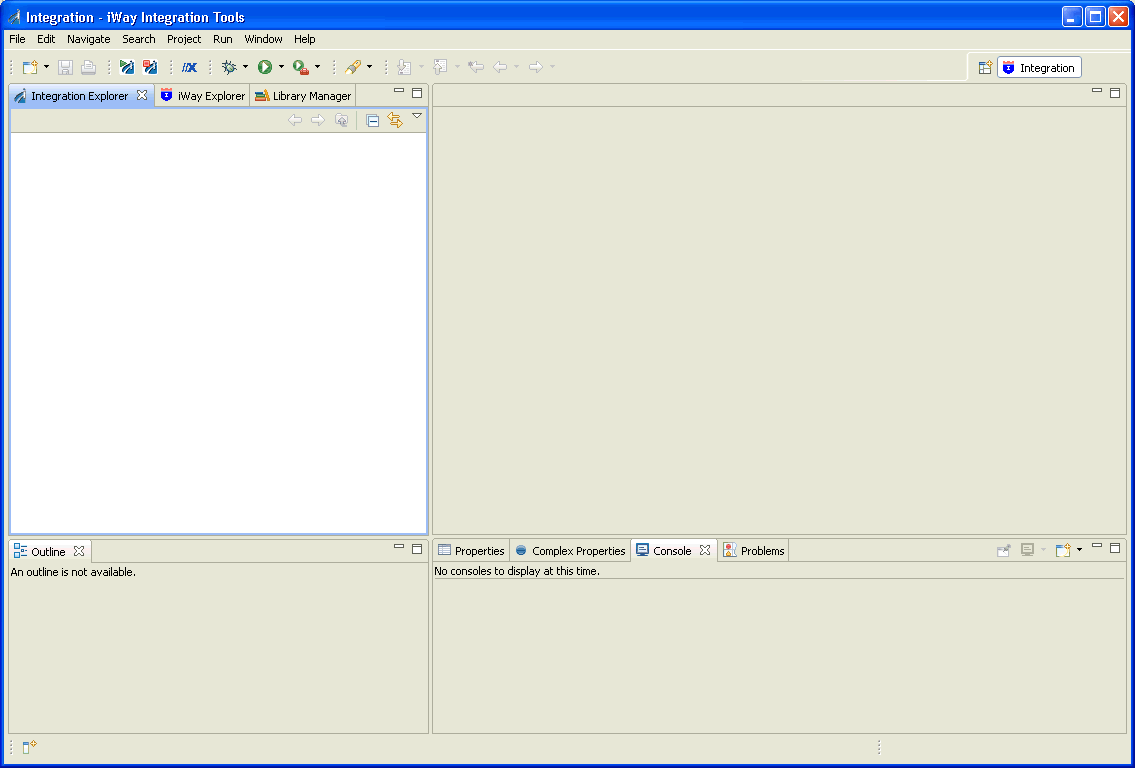
    iWay Integration Tools suite opens.

Top of page

x
Procedure: How to Create an iWay Explorer Connection to an iSM Server

This procedure assumes that you have opened iWay Integration Tools (iIT) and are in the Workbench.

  1. Click the iWay Explorer tab to make it active.
  2. Click the Launch iWay Resource Creator Wizard button on the tool bar. In the following image, the iWay Explorer tab is active, and the cursor is pointing to the Launch iWay Resource Creator Wizard button.

    When you click the button, the Resource Selection Dialog opens and displays the New iWay Connection pane, as shown in the following image.
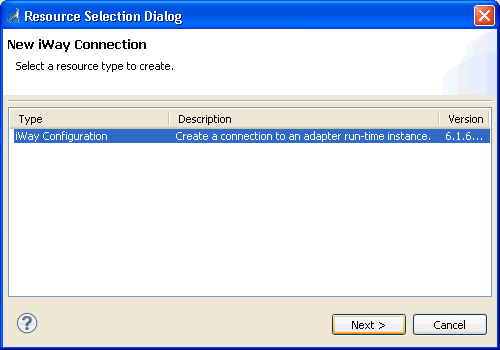
  3. Under the Type heading, click iWay Configuration, which is the type of resource that you are going to create.
  4. Click Next.

    The Add iWay Configuration dialog box opens and displays the Select Connection Types pane, as shown in the following image.
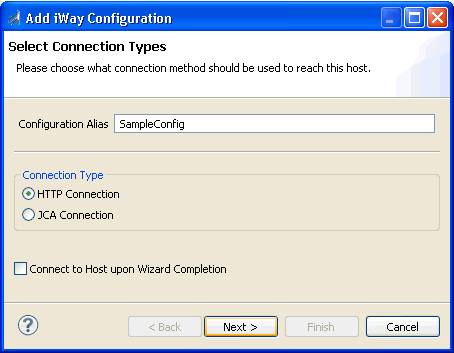
  5. In the Configuration Alias field, type a name for the new configuration (for example, SampleConfig).

    Tip: The name that you supply is used only for display purposes in the tree. It is not a server connection property.

  6. For Connection Type, click the radio button for the method that you are using to connect to iSM. Your choices are:
    • HTTP Connection. The connection to iWay Service Manager is made using HTTP.
    • JCA Connection. The iWay Connector for JCA runs in a J2EE Connector Architecture compliant application server. It uses the Common Client Interface (CCI) to provide integration services using iWay adapters.
  7. Optionally, select the Connect to Host upon Wizard Completion check box if you want iWay Explorer to automatically connect to this instance of iSM after you have created it. If you select this option, all the explorer environments under the new iSM connection are automatically connected to iSM when this procedure is finished.

    If you do not select this option, the explorer environments are not automatically connected to iSM. You can connect to an individual explorer environment when you want to access it.
  8. Click Next to continue the procedure. The dialog box that you see depends on whether you selected an HTTP Connection or a JCA Connection in step 6.
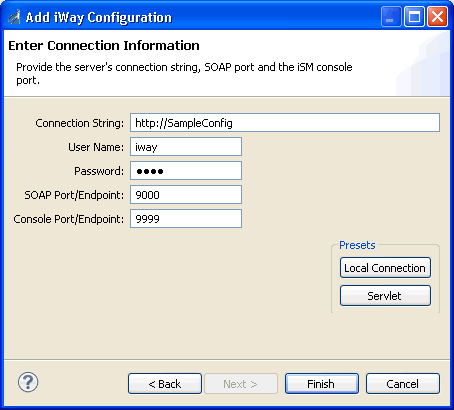
  9. If you selected an HTTP Connection, the Enter Connection Information pane opens, as shown in the following image.

    • Verify the values in the three fields, or type the valid value or values.
      • The Connection String field contains the URL that connects to the iSM.
      • The SOAP Port/Endpoint field contains the SOAP port number.
      • The Console Port/Endpoint field contains the port number that the iSM Administration Console is listening on.
    • Optionally, under Presets, click Local Connection to insert values for a local default iSM connection in the fields, or click Servlet to insert values for a sample servlet connection.
    • Click Finish.

    If you selected a JCA Connection, the Enter JCA Path pane opens, as shown in the following image.
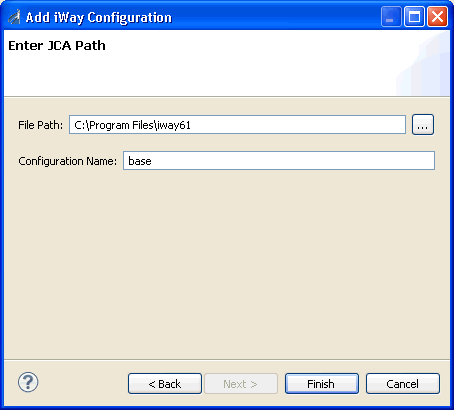
    • In the File Path field, browse to the full path for your iWay installation directory and insert the path in the field. This path is used to locate the iWay adapters and store the XML schemas. For example:
      C:\Program Files\iWay61
    • In the Configuration Name field, verify the name of your iWay server configuration. The base configuration is specified by default. Alternatively, you can type the name of the server configuration.
    • Click Finish.

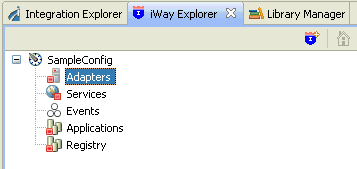
The new iSM connection is added to the tree on the iWay Explorer tab.

In the following image, an iSM connection named SampleConfig was added to iWay Explorer. The tree is expanded to show the five explorer environments that are available.

iWay Software