To configure the adapter:
-
In the left pane of the Adapter Manager console, click Configuration,
select Defines, and then select Adapters.
The Adapter Defines pane opens, as shown in the following image.
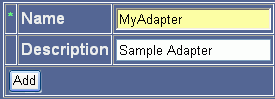
- In the Name field, type the name of the adapter, for example, MyAdapter.
- In the Description field, type a description (optional) of the adapter, for example, Sample Adapter.
-
Click Add.
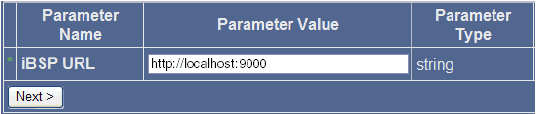
A pane opens where a value for IBSP URL is required in the Parameter Value field, as shown in the following image.
-
Type the iBSP URL, which is the location of the Adapter Manager repository,
or accept the default,
http://localhost:9000
-
Click Next.
A pane, which is divided into four columns and three rows, opens as shown in the following image. The first column lists the names of the parameters, the second column provides drop-down lists where you can select a value for each parameter, the third column lists the parameter type, and the fourth column provides a description for each parameter.
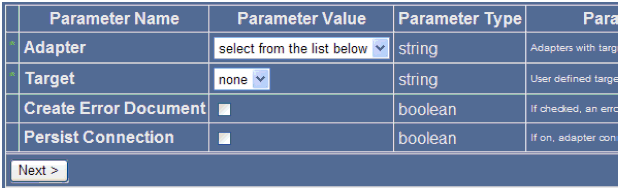
- From the Adapter drop-down list in the Parameter Value column, select the iWay adapter.
- From the Target drop-down list, select the target corresponding to the adapter you configured in Application Explorer.
- To return an error document, select the Create Error Document check box (optional).
- To enable a persistent connection, select the Persist Connection check box (optional).
-
Click Next.
A pane opens and displays the target connection information that was previously configured in Application Explorer, as shown in the following image. The first column lists the names of the parameters, the second column provides values for the connection parameters, the third column lists the parameter type, and the fourth column provides a description for each parameter.
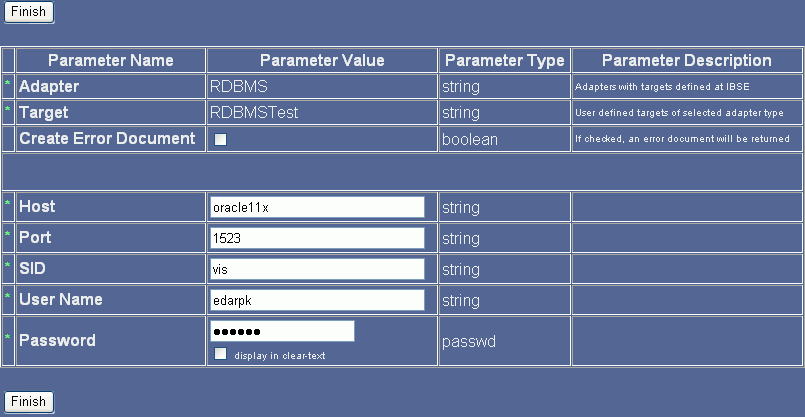
- Review the imported configuration. At this point you can change or update the connection information.
-
Click Finish.
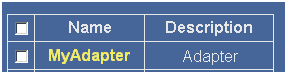
The adapter you configured, MyAdapter, is added to the Adapter Defines list.