To use a generic template:
-
Create
a JSP file in the webapps\ibitelnet directory.
You can use the JSP file distributed with the adapter (ibitc_default.jsp) located in the iway\telnet\projects\tomcat\webapps\ibitelnet directory as a sample.
- Copy and save the JSP file as web2template.jsp.
-
Edit
the web2template.jsp file manually to change the background color and
to add a title.
<!-- The fieldTab javascript takes care of cursor positioning -->
<!-- 1) Here you can change the background color -->
<BODY onLoad='fieldTab()' bgcolor='#FFFF00'>
where:
- #FFFF00
Is the hexadecimal code for the color yellow.
You can make other HTML modifications to the JSP file that are reflected in the translated mainframe screen, in this case, the CICS BROWSE screen.
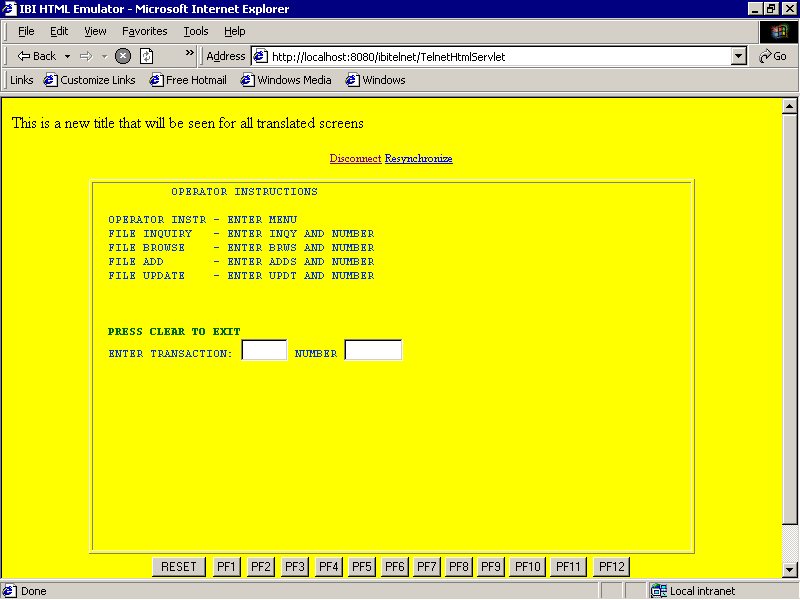
This is a new title that appears for all translated screens:
<!-- ------------------------ -->
<!-- THIS MUST ALWAYS BE HERE -->
<!-- ------------------------ -->
Snippets from the file reveal notes that can help you make other changes, such as:
<!-- 2) Here you can change the translation commands properties --> <!-- or move it to the bottom of your page --> <font style='font-size:8pt' color='#0033CC'> <!-- 3) Here you can change the font properties --> <% telnetConnection.setIntensifiedColor("#006600"); %> <font style='font-size:8pt' color='#0033CC'> <!-- 4) Here you can move the keyboard to the top of the page --> <%= TelnetHtmlHelper.buildKeyboard(emulation) %> -
Edit
the WEB2.XML rules file located in the ibitelnet/sessions
directory within the webapps directory of the web server.
The WEB2.XML file was created when you deployed the application using the GUI Developer.
-
Make
the following change that identifies the web2template.jsp file (3270
is used for this procedure):
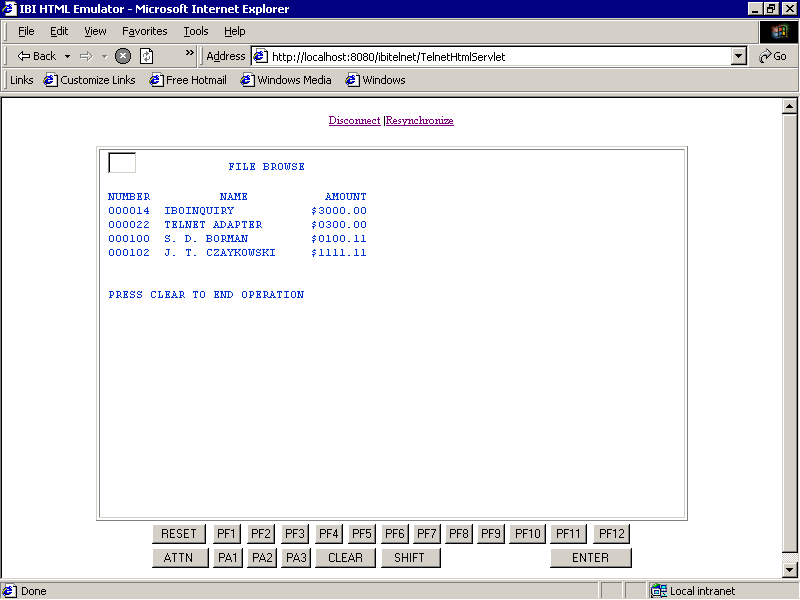
<sequence NAME='WEB2' MODE='WEB' VERSION='2.0' >
<remarks>
5. Hide the set of screens until the BROWSE Transaction.
</remarks>
<connection HOST='IBIVM' PORT='23' EMULATION='tn3270' EXTENDED='OFF'
LANGUAGE='Cp037' TIMERTIMEOUT='15' URL='web2template.jsp' />
The following image illustrates the translated CICS Browse screen before adding a template.
The following image illustrates the CICS Browse screen after adding the template called web2template.jsp to the WEB2.XML rules file.
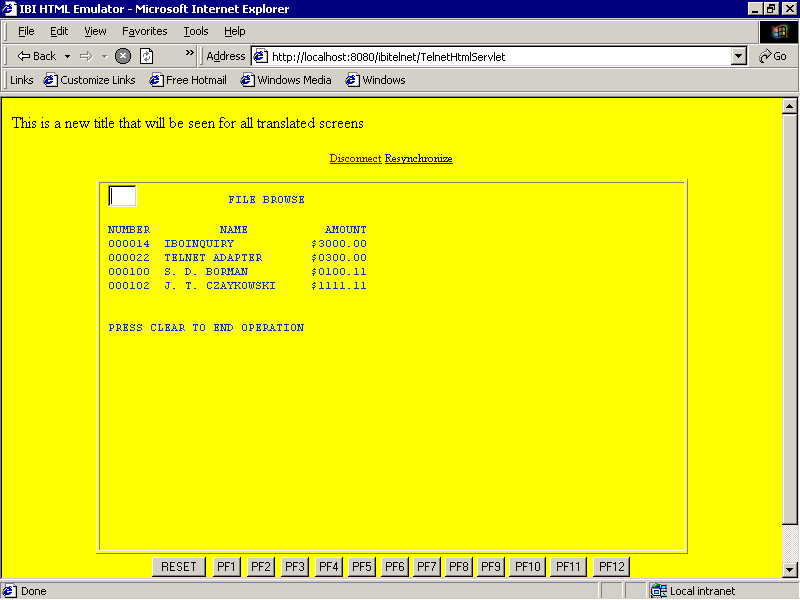
Notice the new title and the yellow background color.
Another action such as clicking the Clear key displays the menu screen with the yellow background and the title, as shown in the following image.