-
Right-click the SG0 tag, which
is located under inv_order, select Add,
move your pointer over Variable and select HLCTR.
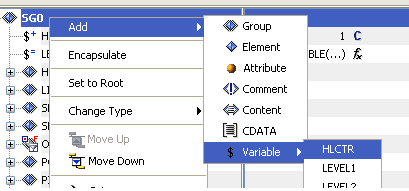
- Use the position icons (Move Up and Move Down) on the tool bar (or right-click and select from the control menu) to position the HLCTR variable below the SG0 tag.
-
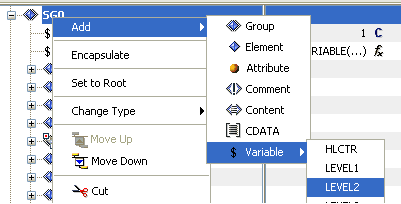
Right-click the SG0 tag, which
is located under inv_order, select Add, move
your pointer over Variable and select LEVEL2.
-
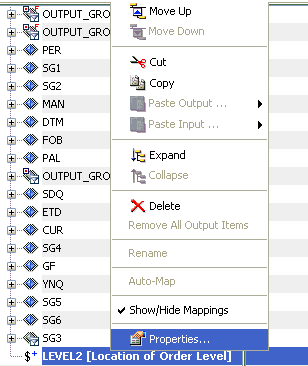
Right-click the LEVEL2 variable
tag in the Output pane and select Properties from
the context menu.
The Output Node Properties - LEVEL2 dialog box opens.
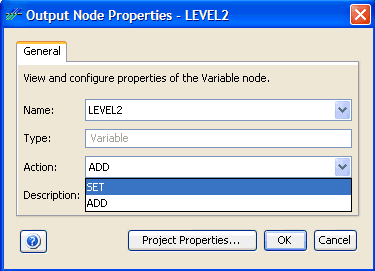
- Select SET from the Action drop-down list.
- Click OK.
-
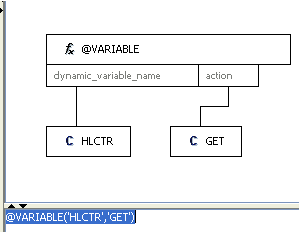
Configure the mapping values for the LEVEL2 variable
as indicated by the following table:
Element
Value
LEVEL2
@VARIABLE('HLCTR','GET')
Your screen should now resemble the following image:
-
Use the position icons (Move Up and Move Down) on the
toolbar (or right-click and select from the control menu) to position
the LEVEL2 variable below the HLCTR variable tag.
Your screen should now resemble the following image:

-
Configure the mapping values for the HL elements as indicated
by the following table:
Element
Value
HL01
@VARIABLE('HLCTR','GET'
HL02
@VARIABLE('LEVEL1','GET')
HL03
O