Sample Configuration for Inbound Processing: SWIFT to XML
This topic provides step-by-step instructions on how
to configure a basic inbound message flow for the iWay Integration
Solution for SWIFT. The message flow represents the movement and
tasks in the conversion of a message from SWIFT FIN format to XML
format.
x
Accessing the iWay Service Manager Administration Console
To access the iWay Service Manager Administration Console,
you must first ensure that the iWay Service Manager service is running.
For instructions on starting iWay Service Manager, see the iWay
Service Manager User's Guide.
x
Procedure: How to Access the iWay Service Manager Administration Console on Windows
-
From the Windows desktop, select Start, All
Programs, iWay 6.1 Service Manager,
and Console,
or,
from a browser such as Microsoft Internet Explorer,
enter the following URL,
http://host:port
where:
- host
- Is the host machine on which iWay Service Manager is installed.
The default value is localhost.
- port
- Is the port number on which iWay Service Manager is listening.
The default value is 9999.
The following image
shows the URL with the default values.

-
When prompted, enter your user name and password, and click OK.
Note: The default user name and password is iway.
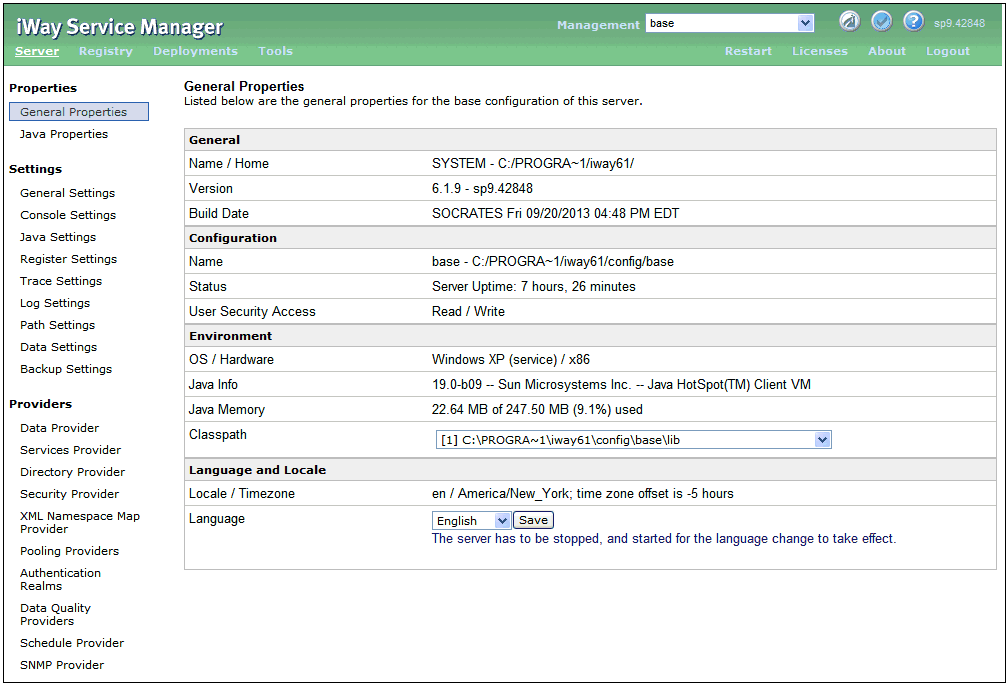
The iWay Service Manager Administration Console opens,
as shown in the following image.
x
Adding an Ebix to the Registry
The iWay e-Business Information Exchange (Ebix) framework
supplies several Ebix files for the iWay Integration Solution for
SWIFT.
An Ebix file for SWIFT is named SWIFT_ccyy.ebx, where ccyy is
the release year. For example, an Ebix file for the 2013 SWIFT FIN
messages is named SWIFT_2013.ebx.
For details on the supported SWIFT FIN messages, see Ebix-Supported Transaction Sets.
This topic describes how to add an Ebix to the Registry on Windows
and UNIX.
Note: Ebix archives are not packaged with the iWay Service
Manager installation. You can download all Ebix archives from the
following website, which is hosted and maintained by iWay Software:
http://techsupport.informationbuilders.com
Note: A 2013 Ebix is attached with the sample channels
that are provided in this document. If you are going to download
and attach an Ebix, then you must delete the Ebix from the sample
channels or remove it from the channel being deployed.
x
Procedure: How to Add an Ebix to the Registry on Windows
-
To access the Registry, select the Registry option
in the green shaded area below the iWay Service Manager banner,
as shown in the following image.

-
Under Components in the left pane of the Registry, select Ebix.
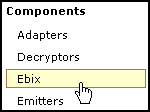
The
Ebix pane opens, as shown in the following image.

-
Click Add to add a new Ebix.
The New Ebix pane opens.

-
Browse to the directory in which the Ebix is located and select
the name of the file (for example, SWIFT_2013.ebx).
-
Once you have selected the Ebix, click Next.
You are prompted for the name of the Ebix and an optional
description.

-
Enter a name for the Ebix, for example, SWIFT2013,
and an optional description, for example, SWIFT2013.
Note: This step must be repeated for each SWIFT
Ebix that is added to the Registry.
-
Click Finish.
On the Ebix pane, you will see that the Ebix was successfully
added. Later you will associate it with the channel for inbound processing.
x
Procedure: How to Add an Ebix to the Registry on UNIX and z/OS
Depending
on your system configuration, there are two methods that you can
use to add an Ebix to the Registry on UNIX and z/OS.
- If you have
a web browser on the UNIX machine, follow the instructions for Windows.
- Use FTP to
download the Ebix from the iWay61/etc/manager/packages directory
to your Windows machine and follow the instructions for Windows.
x
An inlet defines how a message enters a channel. For
SWIFT, it typically contains the following:
-
Listener. A
listener is a component that picks up input on a channel from a
configured end point.
-
Preparser. A
preparser is a component that converts incoming messages into processable
documents. Typically a preparser converts a document into XML format.
x
Procedure: How to Add a Listener
-
From the Registry menu options on the left pane, select Listeners under
Components.
-
On the Listeners pane on the right, click Add to add
a new listener.
For the purpose of this example, we will show the configuration
with a File listener. For details on supported protocols, see the iWay
Service Manager Protocol Guide.
-
Select File from the Type drop-down
list and click Next.
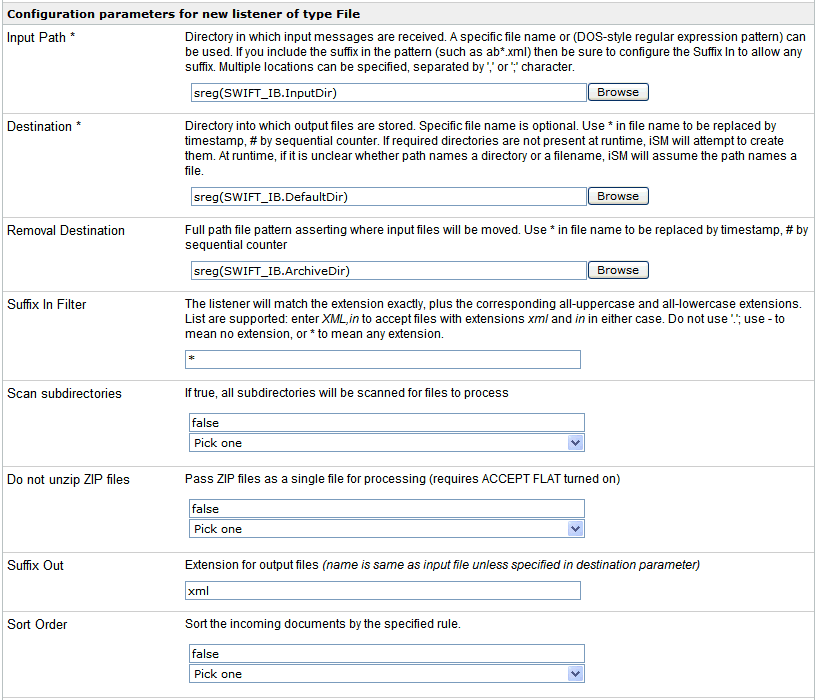
The configuration parameters pane opens, as shown in the
following image.
-
Supply configuration parameters for the new File listener as
follows. An asterisk indicates that a parameter is required. For
parameters not listed in the following table, accept the default
value.
|
Parameter
|
Value
|
|---|
|
Input Path *
|
sreg(SWIFT_IB.InputDir)
This value
is a special register that uses a defined directory in which input
messages are received.
Ensure that you have created this directory; otherwise,
errors will occur during deployment.
|
|
Destination *
|
sreg(SWIFT_IB.DefaultDir)
This value
is a special register that uses a defined directory in which output
files are stored after transformation.
Ensure that you have
created this directory; otherwise, errors will occur during deployment.
|
|
Removal Destination
|
sreg(SWIFT_IB.ArchiveDir)
This value
is a special register that uses a defined directory to which input
messages are moved if they fail during transformation.
Ensure
that you have created this directory; otherwise, errors will occur
during deployment. It is recommended to configure a removal destination
when you are constructing a basic channel.
|
|
Suffix In
|
*
Input files with any file extension
are allowed.
|
|
Suffix Out
|
xml
The extension for
output files is .xml.
|
|
Accepts non-XML (flat) only
|
true
If true, listener expects flat
(non-XML). Automatic parsing is not performed.
|
-
Click Next.
You are prompted for the name of the listener and an optional description.
-
On the Listeners pane, enter the name of the new listener, SwiftToXml_Listener,
and an optional description. Then click Finish to
add the listener.
In a later step, you will associate this listener with
the inlet.
x
Procedure: How to Add a Preparser
-
From the Registry menu options, select Preparsers under
Components.
-
On the Preparsers pane, click Add to
add a new preparser.
You are prompted for the type of preparser.

-
Select XDSWIFTpreParser {com.ibi.preparsers.XDSWIFTpreParser} from
the Type drop-down list.
The SWIFT preparser parses a SWIFT input message into an
XML output.
For details on the supported SWIFT FIN messages,
see Ebix-Supported Transaction Sets.
-
Click Next.
The Preparsers configuration parameters pane opens.
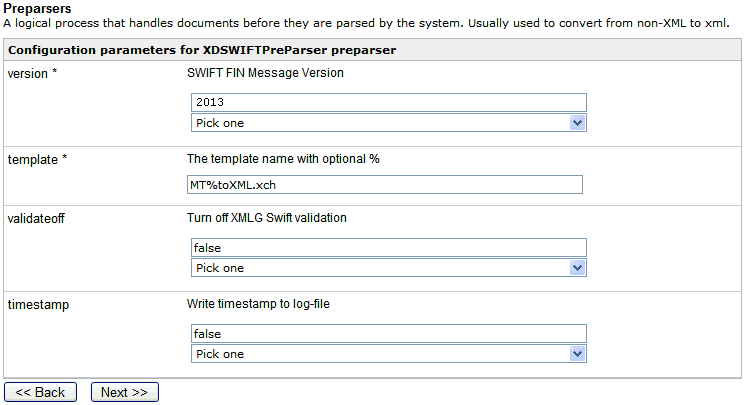
The following table
lists and describes the available configuration parameters for the
preparser:
|
Parameter
|
Description
|
|---|
|
version *
|
Represents the SWIFT release year you are using.
|
|
template *
|
Represents the template to use for the SWIFT
to XML transform. Enter the following:
MT%toXML.xch |
|
validateoff
|
Select false to validate the
structure.
|
|
timestamp
|
Writes a time stamp to the log file. Select true or false.
|
-
Click Next.
You are prompted for a name and optional description for
the new preparser.
-
Enter a name for the new preparser (for example, SwiftToXml_Preparser_EBIX)
and an optional description.
-
Click Finish to add the preparser.
In the next procedure, you will associate this preparser
with an inlet.
x
Procedure: How to Define an Inlet
Now
that you have added a File listener and a preparser to the Registry,
you are ready to add and define an inlet. You will associate the
previously created listener and preparser with the inlet.
-
From the Registry menu options, select Inlets under
Conduits.
-
On the Inlet Definitions pane, click Add to
add an inlet.
-
On the New Inlet Definition pane, enter the name of the new
inlet and an optional description, as shown in the following table.
Then click Finish to add the inlet.
|
Parameter
|
Value
|
|---|
|
Name *
|
SwiftToXml_Inlet
|
|
Description
|
Inlet for SWIFT to XML (Listener and SWIFTPreParser)
|
-
On the Construct Inlet pane, click Add to associate
the listener and preparser with the inlet.
The next pane prompts you for the component type.

-
Select Listener and click Next.
The next pane prompts you to select a listener.
-
Select SwiftToXml_Listener, which is
the listener you added earlier, and click Finish.
The listener is associated with the inlet. Now you need
to associate the preparser created earlier with the inlet.
-
On the Construct Inlet pane, click Add.
The next pane prompts you for the component type.

-
Select Preparser and click Next.
On the next pane, you are prompted to select a preparser.
-
Select SwiftToXml_Preparser_EBIX, which
is the preparser you added earlier, and click Finish.
You have now successfully completed definition of the inlet.
x
A route defines the path a message takes through a channel.
The route for the channel for inbound processing consists of
a process. A process is a stateless, lightweight, short-lived microflow
executed by iWay Service Manager on a message as it passes through
the system. A service is an executed procedure that handles the
business logic of a message.
This section describes how to create a process flow with iWay
Integration Tools (iIT) Designer and bind it to a sample channel
as a route.
For details on the full features of iIT Designer, and additional
information on using its capabilities, see the iWay Integration
Tools Designer User's Guide.
You will complete the following high-level steps to define the
route.
- Using iIT Designer, create a new project and start a new
process flow.
- Validate the process flow and publish it to the Registry of
the iWay Service Manager Administration Console. See the iWay
Integration Tools Designer User's Guide for instructions
on validating and publishing.
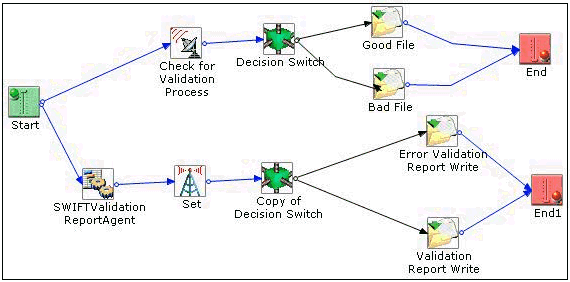
- The process flow that is used for the inbound channel in this
chapter, which is also attached to this documentation, is structured
as shown in the following diagram.
- Add a route to the Registry and associate the process flow with
that route.
x
Procedure: How to Define a Route and Associate the Process Flow With It
-
From the Registry menu options in the iWay Service Manager
Administration Console, click Routes.
-
On the Route Definitions pane, click Add to add
a route.
-
On the New Route Definition pane, enter a name for the route
and an optional description, as shown in the following table. Then
click Finish.
|
Parameter
|
Value
|
|---|
|
Name *
|
SWIFT_to_XML_QS_Pflow
|
|
Description
|
SWIFT to XML transformation where output transform
data will be written to a good or bad folder depending on the validation
report service. The definition of folders can be found in the channel
SREG.
|
-
On the Construct Route pane, click Add.
You are prompted for the type of component to associate
with the route.
-
Select Process and click Next.
-
The next pane prompts you to select a process. Select the process
flow you created earlier with iIT Designer (Swift_to_XML_QS_Pflow)
and click Finish.
The route, with its associated process flow, has been successfully defined.
x
An outlet defines how a message leaves a channel. In
the sample inbound configuration, a default outlet is used. For
details on supported protocols, which can be used as outlets, see
the iWay Service Manager Protocol Guide.
x
Defining an Inbound Channel
Now that you have defined the inlet, route, and outlet
for the inbound channel, you are ready to add the inbound channel
to the Registry and associate the conduits with it.
x
Procedure: How to Define a Channel
-
From the Registry menu options, select Channels.
-
On the Channel Definitions pane, click Add to add
a channel.

-
On the New Channel Definition pane, enter the name of the new
channel and an optional description, as shown in the following table.
Then click Finish to add the channel.
|
Parameter
|
Value
|
|---|
|
Name *
|
Swift2013ToXml_QS2_Pflow_Channel
|
|
Description
|
SWIFT to XML channel using a process flow.
Output XML will be placed in different folders based on results of
the Validation Report. A channel SREG is used to define the folders.
|
-
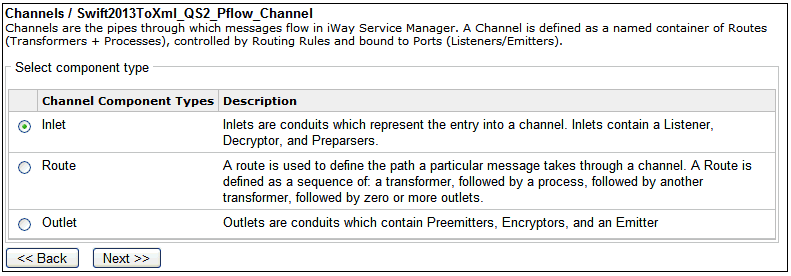
On the Construct Channel pane, click Add to associate
the inlet, route, and outlets defined previously with the channel.
You are prompted to associate components with the channel.
-
Select Inlet and click Next.
The next pane prompts you to select an inlet.
-
Select SwiftToXml_Inlet, which is the
inlet you defined earlier, and click Finish.
The inlet is added to the channel.
Now you need to
associate the route defined earlier with the channel.
-
On the Construct Channel pane, click Add.
The next pane prompts you for the component type.

-
Select Route and click Next.
On the next pane, you are prompted to select a route.
-
Select Swift_to_Xml_QS_Pflow, which
is the route created earlier, and click Finish.
-
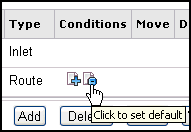
On the Construct Channel pane, click the minus sign (-)
under Conditions next to the name of the route to set it as the default.
-
On the Construct Channel pane, click Add to add
the outlet.

-
Select Outlet and then click Next.
-
Select default.outlet and then click Finish.
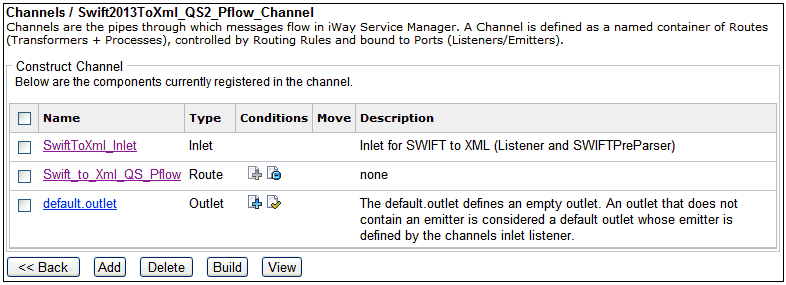
The following image shows the completed channel (Swift2013ToXml_QS2_Pflow_Channel)
with a defined Inlet, Route, and Outlet.
x
Procedure: How to Add the Ebix to the Channel
-
From the Registry menu options, select Channels.
The Channel Definitions pane opens.

-
Click the link in the Ebix column for the Swift2013ToXml_QS2_Pflow_Channel.
The Add Ebix components pane opens.
-
Click Add.
-
Select SWIFT2013, which is the name
of the Ebix you added previously, and click Finish.
The following image shows that the SWIFT 2013 Ebix is now
bound to the Swift2013ToXml_QS2_Pflow_Channel.

Now that you have
associated all the components with the channel, you are ready to
build it.
x
Procedure: How to Build the Channel
-
In the iWay Service Manager Administration Console, click Registry in
the top pane, and then Channels in the left
pane.
-
Select Swift2013ToXml_QS2_Pflow_Channel, as
shown in the following image.

-
Click Build.
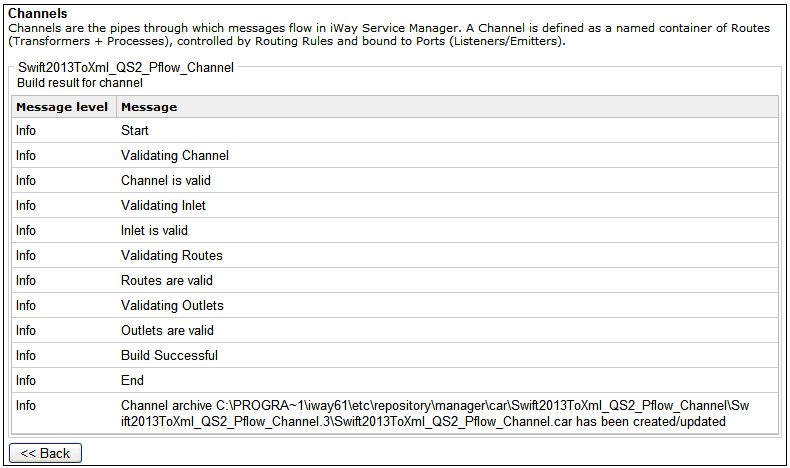
The build results of the selected channel are displayed,
as shown in the following image.
-
Review the results of your build and then click Back.
If an error or errors are displayed in the Message column,
take the appropriate action as instructed.
x
Procedure: How to Deploy the Channel
Deployment
is the mechanism by which a channel moves from being stored in the
Registry to becoming active in iWay Service Manager. For more information
on deployment, see the iWay Service Manager User's Guide.
-
Click Deployments at the top of the screen.
-
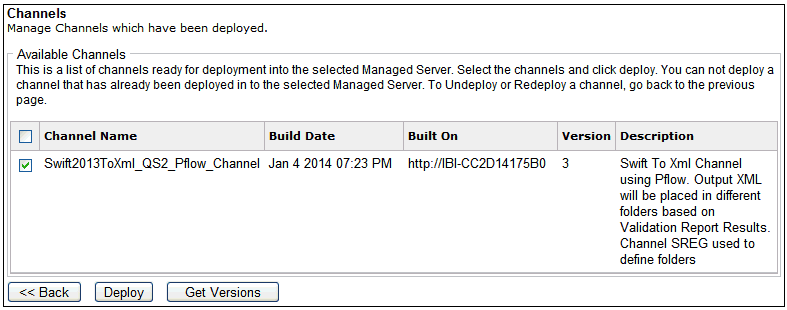
Click the Deploy button.
-
Select Swift2013ToXml_QS2_Pflow_Channel and
click Deploy.
-
Click the red X under the status column.
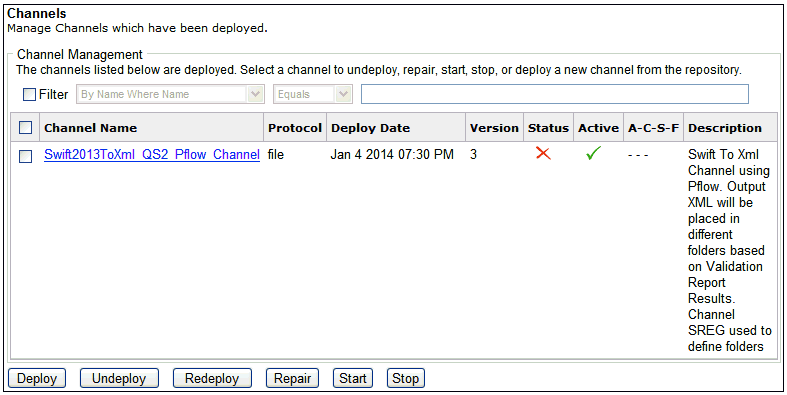
A green check mark
now appears under the status column, as shown in the following image.
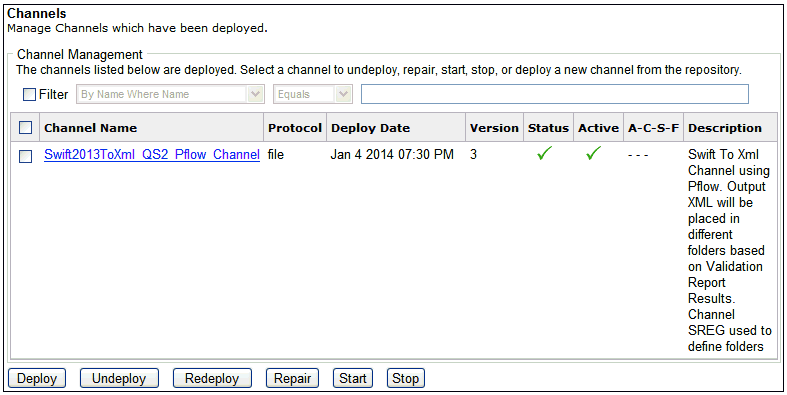
The channel is ready
to accept inbound data.
x
Procedure: How to Verify the Channel
To
ensure that the channel is working as expected, perform the following
steps:
-
Place a SWIFT document as test data in the file directory that is
defined by sreg(SWIFT_IB.InputDir). This is the path in which
SWIFT messages are received, which you specified for the listener
associated with the inlet for the channel.
The following table contains links to SWIFT files that
are attached to this PDF and can be used to verify your channel.
|
SWIFT MT950 (Statement of Cash)
|
SWIFT MT535 (Statement of Holding)
|
SWIFT MT541 (Receive Against Payment)
|
|---|
|
.
MT950.txt
|
.
MT535.txt
|
.
MT541.txt
|
Note: For file association compatibility
only, each SWIFT file that is attached to this PDF has been renamed
to include a .txt extension. However, please note that the actual
SWIFT file that is placed in the input directory will not carry
a .txt extension.
-
Check for the XML file and the validation report in the file
directory that is defined by sreg(SWIFT_IB.DefaultDir). This
is the destination path you specified for the emitters associated
with the outlets for the channel.
For example, a SWIFT input file named MT950.txt is named
MT950__2013-11-27T17_17_38_932Z.xml on output.
The following table contains links to sample XML validation
reports that are attached to this PDF and can be used to verify
your output.
|
SWIFT MT950
|
SWIFT MT535
|
SWIFT MT541
|
|---|
|
.
MT950_rpt.xml
|
.
MT535_rpt.xml
|
.
MT541_rpt.xml
|
The following table contains links to SWIFT FIN message
report files that are attached to this PDF and can be used to verify
your output.
|
SWIFT MT950
|
SWIFT MT535
|
SWIFT MT541
|
|---|
|
.
950.xml
|
.
535.xml
|
.
541.xml
|
x
Reusing Your Channel Configuration
Using the Archive Manager feature of iWay Service Manager,
you can archive your channel configuration with its associated components
and import them into another Registry. They will then be available
from that Registry for modification or reuse.
For details on this feature, see the iWay Service Manager
User's Guide.


