This section describes steps involved in adding a Custom
Z Segment to the ADT^A01 (Admission, Discharge, and Transfer) HL7
message. Defining a Z segment may involve reusing predefined fields
or using newly defined custom fields.
The ADT (Admission, Discharge, and Transfer) transaction set
is one of the most commonly used, because it provides for the transmission
of new or updated demographic and visit information. All systems
that are attached to the network require information about patients.
The following list of procedures describe step-by-step instructions
of how to create custom Z segments to add to ADT^A01 message structures
using iWay Dictionary Builder.
Note: Dictionary builder recommends the bottom up approach
(defining Basic Building Blocks first before adding the custom segments
to the Message Structure).
x
Procedure: How to Create a New Custom Element Field in the Field Library
-
In the Dictionary Builder, open an Ebix,
for example, HL7_2.2.
-
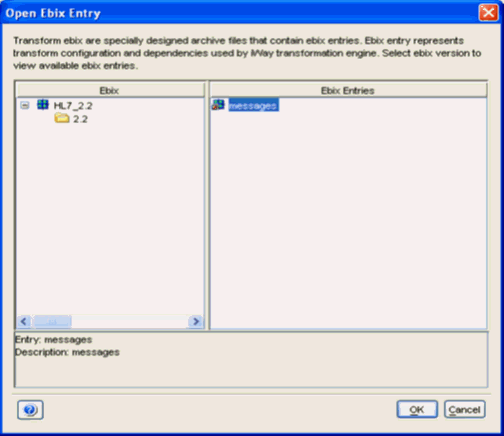
Select Messages in the Ebix Entry
pane, and click OK, as shown in the following
image.
-
Click the Field Dictionary tab.
-
At the top, right-click on Schema,
select Add, and then click Field.
-
At the bottom of the screen, type the values of the parameters,
as seen in the following table.
|
Parameter
|
Value
|
|---|
|
Name
|
ZPD_Allergies.
|
|
Description
|
Custom field for Allergy information.
|
|
Type
|
TX (Select from the list of data types).
|
-
Press Enter.
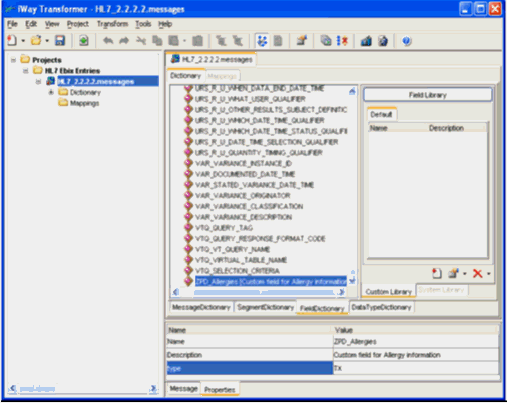
The new field ZPD_Allergies is added to the list of fields,
as shown in the following image.
-
Validate the structure and save. To save:
-
Right-click the new element or field and
select Validate.
-
Click OK from the message screen
if the structure is acceptable and then click Save.
x
Creating a New Z Segment ZPP in the Segment Library
This section describes how to create a new Z segment
ZPP (patient preference) in the segment library, and add elements
or fields to it.
x
Procedure: How to Create a New Z Segment ZPP in the Segment Library
-
Click the Segment Dictionary tab.
-
Right-click on Schema, select Add,
and then click Segment Dictionary/Segment.
-
At the bottom of the screen, type the parameter and value
found in the following table.
|
Parameter
|
Value
|
|---|
|
Name
|
ZPP
|
|
Description
|
Patient preference
|
-
Press Enter.
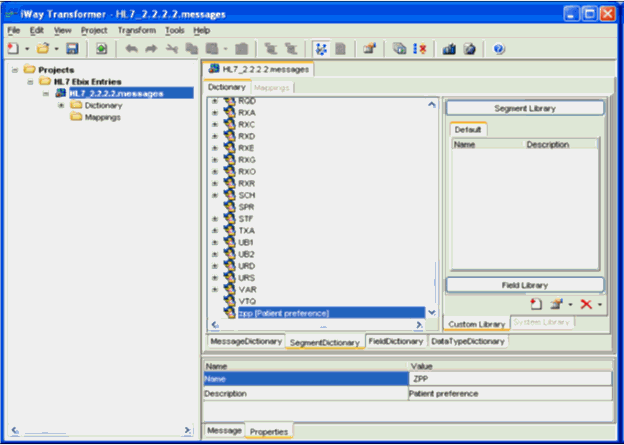
The new segment ZPP is added to the list of segments, as
shown in the following image.
-
Validate the structure and save. To save:
-
Right-click the new segment ZPP and select Validate.
-
Click OK from the message screen
if the structure is acceptable and then click Save.
-
Add the existing element, PR1_Surgeon,
to the created ZPP segment. To add the existing element:
-
Right-click on the new ZPP segment, select Add,
and then click Element.
-
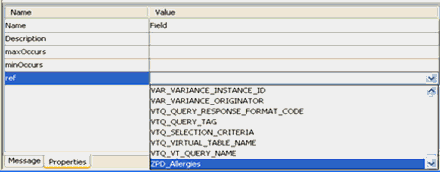
At the bottom of the screen, click on Ref,
select PR1_Surgeon from the element list,
and choose the corresponding value section on the right.
A drop-down list of all available elements and fields including
custom ZPD appears, as shown in the following image.
A Confirmation message
also appears.
-
Click Yes to accept the confirmation. This
also updates the name field.
-
In the MaxOccurs field, type 2,
and in the MinOccurs field, type 1.
Note: MinOccurs should be less than MaxOccurs.
-
Add the PV1_Diet_Type element to the ZPP segment. To
add the element:
-
Right-click the new ZPP segment, select Add,
and then click Element.
-
At the bottom of the screen, click on Ref,
and select PV1_Diet_Type from the element
list.
A Confirmation message appears.
-
Select Yes to accept the confirmation. This
also updates the name field.
-
In the MaxOccurs field, type 5,
and in the MinOccurs field, type 0.
Note: MinOccurs should be less than MaxOccurs.
-
Press Enter, and then Save.
Elements PR1_Surgeon and PV1_Diet_Type is added to the
ZPP segment, as shown in the following image.
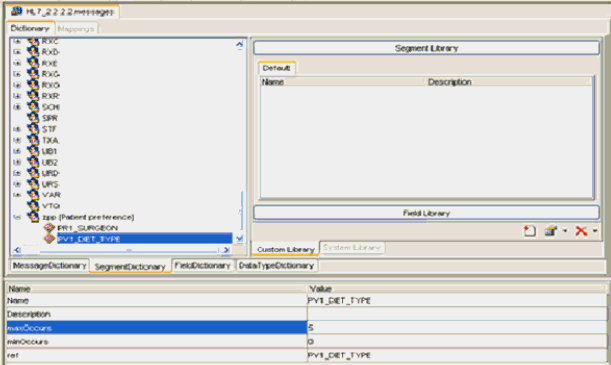
The new segment ZPP
is available to add to the Message (ADT^A01).
-
Validate the structure and save. To save:
-
Right-click the element PR1_Surgeon,
select Validate, and then click OK from
the message screen if the structure is acceptable.
-
Right-click the element PV1_Diet_Type, select Validate,
and click OK from the message screen if the
structure is acceptable and then Save.
-
Add a new custom element ZPD_Allergies (from the previous
section) the ZPP segment. To add a new custom element:
-
Right-click the new ZPP segment, select Add,
and then click Element.
-
At the bottom of the screen, click on Ref,
and select ZPD_Allergies from the element
list (this element should already be available on the list).
A Confirmation message appears.
-
Select Yes to accept the confirmation. This
also updates the name field.
-
In the MaxOccurs field, type 5,
and in the MinOccurs field, type 0.
Note: MinOccurs should be less than MaxOccurs.
-
Press Enter, and then Save.
Elements ZPD_Allergies is added to the ZPP segment, and
the new segment with three elements, ZPD_Allergies, PR1_Surgeon,
and PV1_Diet_Type are added to the Message (ADT^A01), as shown in
the following image.
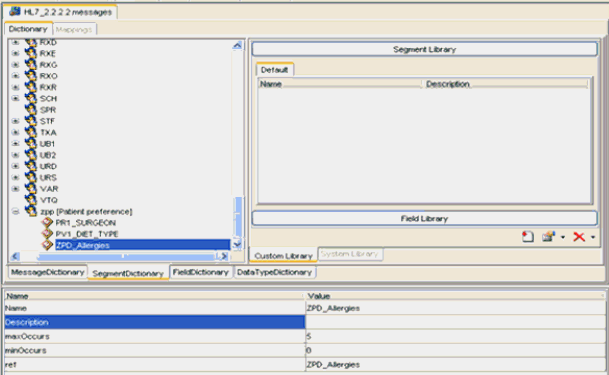
-
Validate the structure and save. To save:
-
Right-click the element ZPD_Allergies,
and select Validate,
-
Click OK from the message screen
if the structure is acceptable, and then Save.
The message, Element ZPD_Allergies, has valid structure,
and appears in the newly added field.
x
Adding Z Segment ZPP to the ADT^A01 Message
This section describes how to add a Z segment ZPP to
the ADT^A01 message.
x
Procedure: How to Add Z Segment ZPP to the ADT^A01 Message
-
Click the Message Dictionary tab.
-
Right-click the ADT^A01 message, select Add, and
then click the Message Dictionary element.
-
At the bottom of the screen, click on Ref,
and select ZPP from the segment list (this
segment should already be available in the list).
A confirmation message appears.
-
Select Yes to accept the confirmation.
This also updates the name field.
-
In the MaxOccurs field, type 5,
and in the MinOccurs field, type 0.
Note: MinOccurs should be less than MaxOccurs.
-
Select Segment for the value of
Group, press Enter, and then Save.
The new segment ZPP is added to the ADT^A01 message, as
shown in the following image.
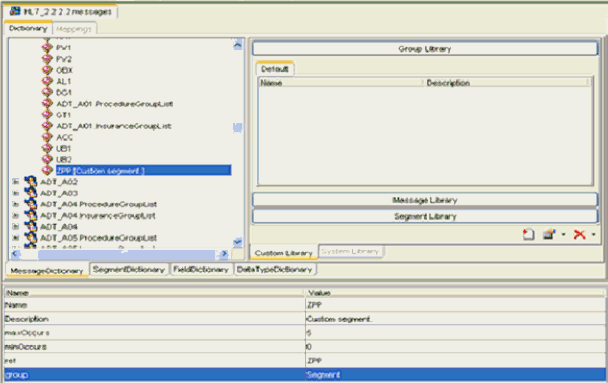
The new ADT^A01 message
is saved with custom Z segment ZPP, which has the following three
elements:
- ZPD_Allergies
- PR1_Surgeon
- PV_Diet_Type
-
Validate the ADT^A01 message structure and save. To save:
-
Right-click the message ADT^A01,
and select Validate.
-
Click OK from the message screen
if the structure is acceptable, and then Save.
x
Saving and Exporting an Ebix Using Dictionary Builder
This section describes how to save and export an Ebix
using Dictionary Builder.
x
Procedure: How to Save and Export an Ebix Using Dictionary Builder
-
Click File in
the menu bar and select Save, as shown in
the following image.
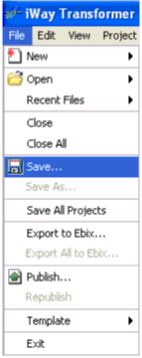
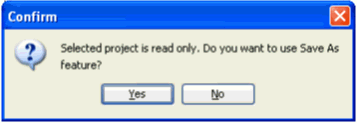
The following confirmation
dialog box opens.
-
Click Yes.
You can now export the Ebix.
You can also click File in
the menu bar and select Export to Ebix, as
shown in the following image.
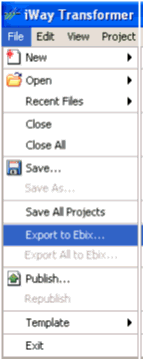
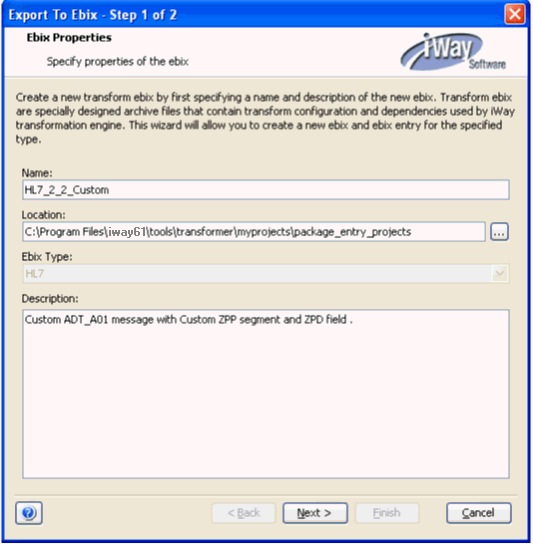
The Export to Ebix
- Step 1 of 2 dialog box opens.
-
In the Name field, specify a name for the Ebix.
-
In the Location field, specify the location of the Ebix
on your machine. The default location is shown below:
<iWaySMHome>\tools\transformer\myprojects\package_entry_projects
-
In the Description field, provide a short description (optional).
-
Click Next.
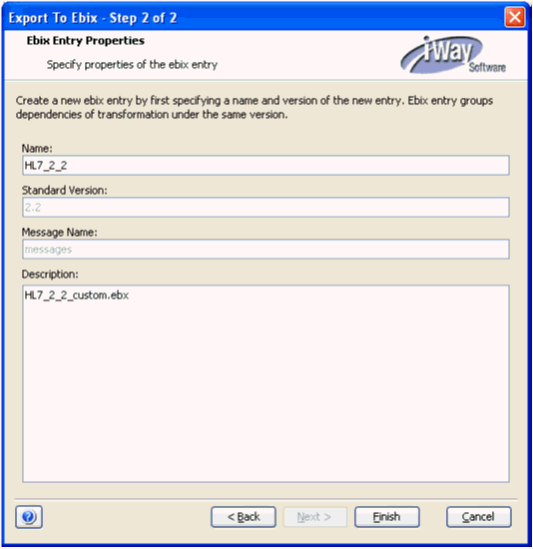
The Export to Ebix - Step 2 of 2 dialog box opens, as shown
in the following image.
-
Specify a name and a description for the new Ebix entry,
and click Finish.
The custom Ebix HL7_2_2_custom.ebx is now saved.
x
Adding an Ebix to the Registry
This section describes how to add an Ebix to the registry.
x
Procedure: How to Add an Ebix to a Registry
To
add an Ebix to the registry:
-
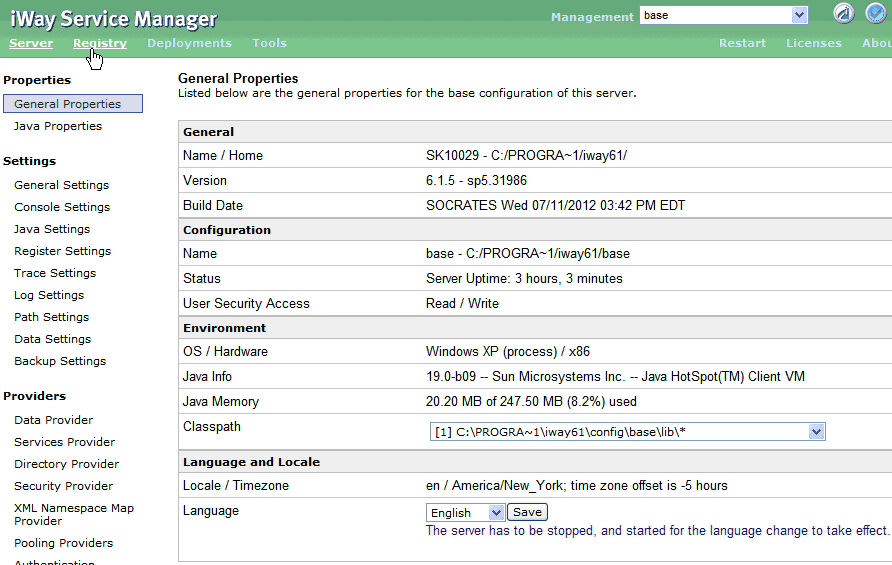
Select the Registry from
the iWay Service Manager console, as shown in the following image.
-
In the left pane, under Components, select Ebix.
-
On the Ebix pane on the right, click Add to
add a new Ebix.
The New Ebix pane opens on the right.

-
Browse to the directory in which the Ebix is located
and select the name of the file, for example, HL7_2.5.ebx.
The directory path is based on the one in which you installed
iWay Service Manager. By default, the directory path in which Ebix
files are located is installation_drive:\..\iway61\etc\manager\packages.
On Windows, the default directory is C:\Program Files\iway61\etc\manager\packages
-
Select an Ebix and click Next.
The following pane opens, which allows you to specify a
name and description of the Ebix.

-
Enter a name for the Ebix, for example, HL7_2.2_Ebix,
and an optional description.
Note: This step must be repeated for each HL7 version
that is added to the Registry.
-
Click Finish.
The Ebix is successfully added on the Ebix pane.
x
Adding the Ebix to the Channel
This section describes adding the Ebix to the channel.
x
Procedure: How to Add the Ebix to the Channel
-
From the Registry menu of the iWay Service Manager
Console, select Channels.
The Channel Definitions pane opens, as shown in the following
image.

-
Click the link in the Ebix column for the HL7toXML_Channel.
-
On the next pane, which prompts you to add Ebix components,
click Add to add the Ebix to the channel.
-
On the next pane, select HL7_2.2_Ebix,
which is the name of the Ebix you added previously, and click Finish.


