Configuring Application Messaging in PeopleSoft Release 8.1
You can configure PeopleSoft 8.1 to send an
asynchronous outbound message to the Simple File Handler.
To configure application messaging in PeopleSoft 8.1:
- Create and configure
a new Message Node.
- Ensure the message
is active and is routed to the proper Message Channel.
- Configure the
Message Channel.
- Configure the
Simple File Handler in the Gateway.
These tasks are described in detail in the following procedures.
x
Procedure: How to Create and Configure a New Message Node
To create
and configure a new Message Node:
-
From the
File menu, select New and click Message
Node.
The Message Node window opens and contains three options:
Insert Location, Find Object References, and Delete as shown in
the following image.

-
Right-click
anywhere inside the white space and select Insert Location.
The Location URL box opens where you type the URL for the
location as shown in the following image.

-
Type the
following URL for the PeopleSoft Application Gateway (handler directory):
machine-name:port/servlets/psft.pt8.gateway.GatewayServlet
where:
- machine-name
Is the URL of your PeopleSoft web server.
- port
Is the socket on which the server is listening.
The
characters you type after machine-name must be case-sensitive.
-
Click OK.
The Message Node Properties dialog box opens. It contains
a Local Node check box and PeopleTools Version, Application Version,
Password, Re-verify Password, and Distinguished Name fields.
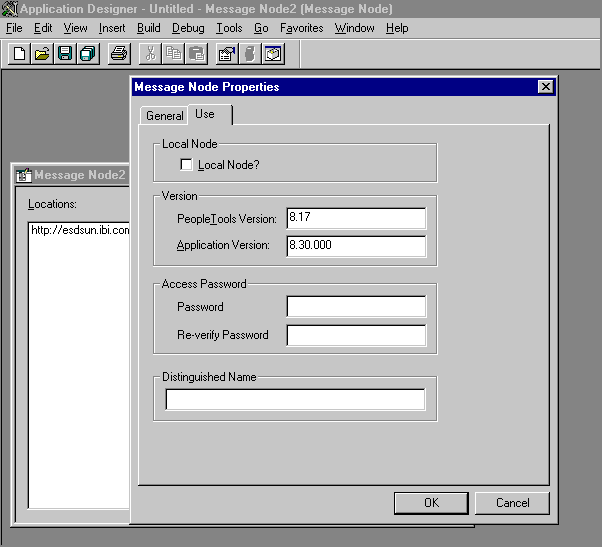
-
Select the Use tab.
-
In the text fields, type the PeopleTools and Application Version numbers.
-
Click OK.
The following image shows the Save As dialog box with a
Save Name As field.
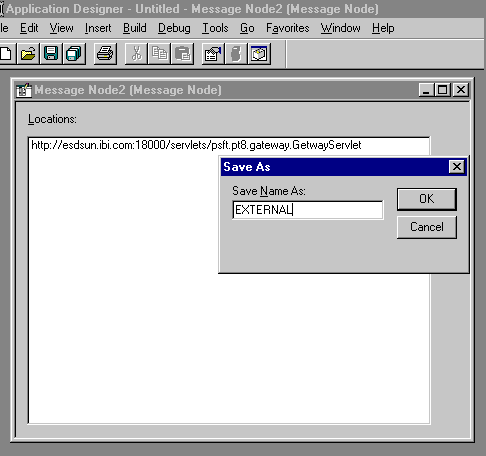
-
To save
the Message Node, click OK.
It is recommended that you name your first (trial) message
node EXTERNAL. After successfully configuring
and sending messages using this node, you can create additional
message nodes with names appropriate for your application.
If
you intend to migrate this message node to a different PeopleSoft
environment (for example, from Test to QA), you can create a PeopleSoft
Project and insert the Message Node into the Project.
You have
finished creating and configuring the message node.
x
Procedure: How to Ensure That the Message Is Active and Is Routed Correctly
To ensure
that the message is active and is routed to the proper message channel:
-
Open Application
Designer.
-
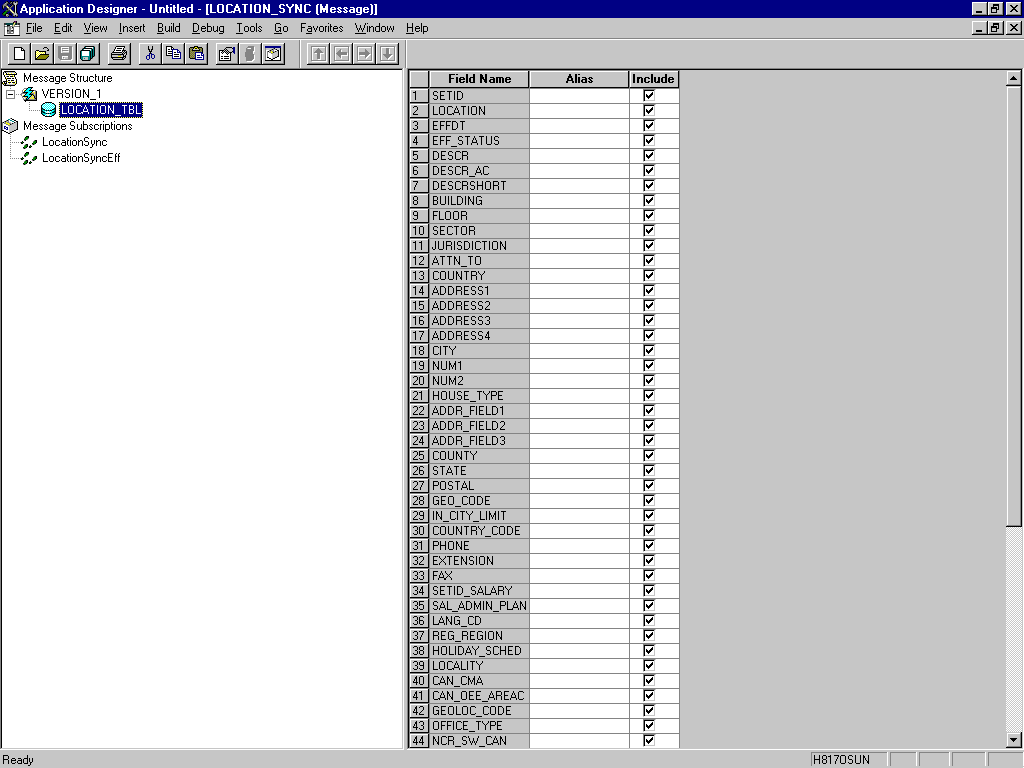
On the
File menu, point to Open, click Message,
and open the LOCATION_SYNC message to view
the fields that are included in the message, highlight LOCATION_TBL.
The following image shows the LOCATION_TBL field, selected
in the left pane. The message field names appear in a column with
corresponding columns for the field alias and a check box indicating
whether to include the field.
-
Right-click LOCATION_TBL and
select Properties.
The Message Properties dialog box opens as shown in the
following image and includes Non-Repudiation and Status check boxes,
Message Channel and Default Version lists, and Use Message Monitor
Dialog and Use Page options.
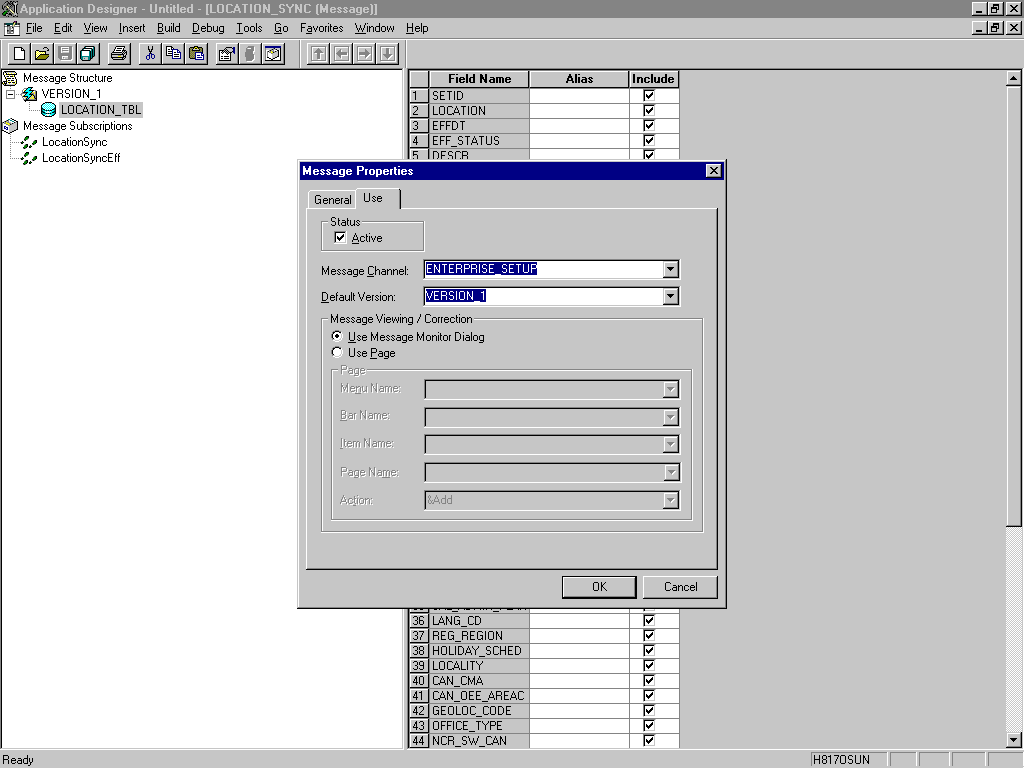
-
Select the Use tab.
-
Ensure the Status check box is selected,
indicating that the message is active.
-
From the Message Channel drop-down list, select ENTERPRISE_SETUP.
-
From the Default Version drop-down list, select VERSION_1 (messages
can have multiple versions).
-
Click OK.
-
Save the
message.
x
Procedure: How to Configure the Message Channel
To configure
the Message Channel:
-
Open the ENTERPRISE_SETUP Message
Channel.
-
Right-click ENTERPRISE_SETUP and
select Properties.
The Message Channel properties dialog box opens as shown
in the following image. It contains Message Channel Status and Quality
of Service options and an Archive Messages? check box.
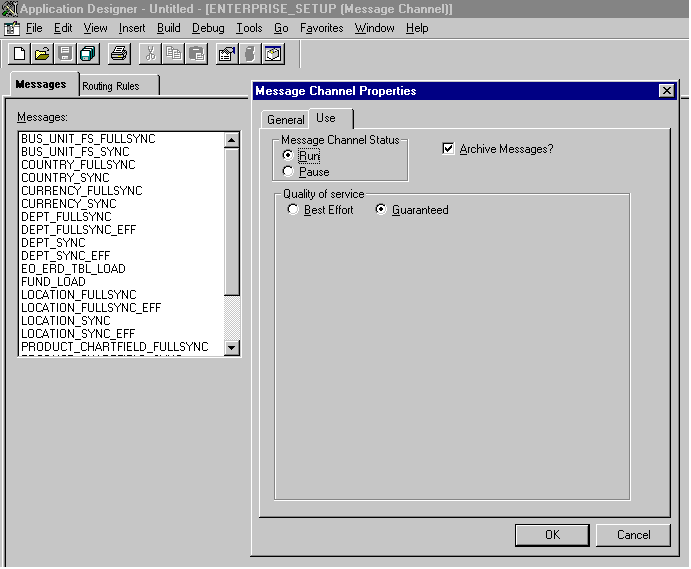
-
Select the Use tab.
-
Ensure that Message Channel status is set to Run.
-
Click OK.
You are returned to Application Designer.
-
From the
left pane, select the Routing Rules tab.
-
Right-click
the pane and select Insert Message Node.
The Insert Message Node dialog box opens, as shown in the
following image with a list of objects that match the selection
criteria.
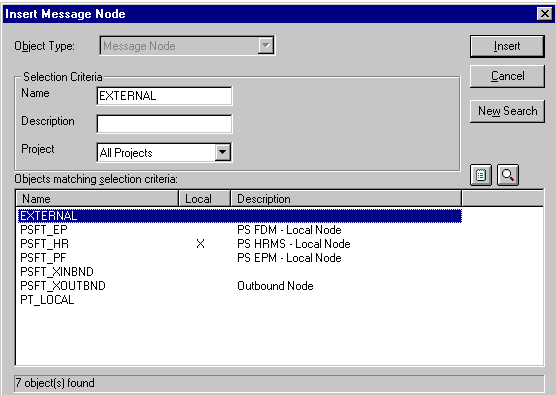
-
Select the message node, for example, EXTERNAL, that you created
in How to Create and Configure a New Message Node.
-
Click Insert.
-
Click Cancel.
You are returned to the routing Rules tab where you can
select from expanding menus as shown in the following image.
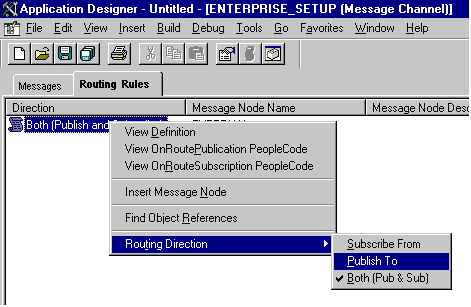
-
Right-click the message node and point to Routing
Direction.
-
From the Routing Direction menu, select Publish To.
-
Save the
Message Channel, and if you require it, place it in your Project.
You have
finished configuring the Message Channel.
x
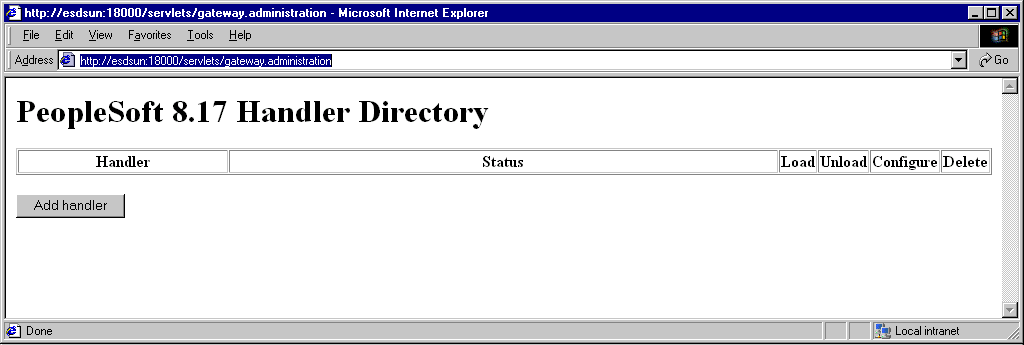
Procedure: How to Configure the Simple File Handler in the Gateway
To configure
the Simple File Handler in the Gateway:
-
In a web
browser, launch the PeopleSoft 8.1 configuration servlet
interface (also known as the server gateway) by typing the following
URL:
machine-name:port/servlets/gateway.administration
where:
- machine-name
Is the name of the application server where PeopleSoft is hosted.
- port
Is the port number on which the application server is listening.
The
Handler Directory window opens, as shown in the following image.
-
Click Add
handler.
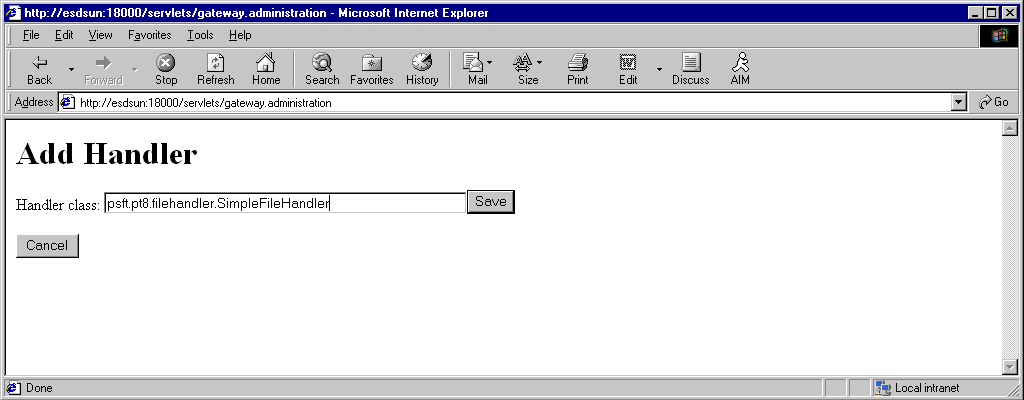
The Add Handler window opens, as shown in the following
image.
-
Type the
following full name of the Simple File Handler class:
psft.pt8.filehandler.SimpleFileHandler
Note: The
name is case-sensitive.
-
Click Save.
The Handler Directory window reopens, as shown in the following image.

-
To load
the handler, click Load.
After the handler loads, "Loaded successfully" appears
in the Status column.
-
Click Configure.
The Simple File Handler Directory window opens, as shown
in the following image.

-
Click Add
a file handler node.
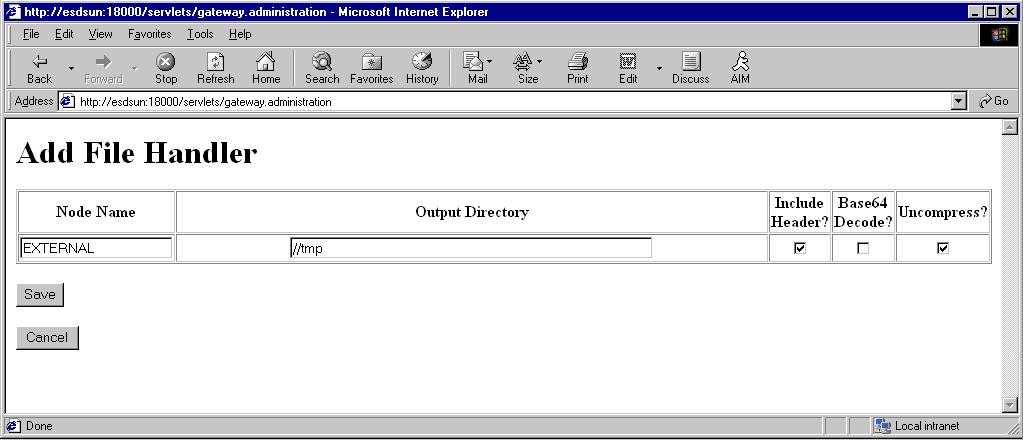
The Add File Handler window opens, as shown in the following
image.
-
In the Node Name field, type the name of the Message Node,
for example, EXTERNAL, that you created in How to Create and Configure a New Message Node.
-
Select an output directory appropriate for your server environment.
The example illustrated in the previous image runs under
UNIX. The default directory under Windows NT is c:\\temp\\file.
(The double slashes may not be required for your environment.)
-
Select the desired output file properties.
-
Click Save.
You have
finished configuring the Simple File Handler.