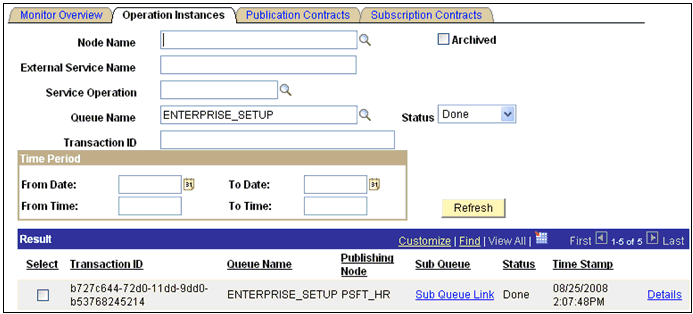
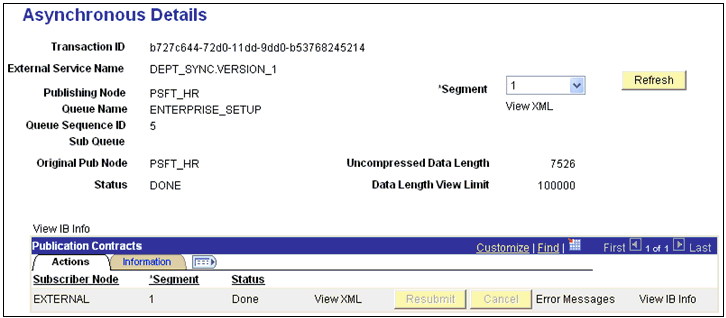
This section describes how to configure PeopleSoft services.
To add a remote node:
- Logon to PeopleSoft using the browser-based GUI (Pure Internet Architecture).
-
Select PeopleTools, Integration Broker, Integration
Setup, followed by Nodes.
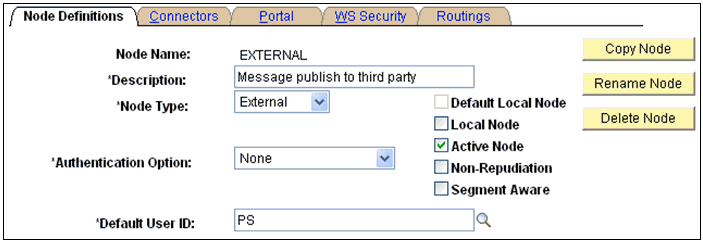
The Node Definitions tab is displayed.
-
Perform the following steps:
- In the Node Name field, type a name for the new node definition, for example, EXTERNAL.
- In the Description field, type a brief description for the new node definition.
- From the Node Type drop-down list, select External.
- From the Authentication Option drop-down list, ensure that the default option, none, is selected.
- In the Default User ID field, type the user ID that is being used by the PeopleSoft system, for example, PS.
- Select the Active Node check box.
-
Click the Connectors tab.
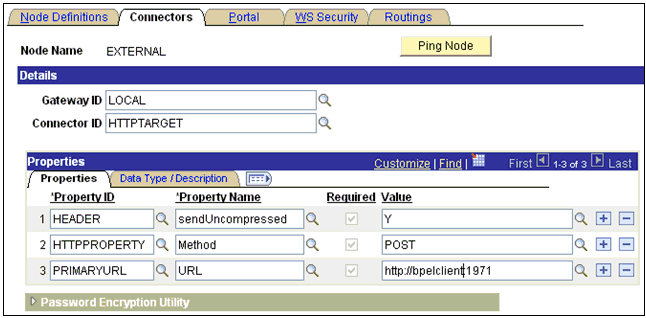
The Connectors tab is displayed.
-
Perform the following steps:
- In the Gateway ID field, type LOCAL.
- In the Connector ID field, type HTTPTARGET.
-
For the PRIMARYURL value, enter the host and port number of the
PeopleSoft adapter instance that is used to listen for events. For example:
http://bpelclient:1971
- Leave the default values for the remaining properties.
- Save your changes.
To select a service:
- Select PeopleTools, Integration Broker, Integration Setup, followed by Services.
-
Search for the DEPT_SYNC service and
select it.
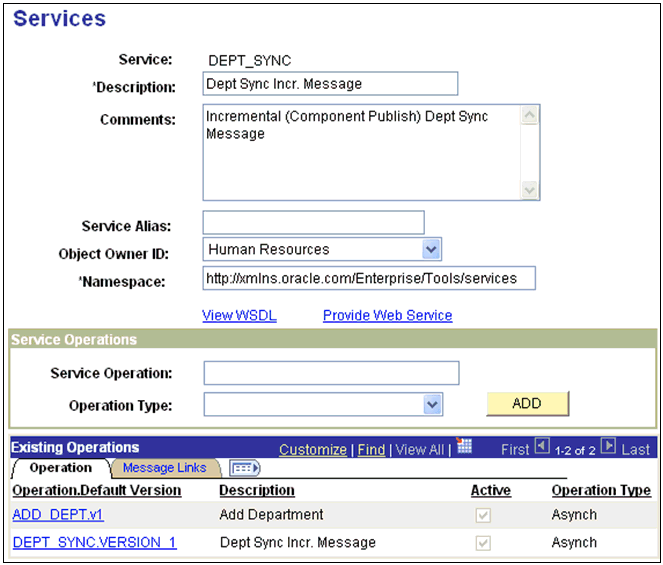
The DEPT_SYNC Services pane is displayed.
-
From the Existing Operations section on the lower left, click
the DEPT_SYNC.VERSION_1 service operation.
The Service Operation - General pane is displayed.

- Click the Active check box.
-
Click the Routings tab to add a new routing.

- In the Routing Name field, type a name for the new routing, for example, ADD_DEPT.
- Click Add.
-
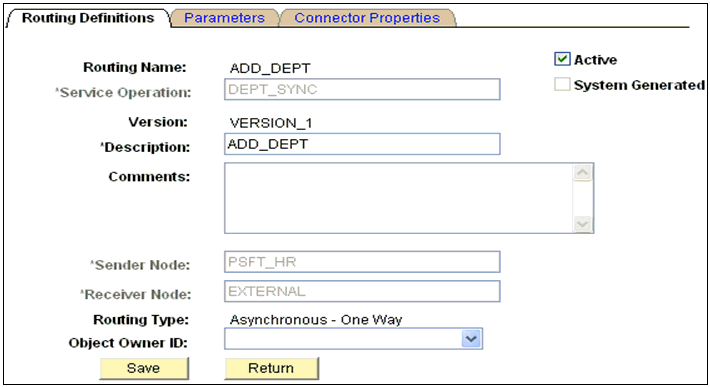
Click the Routing Definitions tab to
add a new routing definition.
-
Perform the following steps:
- In the Sender Node field, type PSFT_HR, which is the default PeopleSoft node that publishes the message.
- In the Receiver Node field, type EXTERNAL, which is the new node that has been created to subscribe the message published by PeopleSoft.
-
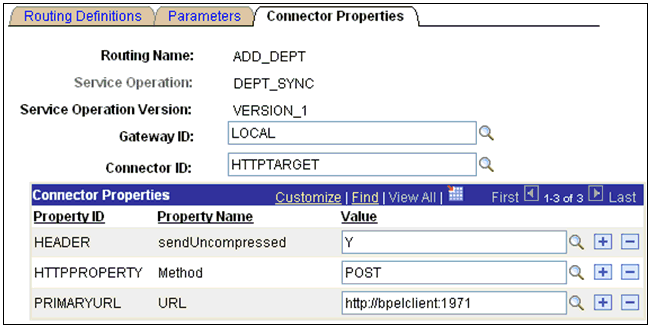
Click the Connector Properties tab.
-
Perform the following steps:
- In the Gateway ID field, type LOCAL.
- In the Connector ID field, type HTTPTARGET.
-
For the PRIMARYURL value, enter the host and port number of the
PeopleSoft adapter instance that is used to listen for events. For example:
http://bpelclient:1971
-
Click Save and then click Return.
You are returned to the Routing Definitions pane. Notice that the new routing definition (ADD_DEPT) is now added to the list.

- Click Save to save the details of the Service Operation.
- Click the Return to Service link to return to the Services pane.
- Click Save on the Services pane.
To activate the gateway:
- Select PeopleTools, Integration Broker, Configuration, followed by Gateways.
-
Search for the Integration Gateway ID, for example, Local and
select it.
The Gateways pane is displayed.

-
Click Ping Gateway.
A new browser window is displayed, which shows that the gateway is active.

-
Close the new browser window to return to the Gateways pane.
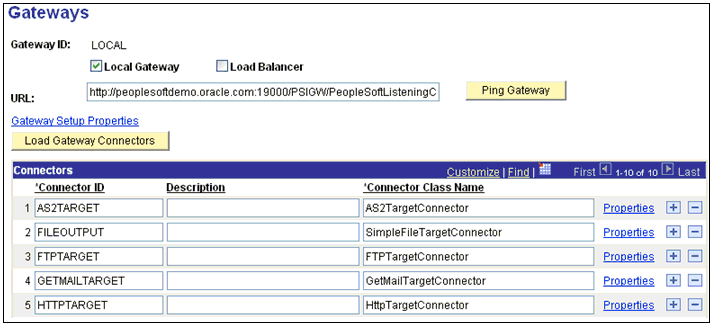
- Ensure that HTTPTARGET is listed in the Connectors section. If it is not listed, click Load Gateway Connectors to refresh the available connectors.
To activate the domain:
-
Select PeopleTools, Integration
Broker, Configuration, followed
by Quick Configuration.
The Quick Configuration pane is displayed.
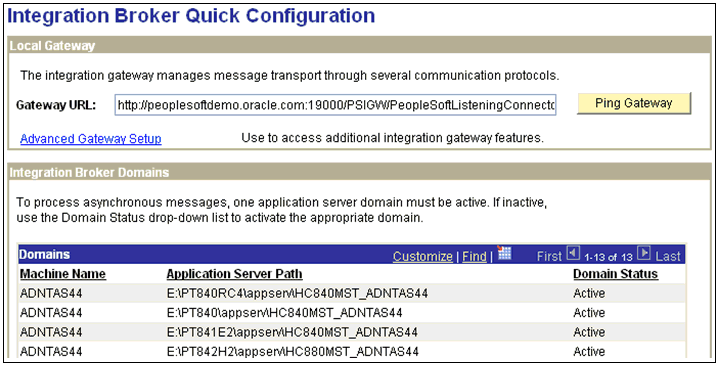
- Ensure that the domain is active.
To activate the service:
-
Select PeopleTools, Integration
Broker, Integration Setup, followed
by Services.
The Services pane is displayed.
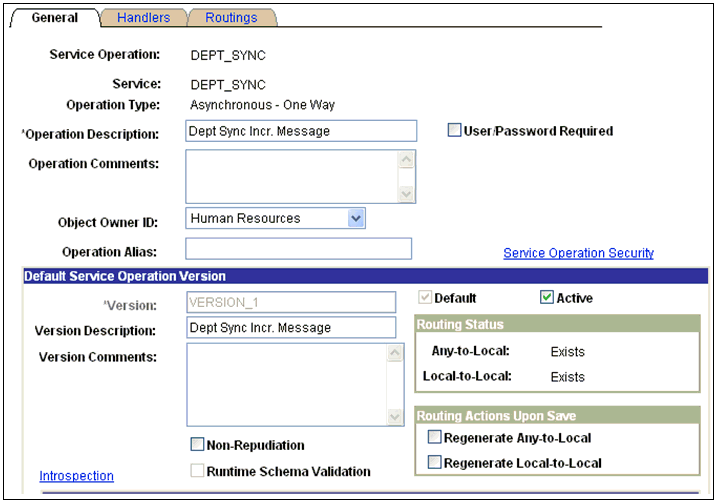
- Ensure that the service is active.
To activate the service operation:
-
Select PeopleTools, Integration
Broker, Configuration, Integration
Setup, followed by Services.
The Services pane is displayed.

-
From the Existing Operations section on the lower left, click
the DEPT_SYNC.VERSION_1 service operation.
The Service Operation - General pane is displayed.
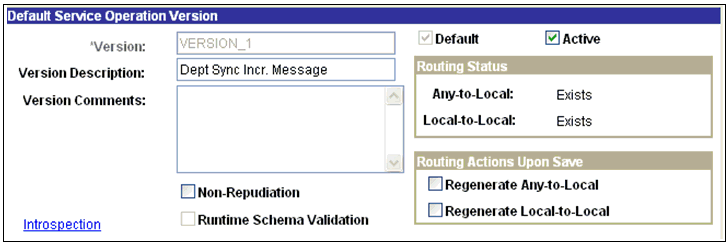
-
In the message information section on the bottom of the page,
note the value in the Queue Name field of the service operation.

-
Click the View Queue link.
The Queue Definitions pane opens.
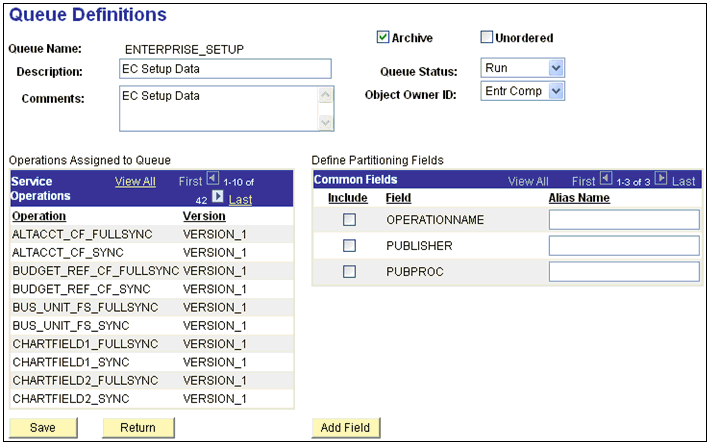
- Ensure that the Queue Status drop-down list has Run selected.
- Click Return to return to the Service operation pane.
-
Click the Routings tab.
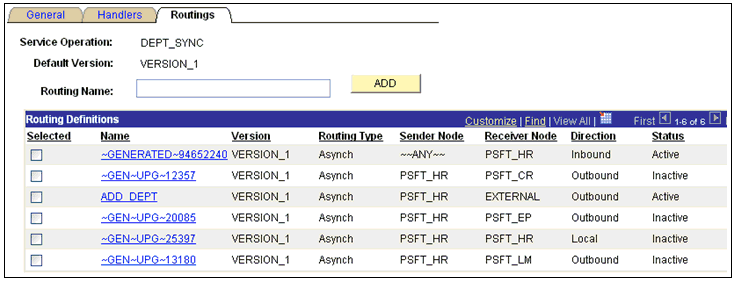
- Ensure that the routings are active.
- Click the Return to Service link on the bottom of the pane to return to the Services pane.
-
Click Return to Search to go to the
Services search pane.
In the above steps, if the status has been activated in any of the panes for any of the components, then make sure to save the status at the appropriate pane and the respective components.
-
Select PeopleTools, Integration Broker, Configuration, Integration Setup,Services,
followed by Nodes.
The Node Definitions pane opens.

-
Ensure that the status of the External node is active.
This completes the configuration on the PeopleSoft side.
