Configuring Web Services Policy-Based Security
This section describes how to configure Web services
policy-based security.
x
Procedure: How to Create a User to Associate With a Policy
Before
you create instances of policies, you must have at least one user
and/or one group, to associate to that instance. You can create
users and groups using iWay Explorer integrated with iWay Designer.
To
create a user:
-
Start iWay Designer and click the Web Services tab,
as shown in the following image.
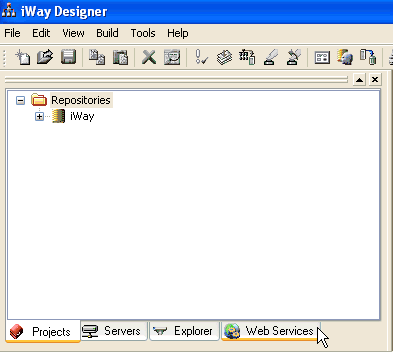
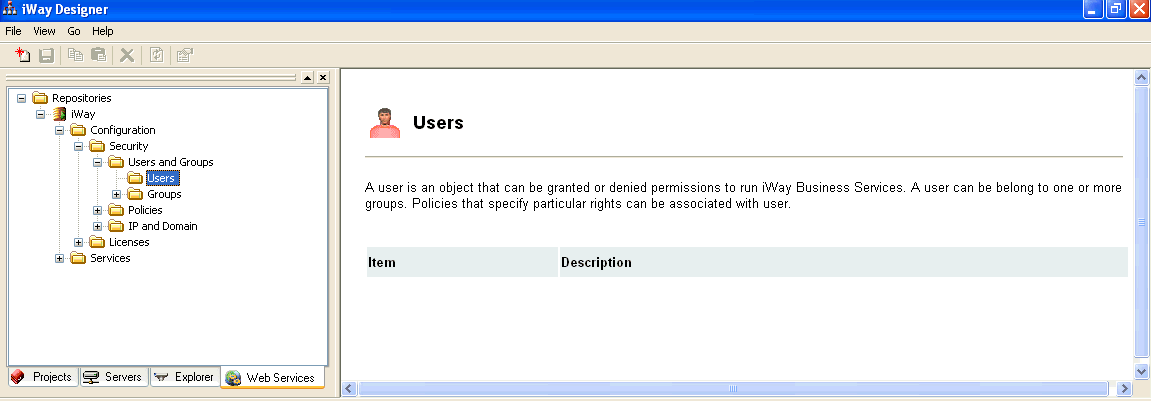
The Web Services pane
opens.
-
In the left pane, expand the main repository node, for example, iWay,
followed by Configuration, Security,
and Users and Groups.
-
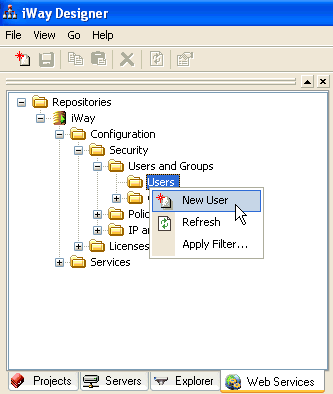
Right-click the Users node and select New
User from the context menu.
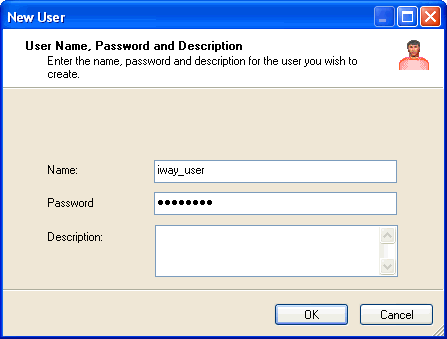
The New User dialog box opens.
-
Enter a name, password, and description (optional) for the
new user in the corresponding fields.
-
Click OK.
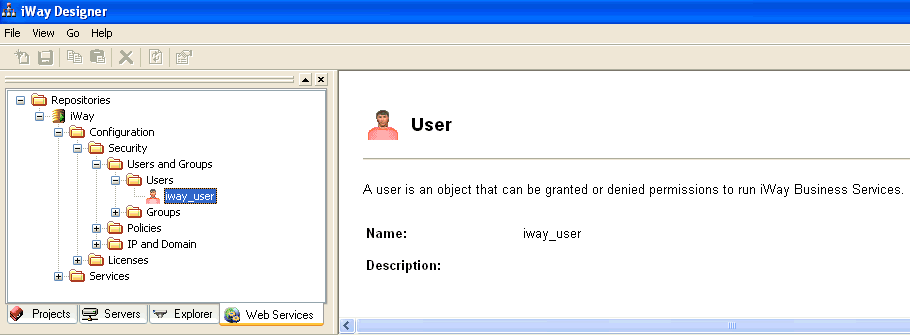
The new user is added to the Users folder, as shown in
the following image.
You are now ready
to create a group to associate with a policy.
x
Procedure: How to Modify the Properties for a User
To
modify the properties for a user:
-
In the left pane, expand the main repository node, for example, iWay,
followed by Configuration, Security, Users
and Groups, and Users.
-
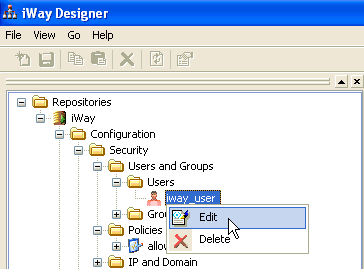
Right-click the name of an available user, for example, iway_user,
and select Edit from the context menu.
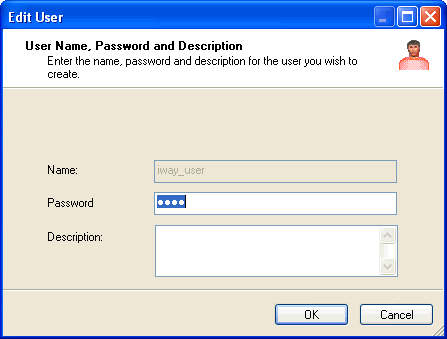
The Edit User dialog box opens, as shown in the following
image.
-
Modify the user properties as required.
-
Click OK when you are finished.
x
Procedure: How to Delete a User
To
delete a user:
-
In the left pane, expand the main repository node, for example, iWay,
followed by Configuration, Security, Users
and Groups, and Users.
-
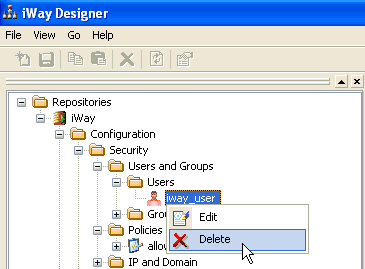
Right-click the name of an available user, for example, iway_user,
and select Delete from the context menu.
The user is removed from the Users folder.
x
Procedure: How to Create a Group to Associate With a Policy
To
create a group:
-
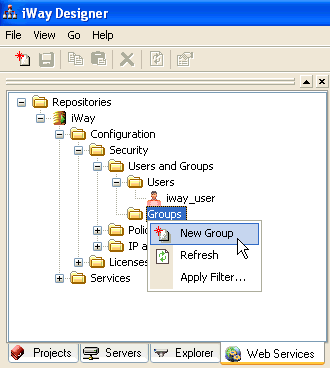
In the left pane, expand the main repository node, for example, iWay,
followed by Configuration, Security,
and Users and Groups.
-
Right-click the Groups node and select New
Group from the context menu.
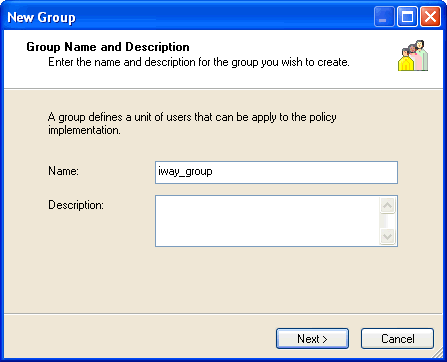
The New Group dialog box opens.
-
Enter a name and description (optional) for the new group in
the corresponding fields.
-
Click Next.
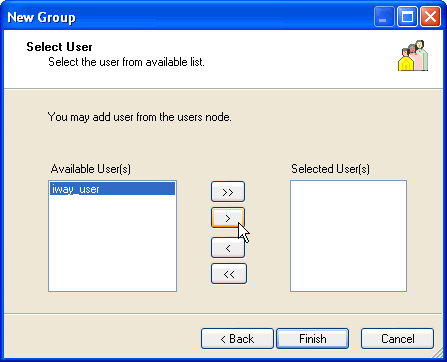
The Select User pane opens, as shown in the following image.
-
You can either highlight a single user in the available list
of users and add it by clicking the right arrow or click the double
right arrow to add all users in the available user list to the group.
-
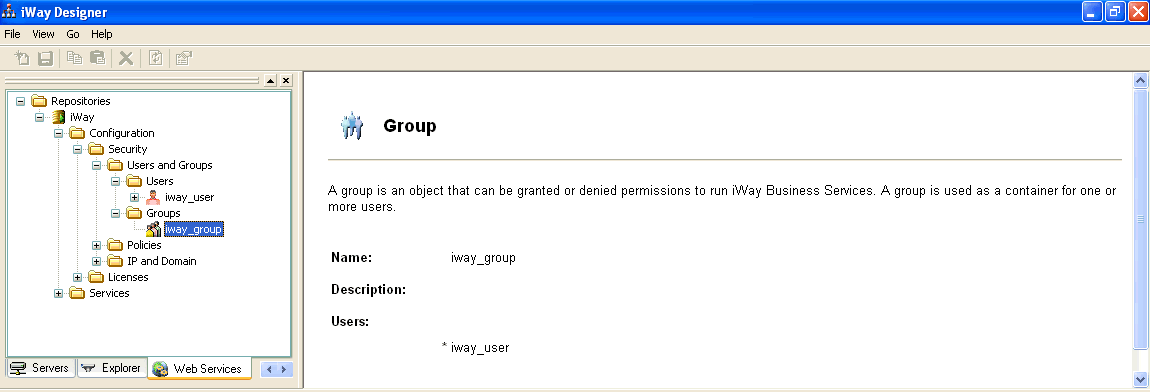
Once you have added at least one user, click Finish.
The new group is added to the Groups folder, as shown in
the following image.
You are now ready
to create a security policy.
x
Procedure: How to Modify the Properties for a Group
To
modify the properties for a group:
-
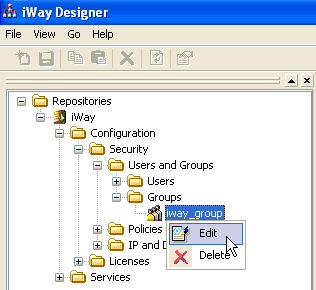
In the left pane, expand the main repository node, for example, iWay,
followed by Configuration, Security, Users
and Groups, and Groups.
-
Right-click the name of an available group, for example, iway_group,
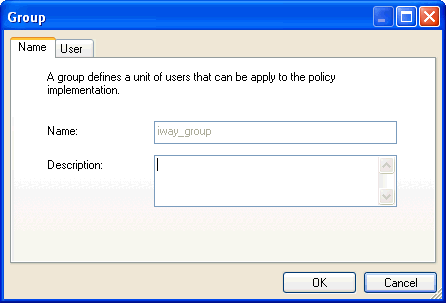
and select Edit from the context menu.
The Group dialog box opens, as shown in the following image.
-
Modify the group properties as required.
-
Click OK when you are finished.
x
Procedure: How to Delete a Group
To
delete a group:
-
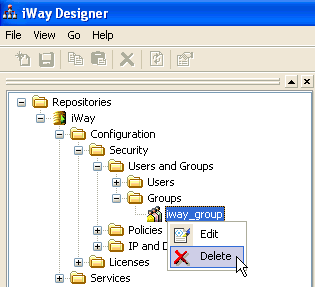
In the left pane, expand the main repository node, for example, iWay,
followed by Configuration, Security, Users
and Groups, and Groups.
-
Right-click the name of an available group, for example, iway_group,
and select Delete from the context menu.
The group is removed from the Groups folder.
x
Procedure: How to Create an Execution Policy
An
execution policy is a policy type, which is uniquely named, associated
with users and groups, and is applied to the Web service. It determines
whether a user or group has permission to execute a Web service.
To
create an execution policy:
-
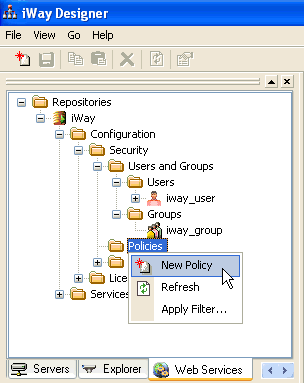
In the left pane, expand the main repository node, for example, iWay,
followed by Configuration, Security,
and Policies.
-
Right-click the Policies node and select New
Policy from the context menu.
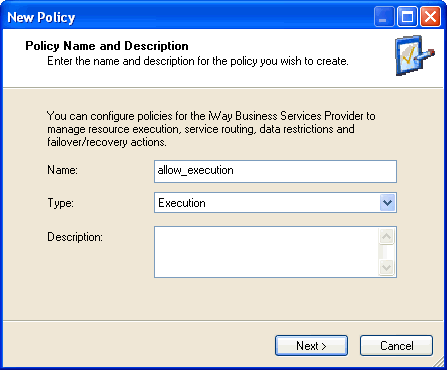
The New Policy dialog box opens.
-
Enter a name for the new policy in the Name field.
-
From the Type drop-down list, select Execution.
-
Enter a brief description for the new policy in the Description
field (optional).
-
Click Next.
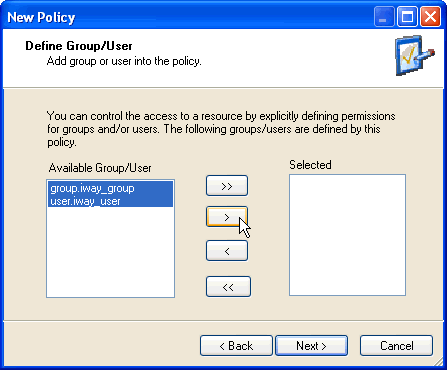
The Define Group/User pane opens, as shown in the following
image.
-
Select at least one user or group from the Available Group/User list.
Note: This user ID is checked against the value
in the user ID element of the SOAP header sent to iBSP in a SOAP
request.
-
Click Next.
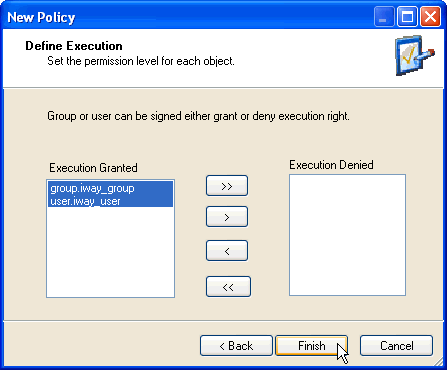
The Define Execution pane opens, as shown in the following
image.
-
Perform one of the following steps according to your requirements:
-
To allow execution privileges for the users or groups, leave
the selection(s) in the Execution Granted list.
-
To deny execution privileges for the users or groups, move
the selection(s) to the Execution Denied list.
-
Click Finish.
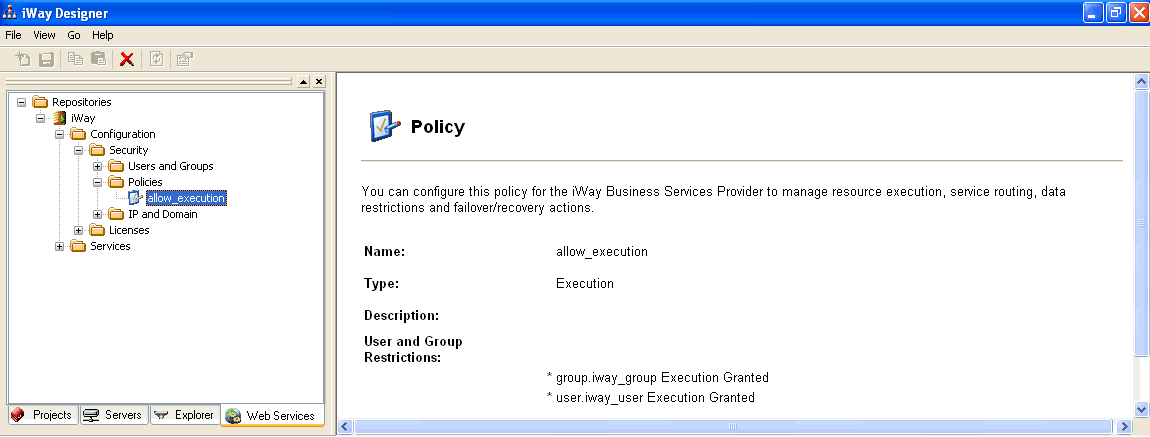
The new policy is added to the Policies folder, as shown
in the following image.
x
Procedure: How to Modify the Properties for a Policy
To
modify the properties for a policy:
-
In the left pane, expand the main repository node, for example, iWay,
followed by Configuration, Security,
and Policies.
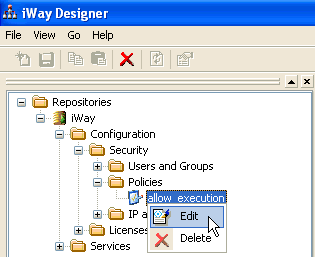
-
Right-click the name of an available policy, for example, allow_execution,
and select Edit from the context menu.
The Policy dialog box opens, as shown in the following
image.
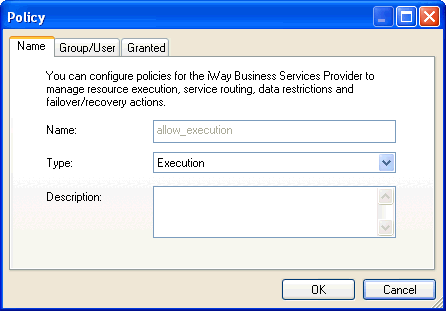
-
Modify the policy properties as required.
-
Click OK when you are finished.
x
Procedure: How to Delete a Policy
To delete
a policy:
-
In the left pane, expand the main repository node, for example, iWay,
followed by Configuration, Security,
and Policies.
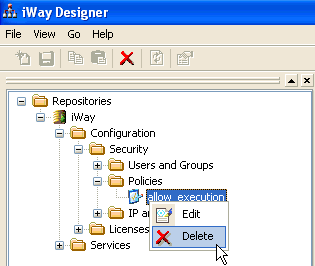
-
Right-click the name of an available policy, for example, allow_execution,
and select Delete from the context menu.
The policy is removed from the Policies folder.
x
Procedure: How to Configure IP and Domain Restrictions
You
can configure iBSP to use policies that control access from a single
IP address, a group of IP addresses, or all addresses within a particular domain.
Note: By
default, all IP and domains are denied access.
To configure
IP and domain restrictions:
-
In the left pane, expand the main repository node, for example, iWay,
followed by Configuration, Security,
and IP and Domain.
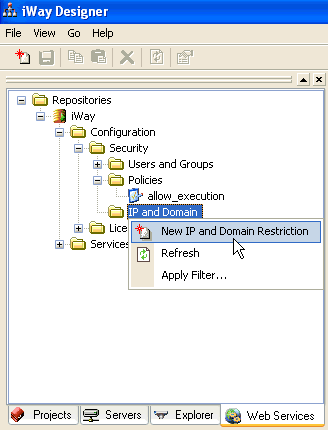
-
Right-click the IP and Domain node and
select New IP and Domain Restriction from
the context menu.
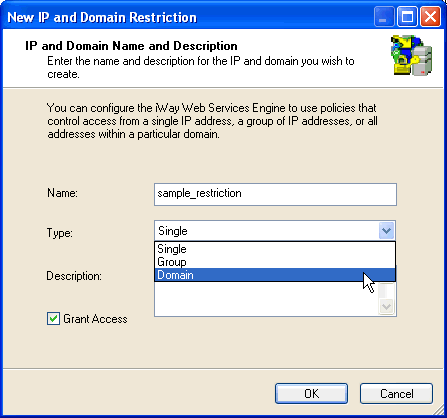
The New IP and Domain Name and Description dialog box opens.
-
Enter a name for the IP and domain restriction in the Name field.
-
From the Type drop-down list, select Single, Group,
or Domain.
-
Enter a brief description for the IP and domain restriction
in the Description field (optional).
-
Select the Grant Access check box to
enable access for the IP and/or domain.
-
Click OK.
The new IP and domain restriction is added to the IP and
Domain folder, as shown in the following image.

x
Procedure: How to Modify the Properties for an IP and Domain Restriction
To modify
the properties for an IP and domain restriction:
-
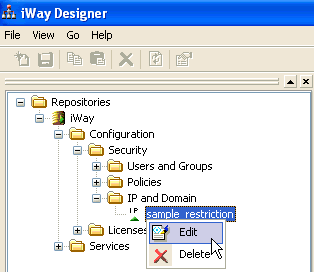
In the left pane, expand the main repository node, for example, iWay,
followed by Configuration, Security,
and IP and Domain.
-
Right-click the name of an available IP and domain restriction,
for example, sample_restriction, and select Edit from
the context menu.
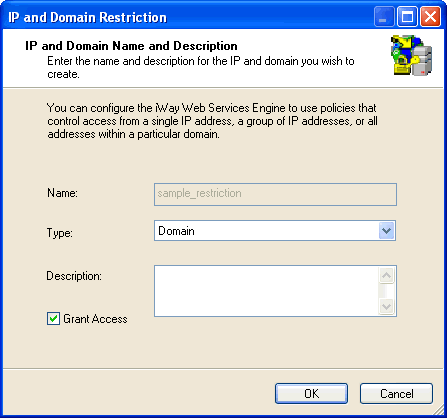
The IP and Domain Restriction dialog box opens, as shown
in the following image.
-
Modify the IP and domain restriction properties as required.
-
Click OK when you are finished.
x
Procedure: How to Delete an IP and Domain Restriction
To delete
an IP and domain restriction:
-
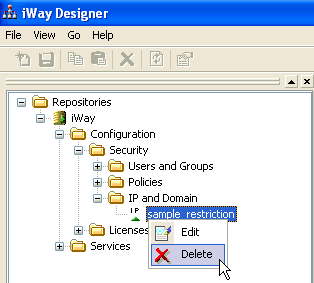
In the left pane, expand the main repository node, for example, iWay,
followed by Configuration, Security,
and IP and Domain.
-
Right-click the name of an available IP and domain restriction,
for example, sample_restriction, and select Delete from
the context menu.
The IP and domain restriction is removed from the IP and
Domain folder.
x
Procedure: How to Add a Policy to a Service
Once
you have created a policy using iWay Explorer, you must add this
policy to a service or method. This section describes how to add
a policy to a service:
-
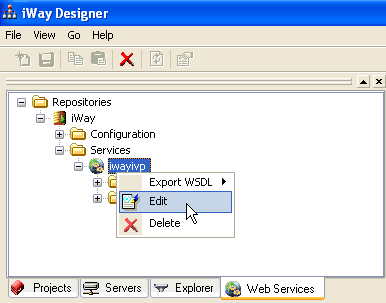
In the left pane, expand the main repository node, for example, iWay,
followed by Services.
-
Right-click the service to which you want to add a policy and
select Edit from the context menu.
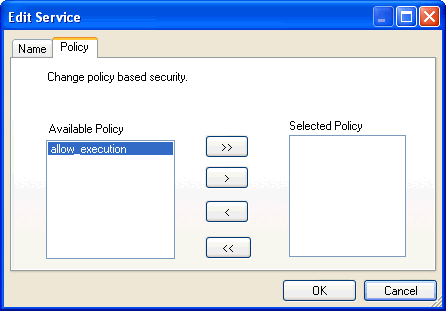
The Edit Service dialog box opens.
-
Click the Policy tab.
-
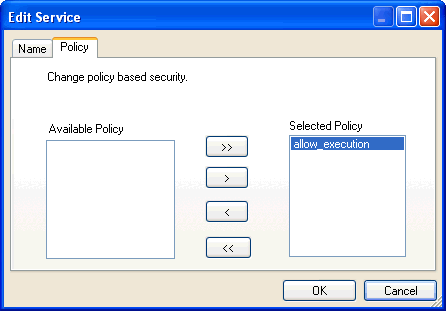
You can either highlight a single policy in the available list
of policies and add it by clicking the right arrow, or click the
double right arrow to add all policies in the available policy list
to the service.
-
Once you have added at least one policy, click OK.
The new policy is added to the service.
x
Procedure: How to Add a Policy to a Method
Once
you have created a policy using iWay Explorer, you must add this
policy to a service or method. This section describes how to add
a policy to a method:
-
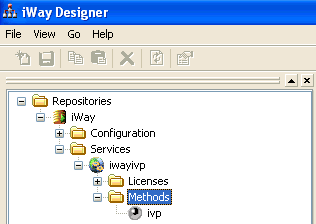
In the left pane, expand the main repository node, for example, iWay,
followed by Services.
-
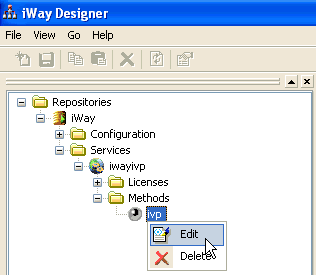
Expand the service, followed by the Methods folder.
-
Right-click the method to which you want to add a policy and
select Edit from the context menu.
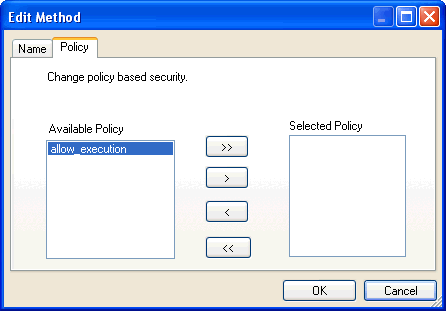
The Edit Method dialog box opens.
-
Click the Policy tab.
-
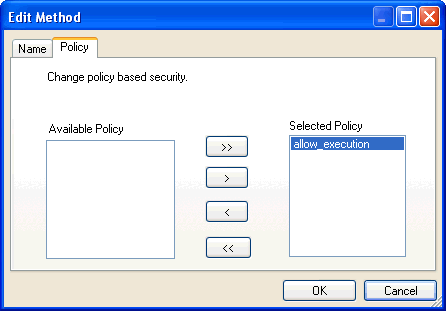
You can either highlight a single policy in the available list
of policies and add it by clicking the right arrow, or click the
double right arrow to add all policies in the available policy list
to the method.
-
Once you have added at least one policy, click OK.
The new policy is added to the method.
x
SOAP Header Configuration
If Web services policy-based security is enabled, information
for the SOAP header must be provided for each Web service. This
may or may not be a manual process. The Web service client that
is used can provide the information that is required.
The following is a sample SOAP header that is included in the
WSDL file for a Web service:
<SOAP-ENV:Header>
   <m:ibsinfo xmlns:m="urn:schemas-iwaysoftware-com:iwse">
       <m:service>String</m:service>
       <m:method>String</m:method>
       <m:license>String</m:license>
       <m:disposition>String</m:disposition>
       <m:Username>String</m:Username>
       <m:Password>String</m:Password>
       <m:language>String</m:language>
   </m:ibsinfo>
</SOAP-ENV:Header>
The following parameters are included in the SOAP header:


