To configure an nHTTP channel:
-
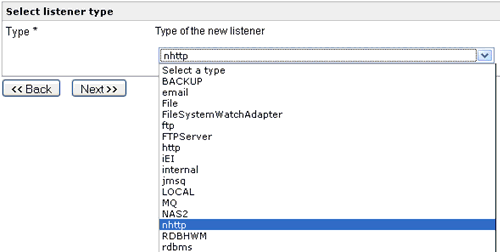
Create an nHTTP Listener by going to the iWay Service Manager
Administration Console and navigating to the Listeners section under
the Registry. Select nhttp as the listener
type.
-
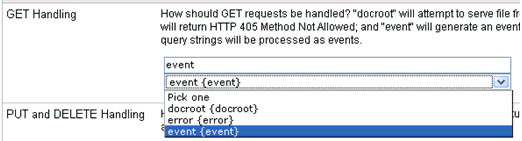
Click Next and provide listener configuration.
In this example, listening for events occurs on HTTP port 2222.
The configuration is port 2222 and GET Handling select Event,
leaving all other parameters with the default settings.
When the listener receives an HTTP GET request, it generates an event document which will be sent to the route.
-
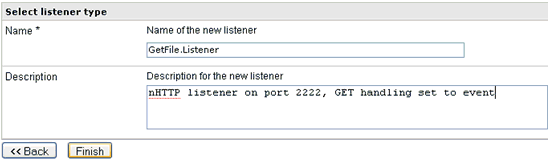
Click Next and provide a listener name
as GetFile.Listener with an optional description.
Click Finish.
-
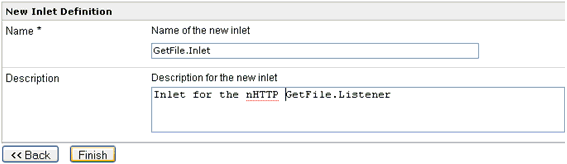
Create a new inlet which will contain the listener. Under the
registry go to inlet section and select New.
Provide inlet name as GetFile.Inlet with
an optional description. Click Finish.
-
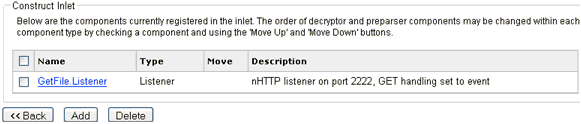
Add the GetFile.Listener to the GetFile.Inlet.
-
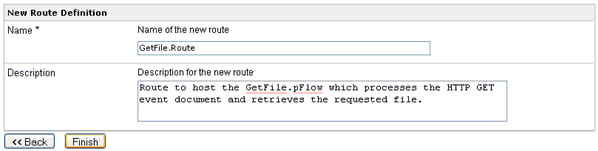
Create a new route to host the process flow which was created.
Under the Registry section click on routes and click New to
create a new route. Provide a name GetFile.Route with
an optional description. Click Finish.
-
Add GetFile.pFlow to the GetFile.Route.

-
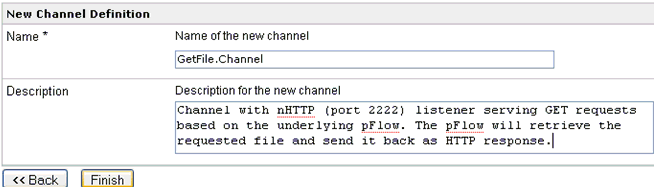
Create a
new channel by selecting Channels under the Registry. Provide Channel
name as GetFile.Channel with optional description. Click Finish.
-
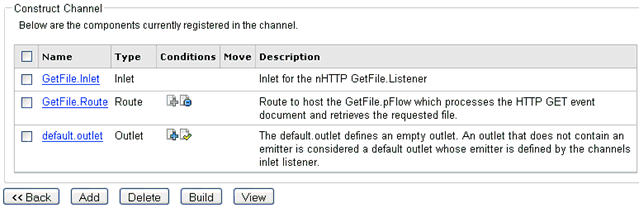
Add the GetFile.Inlet, GetFile.Route and
a default outlet to the GetFile.Channel.
The default outlet will indicate that the response has to be returned
back on the HTTP listener's response. Set the GetFile.Route as a
default route by clicking on the '-' sign under the conditions column. This
will indicate that the route is a default one and no condition exists
to execute.
-
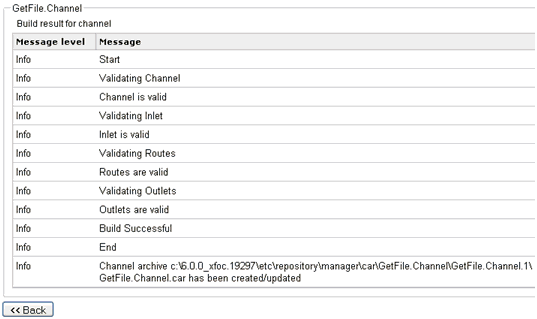
Once the
channel is configured, click Build to build
the channel. Ensure that the channel builds without any errors or
warnings.
-
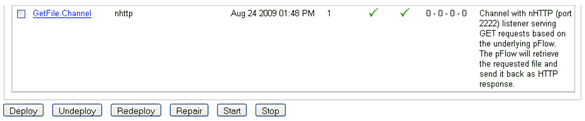
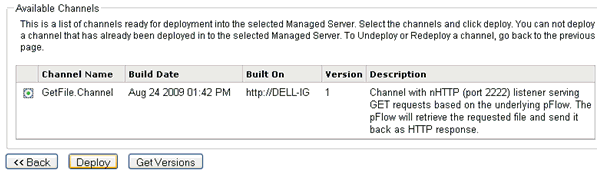
Now the
channel can be deployed under the Deployments section of iSM Console.
Click Deploy to deploy a new channel. Under
the available channels select GetFile.Channel and
click Deploy.
-
Now you
can start your channel under the channels page by clicking on its
status or by selecting a channel and clicking on Start.