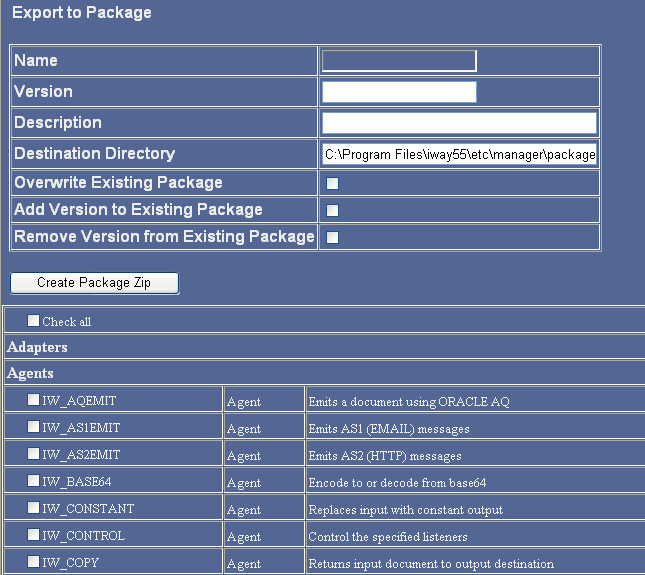
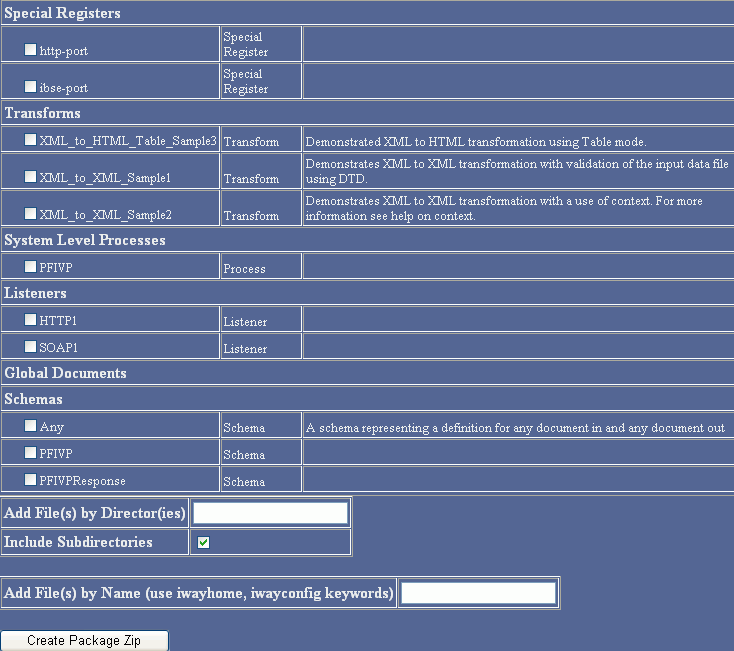
Run-time data can be packaged from either iWay Adapter
Manager using the Export tool, or iWay Service Manager using the
Package Manager tool. These packages can then be brought into the
target iWay Service Manager.
This section provides procedures for each of these steps, as
well as information on migrating run-time custom Transformer functions.
x
Migrating Run-Time Custom Transformer Functions
iWay Transformer supports the use of custom (that is,
user-written) functions to augment the behavior of iWay transforms.
These functions are written in Java and the compiled classes are
stored in jar files in the iWay directory structure.
Run-Time Custom Transformer functions are located in the following
directory, on the existing iWay Adapter Manager or iWay Service
Manager server machine:
[IWAYHOME]\etc\manager\transformations\custom_functions
Copy these custom function jar files from this location to the
analogous directory on the new client machine, using OS file copy,
FTP, e-mail, and so on, either directly or through an interim temporary
storage location.
Note: An import statement has changed between iWay versions,
so depending on your source and target version of iWay, you may
need to edit and recompile your custom functions. For more information,
see the iWay Adapter Transformer User's Guide.
x
Using the iWay Service Manager Package Manager
If your source server is iWay Service Manager, then
you will use Package Manager to create a zip file containing the
run-time components you want to migrate.
When migrating run-time data from a iWay Service Manager source,
you will:
- Create
a package of run-time components in the source iWay Service Manager.
- Download
that package to a location on your workstation.
- Move (add)
the package from your workstation to a location on the target server.
- Install the
package in the target iWay Service Manager. This installs all of
the components contained in the package.
x
Procedure: How to Package iWay Service Manager Run-Time Data
-
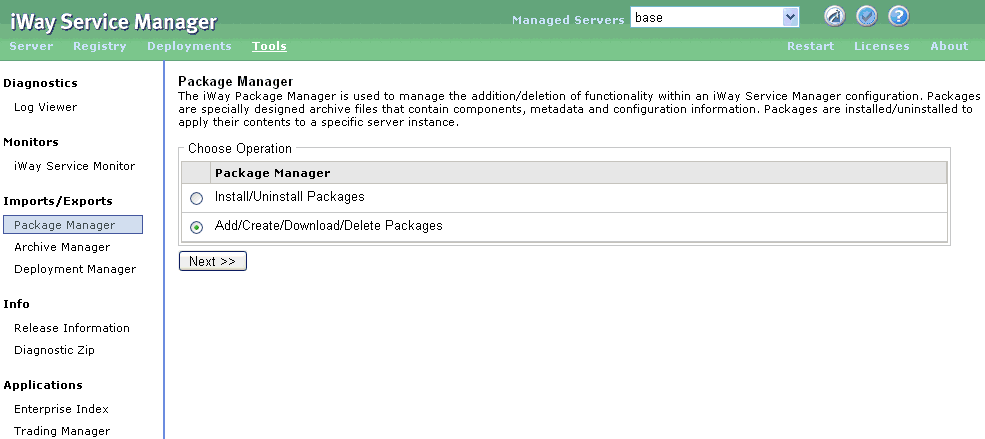
From iWay Service Manager Console on the source server, click Tools,
then in the left pane, select Package Manager.
Package Manager opens in the right pane of the Console,
as shown in the following image.
-
Select Add/Create/Download/Delete Packages and
click Next.
The Package Manager pane opens with a list of available
packages, as shown in the following image.

-
At the bottom of the packages list, click Create.
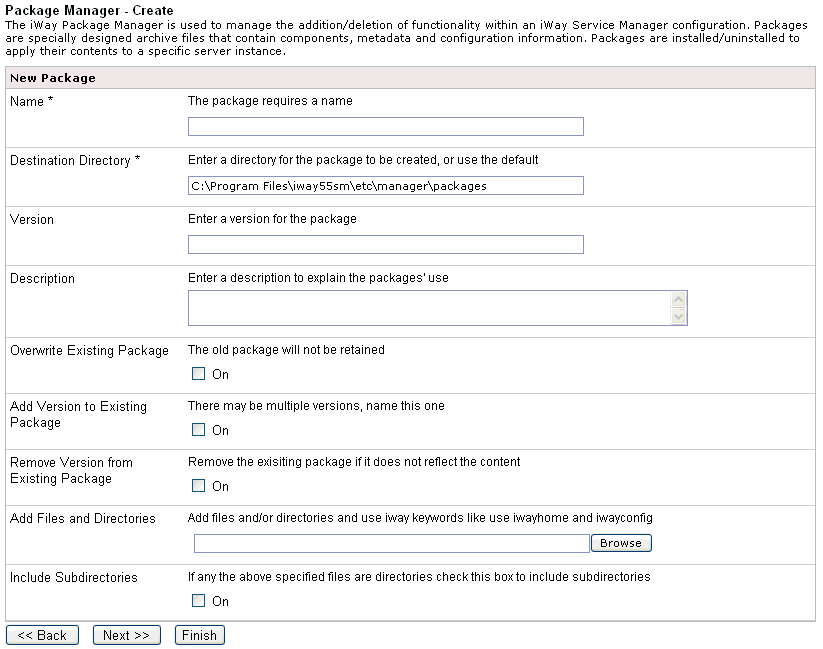
The Package Manager - Create pane opens, as shown in the
following image.
-
The following table lists and describes the properties you
can enter to define the package.
|
Property
|
Description
|
|---|
|
Name
|
Name of the package to create.
|
|
Destination Directory
|
Where the package file will be written upon creation.
|
|
Version
|
Version of the package.
|
|
Description
|
Brief description of the package.
|
|
Overwrite Existing Package
|
If checked, the new package will overwrite any
preexisting one with the same name.
|
|
Add Version to Existing Package
|
Add this version to the existing package.
|
|
Remove Version from Existing Package
|
Remove the existing package.
|
|
Add Files and Directories
|
Add component files and/or directories to the
package file (these directories are relative to and accessible by
the iWay server, not your browser).
|
|
Include Subdirectories
|
If the above option is selected, include subdirectories
when adding files and/or directories.
|
-
Click Next to begin moving through a
series of panes in which you can select the components to include
in the package.
Important: If you are very familiar with your application,
you can choose only those components that you need. Otherwise, as
a best practice, select all components to ensure that you migrate
everything needed to maintain the integrity of your application.
- Adapters
- Agents
- Preemitters
- Emitters
- Preparsers
- Encryptors
- Ebix
- Reviewers
- Exits
- Transforms
- Validation
- Schemas
- Stored Procedures
- PFlows (Process
Flows)
- Listeners
- Global Documents
- Special Registers
-
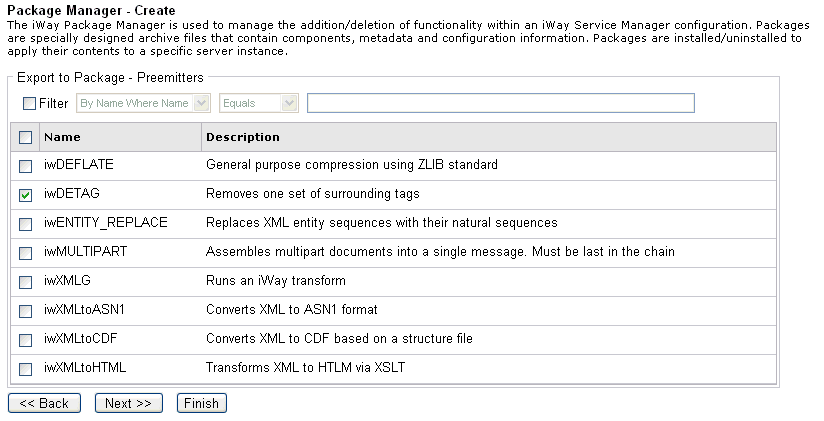
In each pane, select the check box next to the components you
want to include in the package, then click Next to
move to the next pane.
The following image shows an example of the Export to Package
- Preemitters pane, which lists the available preemitters.
-
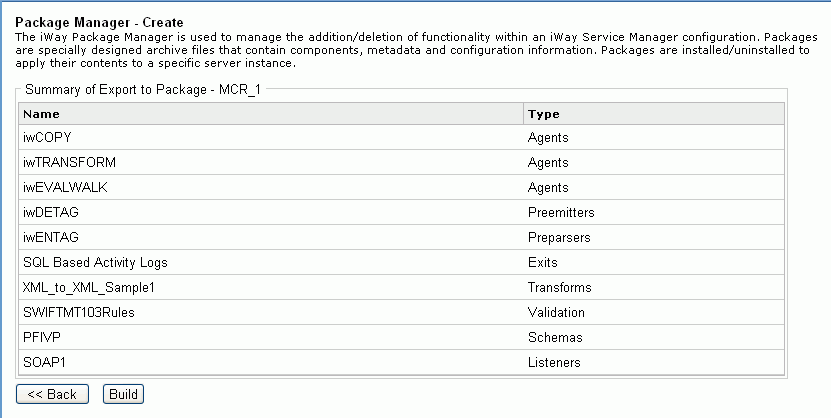
When you have made all of the component selections for the
package, click Finish.
The Summary pane opens showing the items you chose for
the package. An example of the summary pane is shown in the following
image.
-
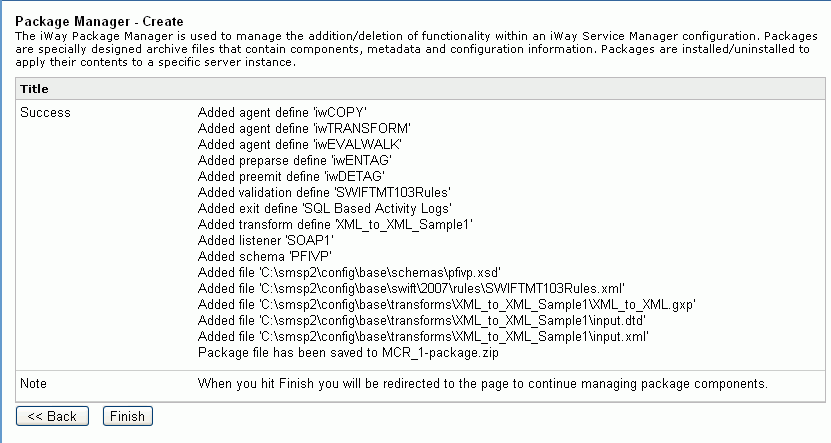
If your package contains all of the components you want, click Build.
The Package Manager - Create pane opens showing the status
of the package that you created.
-
Click Finish.
The Package Manager - Add/Create/Download/Delete pane opens
showing the newly created package in the list of packages.
x
Procedure: How to Download a Package From the Source Server
To
download the package of iWay Service Manager components from the
source server in preparation for installation on the target side:
-
In the Package Manager - Add/Create/Download/Delete pane, click
the Download icon next to the package you
want to download.
The File Download dialog box is displayed, asking whether
to open or save the selected file.
-
Click Save to download the file.
-
In the Save As dialog box, specify a location for the package
and click Save.
The browser copies the file to the specified location.
x
Procedure: How to Add a Package in the Target Server
From
the Package Manager on the target server, add the package to a location
accessible to iWay Service Manager on the target server, as follows:
-
From iWay Service Manager Console on the target server, click Tools,
then in the left pane, select Package Manager.
The Package Manager tool opens.
-
Select Add/Create/Download/Delete Packages and
click Next.
A list of existing packages is displayed.
-
Click Add to go to the Package Upload pane.
You will be prompted for the package to upload, as shown
in the following image.

-
Either type the fully qualified file name or click Browse to
navigate to the file location.
-
Click Upload.
The following image shows a Success confirmation page of
the uploaded package and a note to click the Finish button
to continue managing package components.

-
Click Finish to return to the list of
available packages.
The
newly uploaded package appears in the list of available packages,
as shown in the following image.

x
Procedure: How to Install a Package
To
install the added package into the target iWay Service Manager:
-
From Package Manager on the target server, select the Install/Uninstall
option, and click Next.
Package Manager displays a list of installed packages for
the current configuration.
-
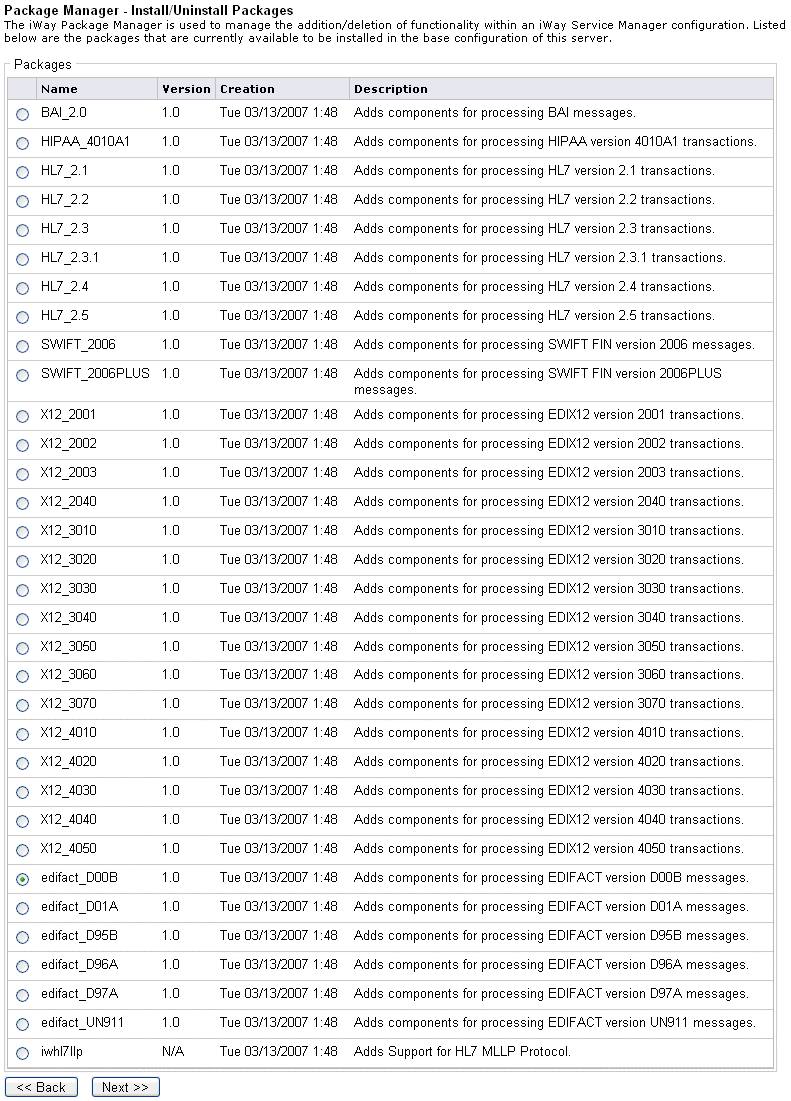
Click Add.
A list of available packages is displayed, as shown in
the following image. This list includes packages that are shipped
with iWay Service Manager.
-
Select the package you want to install and click Next.
The version pane for the selected package opens, as shown
in the following image.

-
Choose one of the listed versions and click Next.
The Configuration page allows you to select the target
configuration for the package and how to apply the package if there
are pre-existing components. If the package exists in the selected
configuration, you may choose to preserve pre-existing components
or to overwrite and save any pre-existing components.

-
Select the server configuration you wish to install the package
to, and the method to handle pre-existing components.
-
Click the box for the base configuration, and click Next.
The Package installation status page displays that the
package was successfully added, as shown in the following image.

-
Click Finish.
The
newly installed package is now in iWay Service Manager and appears
in the Package Manager - Install/Uninstall list.
x
Updating Web Services Connection Information
This section describes how to use Web service providers
in iWay Service Manager to update connection information for Web
services.
Use the following link to access iWay Business Service Provider
configuration information:
http://localhost:port/admin/iwconfig.ibs
where:
- localhost
Is the host machine where iWay Service Manager is installed.
The default value is localhost.
- port
Is the SOAP port where iWay Business Service Provider is
listening. The default port is 9000.
The iWay Business Service Provider (iBSP) Configuration Service
page opens:
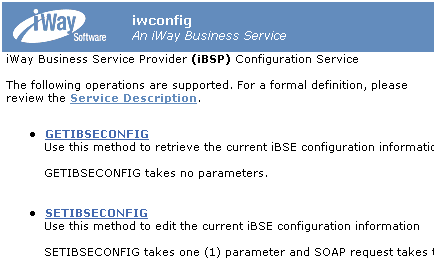
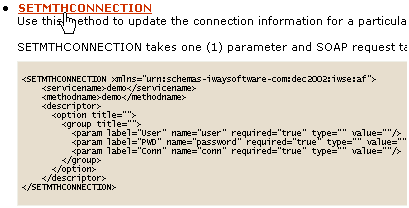
Scroll down and click the SETMTHCONNECTION link as shown
in the following image.
The SETMTHCONNECTION page opens, as shown in the following image.
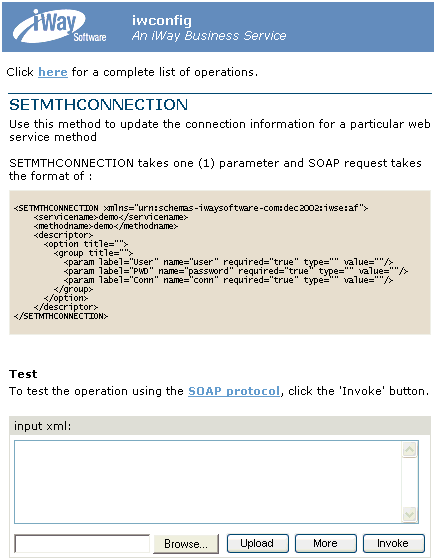
Copy the following sample XML request document that is provided
and paste it into the input xml field:
<SETMTHCONNECTION xmlns="urn:schemas-iwaysoftware
com:dec2002:iwse:af">
   <servicename>demo</servicename>
   <methodname>demo</methodname>
   <descriptor>
    <option title="">
     <group title="">
      <param label="User" name="user" required="true" type="" value=""/>
       <param label="PWD" name="password" required="true" type="" value=""/>
#
<param label="Conn" name="conn" required="true" type="" value=""/>
</group>
</option>
</descriptor>
</SETMTHCONNECTION>In the <servicename> tag, replace the sample value demo with
the name of the Web service you want to modify.
In the <methodname> tag, replace the sample value demo with
the name of the Web Service method you want to modify.
Modify the following tags by specifying a new user name and password
value:
<param label="User" name="user" required="true" type="" value="User_Test"/>
<param label="PWD" name="password" required="true" type="" value="UT1000"/>
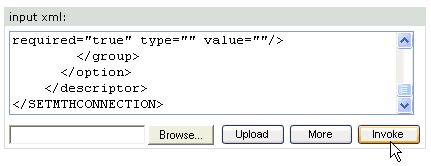
Click Invoke.
A response document is displayed as shown in the following image.

To verify the connection information changes you made to your
Web service use the GETMETHODCONNECTION method.
Click the GETMTHCONNECTION link, as shown in the following
image.

The GETMTHCONNECTION page, shown in the following image, opens.
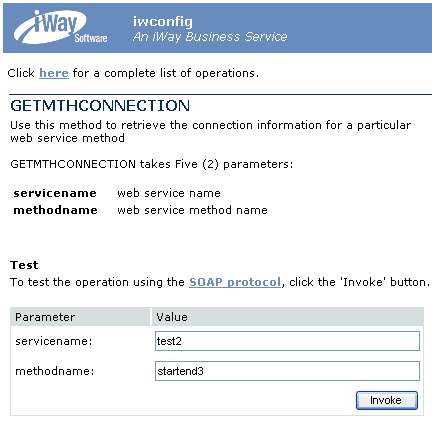
GETMTHCONNECTION is a method that can be used to retrieve the
connection information for a Web service method.
Enter values for the following parameters:
- servicename -
The name of the Web Service.
- methodname -
The name of the Web Service method.
Click Invoke.
The result is displayed, as shown in the following image.
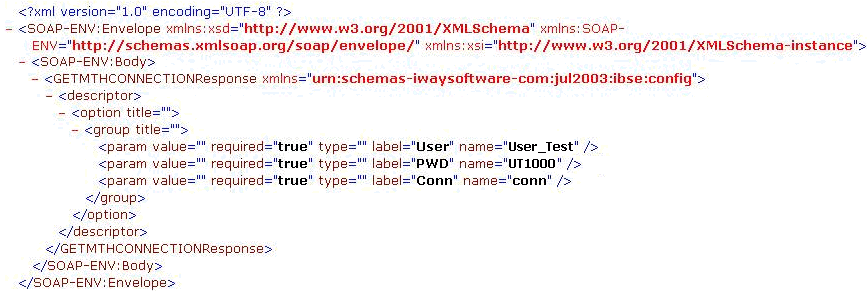
Notice the user name is User_Test and the password is UT1000,
which reflects the values that were specified for the SETMTHCONNECTION method.
