To use rules and rule sets, you will need an active
iWay Enable tap. To check to see if you have a tap, go to the Views
page of iWay Enable and click on Taps. You should have at least
one tap set to On and is tapping a service
or channel.
The tap should contain either of the following iFL statements.
_erules(rulesetName)
where:
- rulesetName
is the name of an existing rule set.
_erules(rulesetName,xpath('//someElement')) where:
- '//someElement'
is an element in a passing document in the process flow.
If you do not have any taps or your existing taps do not tap
an active process flow or channel, see the iWay Enable Getting
Started User’s Guide.
x
Creating Rules and Rule Sets
Rules and Rule sets provide a simpler way of organizing
and reusing rules and their corresponding actions. The following
list is a more detailed description of rules and rule sets.
-
Rules are defined by a user and can be executed by
the iWay Enable Rule Engine (ERE) when the _erules() iFL function
is called. Rules have a Condition and an Action. The condition is
a statement which either returns true or false. If and only if the
condition evaluates to true is the action evaluated or executed.
The action is a set of statements which are executed. An action
can be to expose an event, email a person, post a twitter comment,
or execute another process flow where you can handle the action
yourself.
-
Rule sets contain an ordered set of Rules which the ERE
executes. They are indented to help organize sets of rules and can
be called from an _erules(rulesetName) iFL call.
x
Procedure: How to Create a Rule Set
To
create a rule set:
-
Click Tools in the top
pane of the iWay Service Manager Administration Console.
The iWay Service Manager
Tools pane appears.
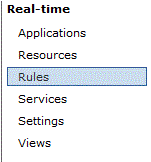
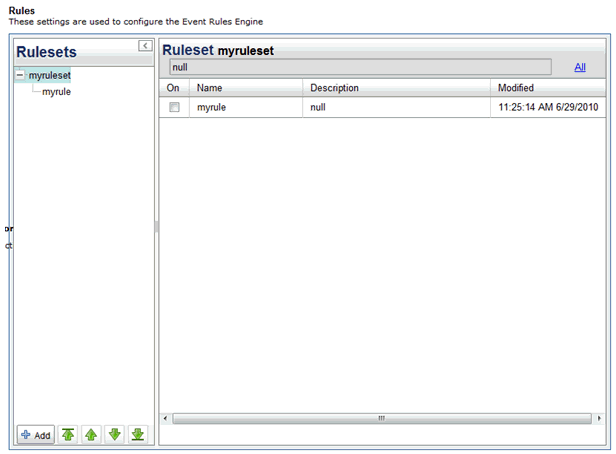
-
In the left pane, select Rules under
the Real-time section.
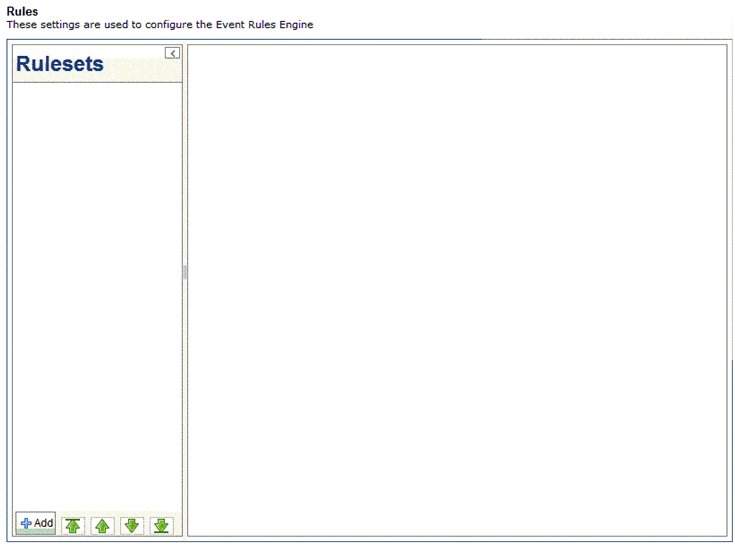
The Rules pane opens, as shown in the following image.
-
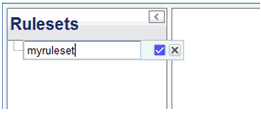
Click the Add button.
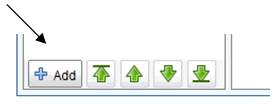
An empty text field
will appear in the Rule set tree.
-
Provide a name for your rule set, for example, myruleset and
save it by clicking on the check mark.
-
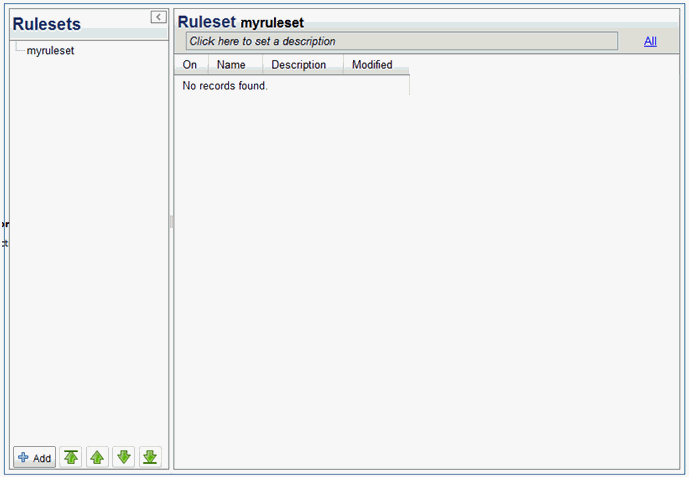
Click on the rule set.
The parameters for the rule set you just created should
appear on the right pane as shown in the following image.
You can now create
a rule.
x
Procedure: How to Create a Rule
To
create a rule:
-
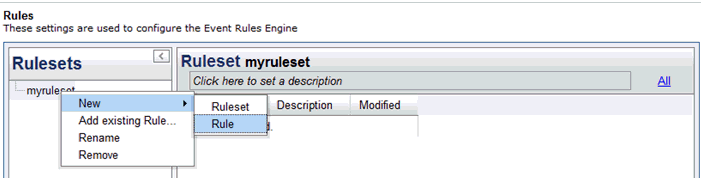
Right-click on the rule set you created and select New and
then Rule.
-
Provide a name for the rule and click the check mark.

-
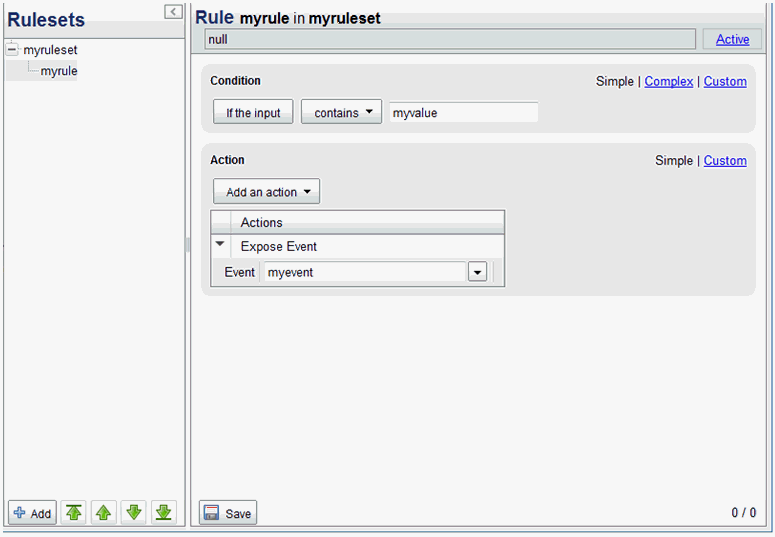
Click on the rule you just created.
The following image appears on the right.
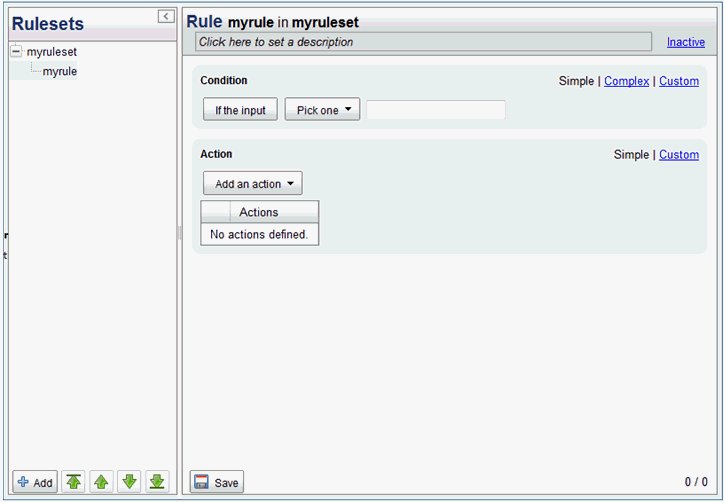
There are two sections
to the Rule, parameters: Condition and Action. The rule you created
is set to a default Condition and an empty Action. The Rule will
be Inactive by default.
-
Click the Save button and refresh
the page.
The appearance of the Rule set and rule confirms that the
rule was created.
x
If your _erules() statement in your
tap provides a second value, you can use that value in the Condition.
For example, if your statement is:
_erules('myruleset',xpath('//mynode'))The value of xpath('//mynode') will be passed
to the Rule as its input value in the condition.
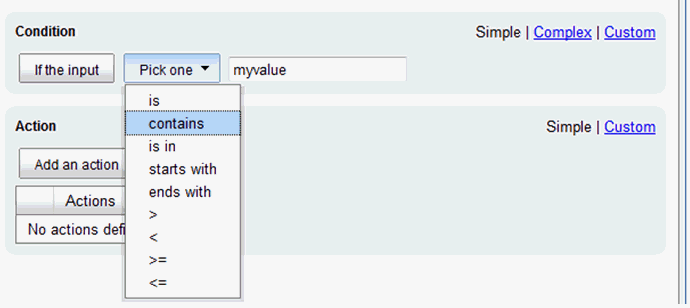
You can use this value to determine if the Action of the rule
should be evaluated. Click the Pick one button
and select an operation. The contains condition
above means, “if the value in the mynode element of the passing
document contains the string myvalue; return true else return false".
Click the If the input button. This will
change the text of the button to say Unless the input.

This condition has been negated and now means: "unless the value
in the mynode element of the passing document contains the string
myvalue, return true else return false".
x
If your _erules() statement in your
tap does not provide a second value, you must use the custom view
to define the condition. The custom view requires knowledge of JavaScript.
Click on Custom for the rule you created.
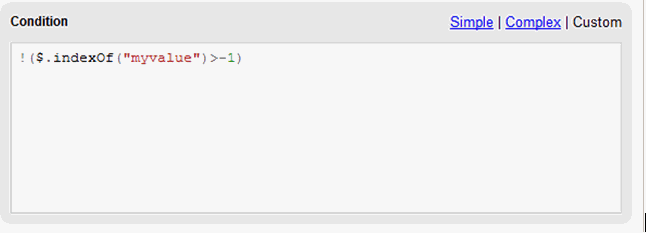
The view above shows the JavaScript version of the Rule created
in the previous test. The $ represents the input value. It will
be replaced by the ERE with the value of the second parameter to
_erule(). If there is no second parameter provided, you must provide
it by searching either from some data store, environment, or from
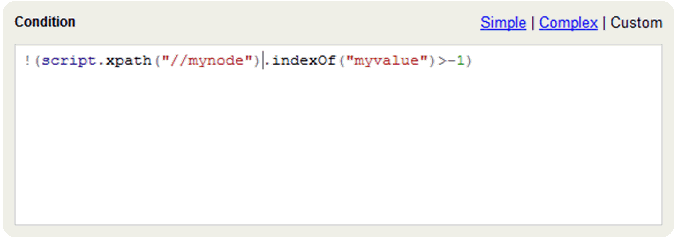
the document itself. Changing the $ to script.xpath(“//mynode”) will
implement the same logic as the Rule in the previous example. This
statement uses the script object to perform an XPATH into the passing
document.
Once you change the JavaScript in a condition you will not be
able to use the Simple or the Complex view of the condition.
x
To add an Action to a Rule, click the Add
an action button and select ExposeEvent.
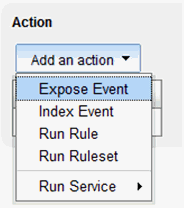
Once you start typing in the event box, the Rules page will provide
a list of suggested events currently existing in your Event table.
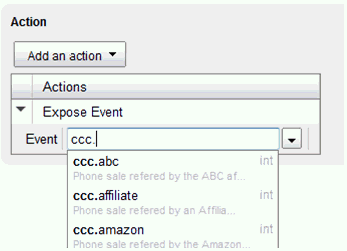
If the event you want to expose does not exist, simply type in
the event name you want to use. Make sure it is clear and descriptive
enough to understand later.
Note: Event names can only contain lowercase letters from
a - z, numbers 0 - 9 and the characters '.' and '-'.
x
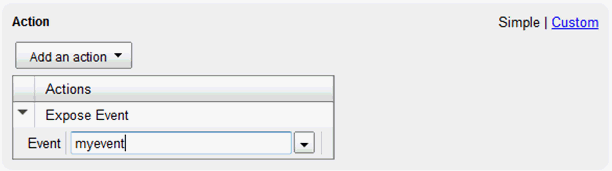
Click Custom on the Action view.
The Action is also implemented in JavaScript. The following image
shows the corresponding JavaScript code where the script and correlation
ID (CID) objects are used. The CID is the correlation ID used to
relate all events exposed within a single _erules() call.
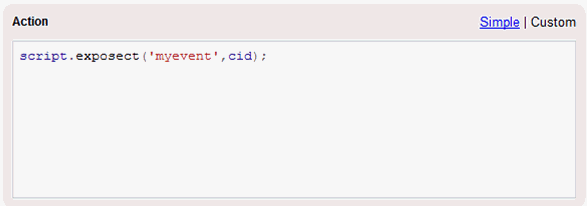
Like the Condition, once you have changed the JavaScript in the
Custom view, you can no longer use the Simple view.
x
Activate your Rule by clicking the Active link
at the top of the Rule page.

Send a message through your channel or process flow.
You will get a “myevent” event occurrence for every time the
input contains “myvalue” if your Rule was defined similar to the
rule shown in the following image.
Place your cursor over the event name and you will see a count
(1), as shown in the following image.
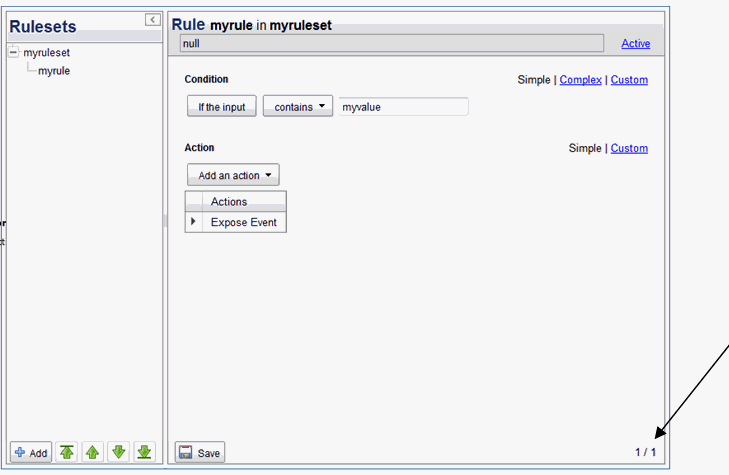
The count 1/1 means the condition of the rule was true 1x and
evaluated 1x OR #true/#evaluated. Note that #true doesn't necessarily
mean the # of times the Action was executed, as Rules can be referenced
by other Rules to form Complex Conditions.
You can now return to the Rule page and check the statistics
for your Rule.
x
Complex Conditions and Rules
Complex Rules are Rules which reference other Rules.
They can be infinitely complex and can express any condition. Complex
Rules take advantage of the reusability of the Rules in iWay Enable.
x
Procedure: How to Create Complex Conditions and Rules
To
create complex conditions and rules:
-
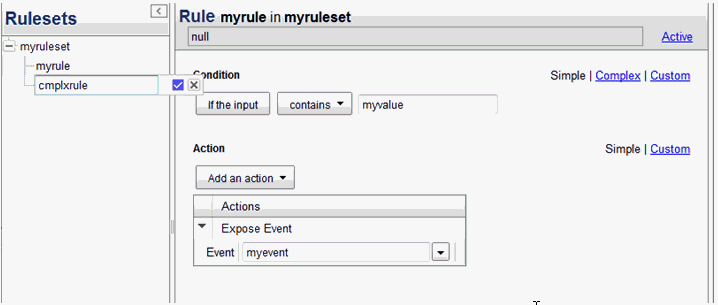
Create a new rule, for example, cmplxrule.
For more information, see How to Create a Rule.
-
In the top pane, click the Complex condition view.
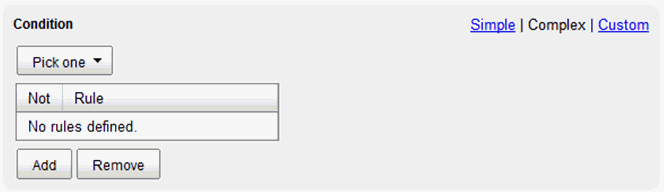
-
Click the Pick one drop-down menu
button and select a Complex Rule logic, for example, If
any of the following pass.
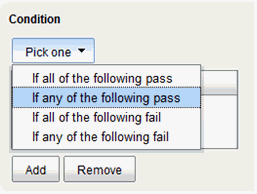
The following table
lists the description of each rule logic.
|
Logic
|
Description
|
|---|
|
If all of the following pass
|
Instructs the ERE to evaluate the conditions
for all of the chosen rules and if all are true, then return true
else return false. (if myrule is true and myrule2 is true then return
true else return false).
|
|
If any of the following pass
|
Instructs the ERE to evaluate the conditions
for all of the chosen rules and if any are true then return true
else return false. (if either myrule or myrule2 is true then return
true else return false).
|
|
If all of the following fail
|
Instructs the ERE to evaluate the conditions
for all of the chosen rules and if all are false then return true
else return false. (if myrule is false and myrule2 is false then
return true else return false).
|
|
If any of the following fail
|
Instructs the ERE to evaluate the conditions
for all of the chosen rules and if any are false then return true
else return false. (if either myrule or myrule2 is false then return
true else return false).
|
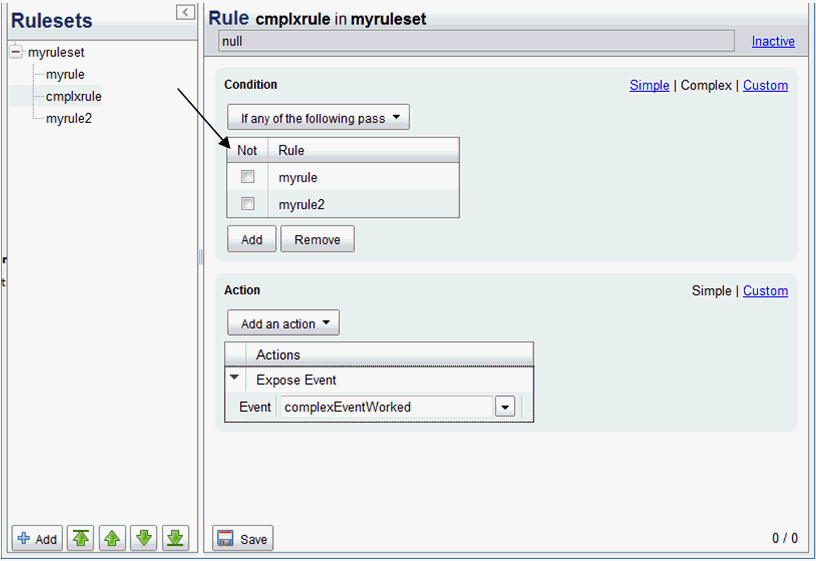
The Not column negates
the output of the specified Rule. For instance, if myrule was
checked, then whenever its condition evaluates to true, the ERE
will change it to false and vice versa; whenever its condition evaluates
to false, the ERE will change it to true.
The complex Rule
above states, "if the input is either myvalue or myvalue2, expose a
complexEventWorked event". If myrule was negated this complex rule
would state, "if the input is either not myvalue or is myvalue2,
expose a complexEventWorked event".
The ERE, when evaluating
Complex Rules, will only evaluate the condition of the Rules it
references and will not execute their actions. This is why the statistics
for each Rule do not represent how many times its Action was executed.
x
The ERE will execute the Rules within a Rule set in
top-down order. You can optimize your Rules and Rule set by reordering
or by changing the execution logic.
x
Five messages pass by to which your Rule set is applied.
The Rules in your Rule set check the State and create events for
each State. The statistics for each of the rules executed in order
are:
- isNewYork = 2/5 or 2 true in 5 evaluations.
- isOhio = 3/5 or 3 true in 5 evaluations.
You can now see that 2 messages are New York and 3 are from Ohio.
You have executed Rules 10 (5 for each rule). Since the Rules can
only be true for one or the other, you can check the All in
your Rule set to say First True. This will
force the ERE to break out of the Rule set and not evaluate anymore
Rules.
If you clear your stats or subtract the previous stats, running
the same 5 messages will get you:
- isNewYork = 2/5 or 2 true in 5 evaluations
- isOhio = 3/3 or 3 true in 3 evaluations
The ERE broke out once for each time isNewYork evaluated to true
reducing the Rule evaluation count to 8 from 10.
Further evaluations can be performed by changing the order of
execution. From the sample, isOhio was true three times and isNewYork
only twice.
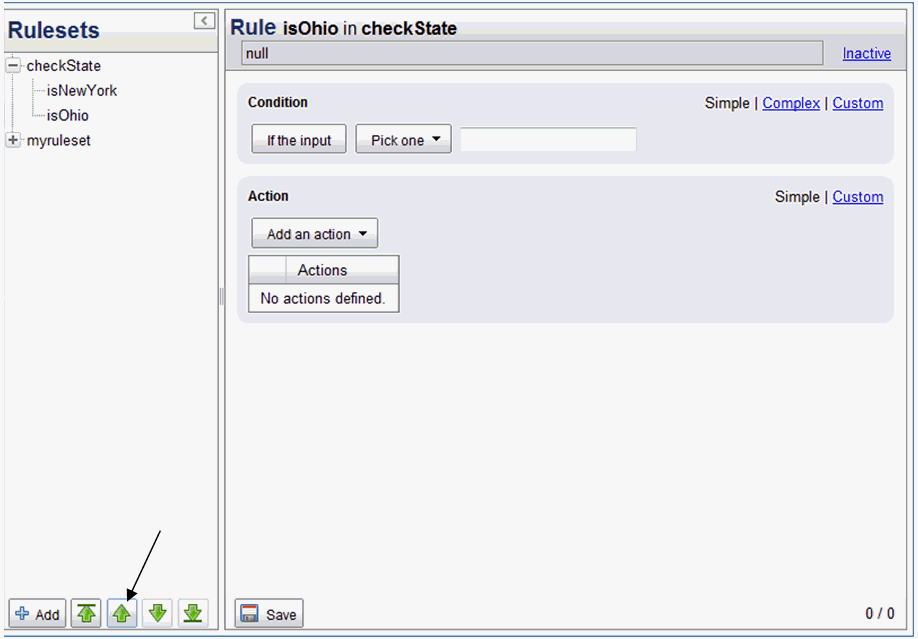
By moving isOhio up before isNewYork, as shown in the image above,
you get the following stats:
- isOhio = 3/5 or 3 true in 5 evaluations
- isNewYork = 2/2 or 2 true in 2 evaluations
The ERE broke out once for each time isOhio evaluated to true,
reducing the Rule evaluation count to 7 from 8.
x
iWay Enable Rule Engine Objects
The iWay Enable Rule Engine (ERE) is a server-side BSF
container which loads JavaScript and executes them. You can switch
to the custom view for each Condition and Action. Both the Condition
and Action rules are compiled into JavaScript and then executed
by the ERE. The Condition is evaluated inside an if statement. For
example, if the condition is:
$==("NY")The action taken would be:
script.exposect('nyevent',cid);The $ is replaced by the input and the each statement is imported
into an if statement:
if('hello world'==("NY"))
{
        script.exposect('nyevent',cid);
}
The assembled code is then evaluated by the BSF container using
the eval JavaScript function.
eval
(
    if('hello world'==("NY"))
    {
            script.exposect('nyevent',cid);
    }
);
Advanced users who know JavaScript, can customize the Condition/Action
to perform additional processing. The ERE provides you with some
objects which can be used in your customized Condition or Action.
x
The script object holds a set of hosted methods which
can be called from JavaScript. Most of them map directly to the
iFL function with the same name.
- String ifl(String statement) - evaluates the iFL statement
passed in and returns its result.
- String sreg(String reg) - looks up a special register and returns
its value.
- String sreg(String reg, String def) - sets the definition of
special register and returns the register name.
- String xpath(String xq) - executes the passed XPATH expression
against the internal document.
- String expose(String key, String val, String loc, String ptype)
- executes an _EXPOSE().
- String expose(String key, String val) - executes an _EXPOSE().
- String etap(String tap) - executes an _ETAP().
- String eindex(String text) - executes an _EINDEX().
- String eindex(String text, String event) - executes an _EINDEX().
- String etimer(String event) - executes an _ETIMER().
- String etimer(String event, String command) - executes an _ETIMER().
- String esearch(String term) - executes an _ESEARCH().
- String ekeys(String search) - executes an _EKEYS().
For more information about iFL functions, see iWay Functional Language.
Action Example:
script. exposect('foo',cid);
x
The logger object holds a set of logging functions.
The functions correspond to the logging levels provided by the iSM
platform.
- info(String msg)
- warn(String msg)
- error(String msg)
- fatal(String msg)
- deep(String msg)
- data(String msg)
- debug(String msg)
Action Example:
logger.debug('hello world');
x
CID (correlation id) does not contain a methods and
is simply a string which represents the current correlation id being
used to expose all events occurring within a sing _erules() call.
This variable is set with a unique id which you can override in
your Condition or Action.
Action Example:
cid = "1234567890";
script. exposect('foo',cid);
logger.debug(cid);
x
CTS is another variable which does not contain functions
and represents the current timestamp in milliseconds. This timestamp
is used at the time an event occurred. If this time is inaccurate
and a more accurate time can be obtained, this variable can be overridden
with that value.
Action Example:
cts = script. xpath('//timestamp'); //long
script. exposect('foo',cid+'|'+ cts);
logger.debug(cid);
x
iWay Enable Rule Engine Functions
The ERE contains a set of functions which the user can
use to build more sophisticated Rules.
-
erule - takes a Rule object/name, executes its condition,
then evaluates the result to true or false. Use this Rule in a condition
to create complex conditions.
-
erun - takes a Rule object/name and checks to see if
the Rule is active. If it is, it executes a Rule's action and returns
true, else it returns false. Use this in a rule action to run a
rule's action without having to evaluate its condition.
-
runRule - takes a rule object/name and executes erule.
If erule returns true, this function executes erun passing the same
rule object. This function returns either true only if the rule's
action was executed. Use this method in an action to chain another
rule to it.
-
runRuleset - takes either a rule set/rule set name. This
function checks the style of rule iteration for the rule set (first
true OR all) and executes runRule. Use this method in an action
of a rule to chain a rule set to it.