To update taps:
-
Click Tools in the top
pane of the iWay Service Manager Administration Console.
The iWay Service Manager Tools pane opens.
-
In the left pane, select Views under
the Real-time section.
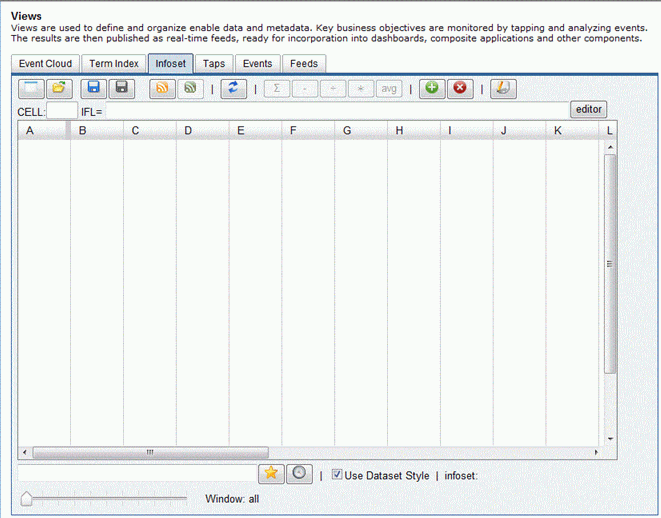
The Views pane opens, as shown in the following image.
-
Ciick the Taps tab.

-
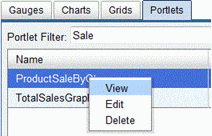
Select the sales.process.tap2 tap
in the Name column.

Note: The sales.process.tap2 tap was created earlier, but not configured.
-
Right-click the sales.process.tap2 tap
and select Edit IFL (iWay Functional Language)
from the context menu.

The Edit IFL Expression dialog box opens.
-
Enter the following expression in the top section of
the Edit IFL Expression dialog box:
_erules("QuantityPerCategory",xpath("/TRANSACTION/ProductCat"))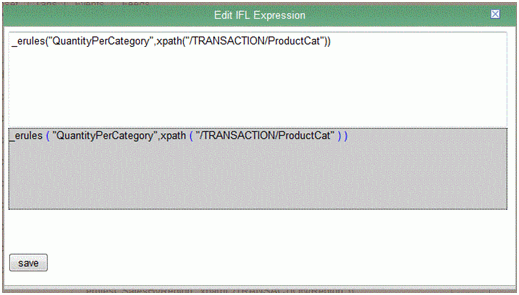
This expression calls a Rule set called “QuantityPerCategory” and this Rule set takes the product category as an input and creates business events which capture the quantity sold in each transaction based on the category of the product in that transaction.
-
Click save.
You are returned to the Views pane, where the new expression is now added to the Expression column for the sales.process.tap2 tap.

Note: You may need to refresh your Web browser after the expression is saved.
-
Select the check box next to the sales.process.tap2 tap
to activate this tap.

-
Configure the Rule set “QuantityPerCategory” to create
business events for capturing the quantity sold for each product
based on its category. The company used in the following example
sells three categories of products:
- Electronics
- Hardware
- Garden
There are three types of business events. Each corresponds to the above categories as they occur in each transaction. These business events capture the quantity of the product which is being sold based on their category. The three events are:
- sales.quantity.electronics
- sales.quantity.hardware
- sales.quantity.garden
In addition to capturing business events for reporting the quantity sold, it might be interesting to discover what type of product was sold in each transaction and to use Enable Event Modeling tools to find out which product had the highest number of sales.
-
Click Tools in the top pane of
the iWay Service Manager Administration Console.
-
The iWay Service Manager Tools pane opens.
-
In the left plane, select Rules under
the Real-time section.
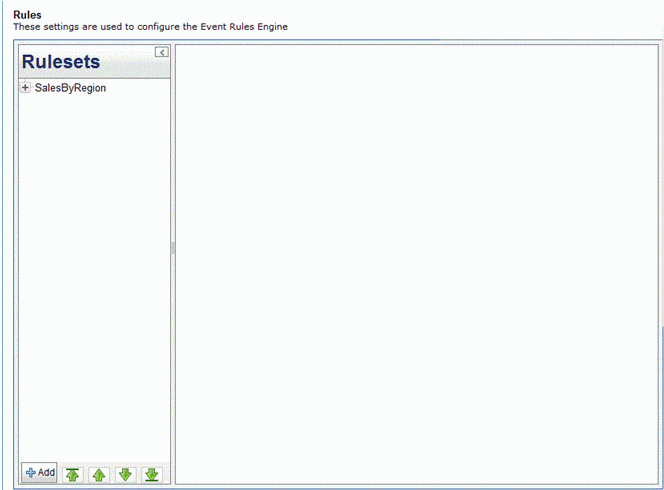
The Rules pane opens, as shown in the following image.
-
Create the Rule set “QuantityPerCategory” which contains
the following three rules:
- IsCategoryElectronics
- IsCategoryHardware
- IsCategoryGardens
-
To create the three Rules, follow the procedures outlined
in How to Create iWay Enable Rules.
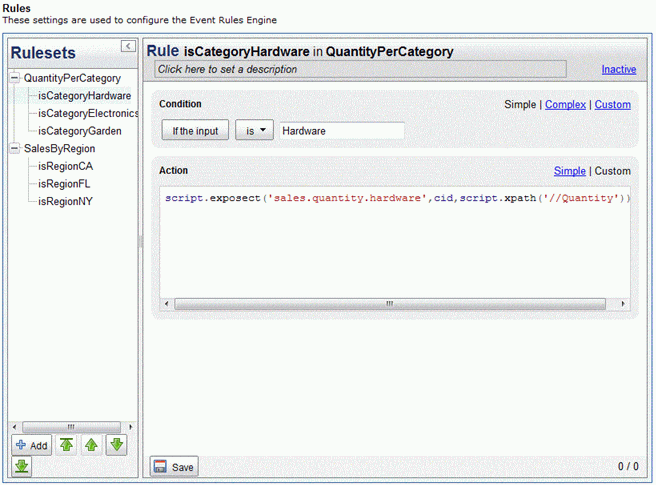
The following table shows the Rule configuration.
Rule
Action
isCategoryElectronics
script.exposect('sales.quantity.electronics',cid,script.xpath('//Quantity'));isCategoryHardware
script.exposect('sales.quantity.hardware,cid,script.xpath('//Quantity'));isCategoryGarden
script.exposect('sales.quantity.garden,cid,script.xpath('//Quantity'));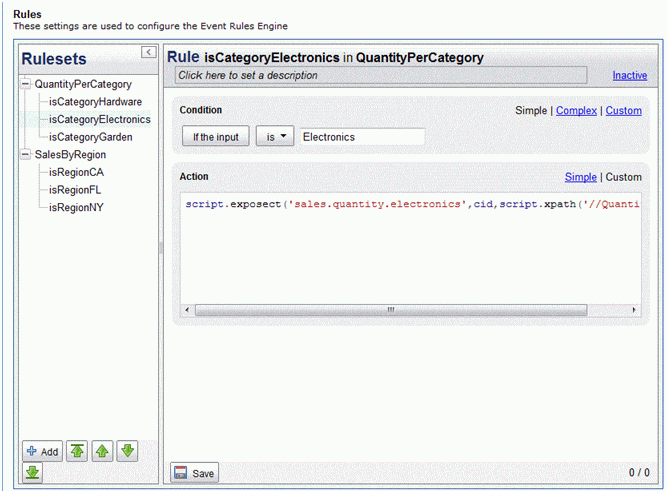

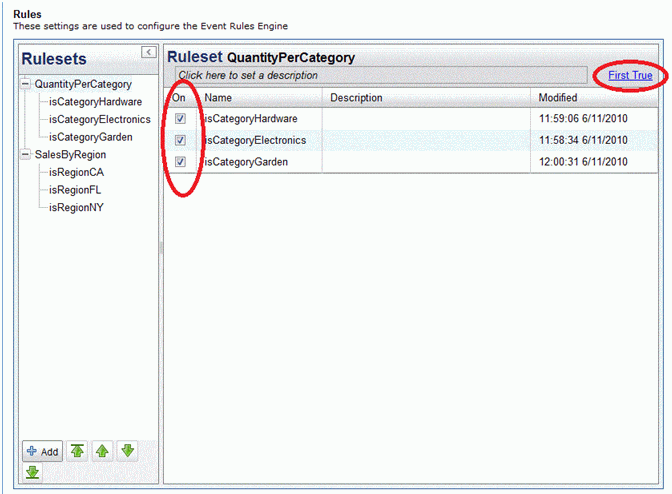
- Activate the three newly created Rules by selecting the On checkbox next to each Rule name.
-
Select the First True option to
run until the first rule returns true.
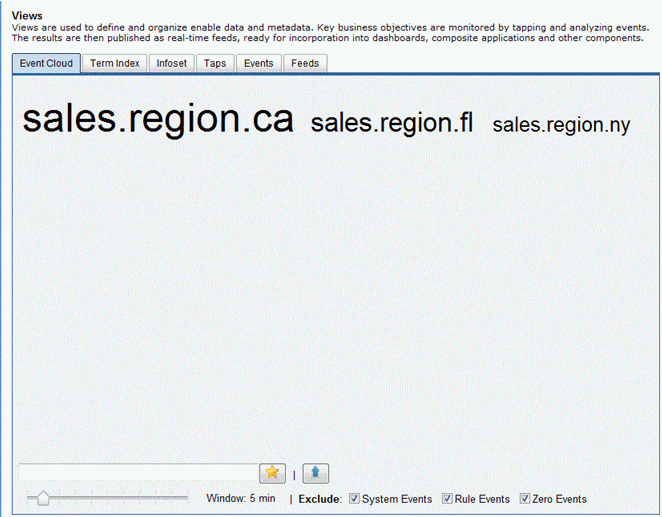
You are now able to tap into additional data through the process flow (sales.process) that was configured earlier and generate business events. As the process flow processes the batched sales transactions, it triggers the sales.process.tap2 tap, which runs the corresponding Rule set. As a result, the three business events "sales.quantity.electronics", "sales.quantity.hardware" ,and "sales.quantity.garden" get generated each time the transaction matches one of the product categories.
-
On your file system, copy the SalesTransactions.xml file
that was created earlier into the following input directory:
C:\Sales_Demo\sales_data\in
-
Click Tools in the top pane of
the iWay Service Manager Administration Console.
The iWay Service Manager Tools pane opens.
-
In the left pane, select Views under
the Real-time section.
The Views pane opens, as shown in the following image.
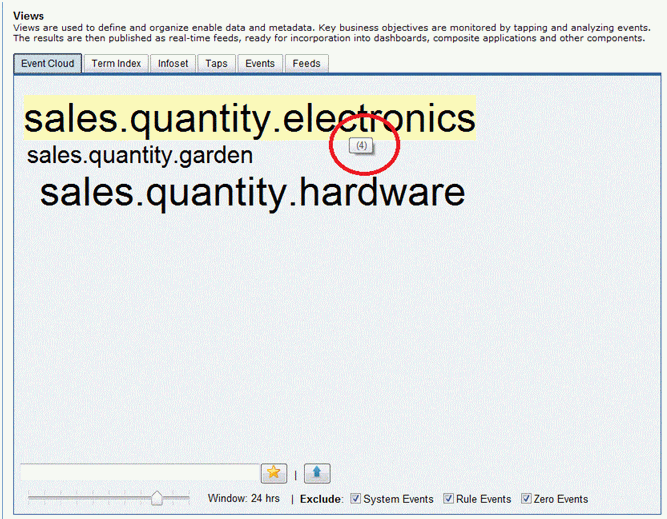
You should have three business events generated and by moving the mouse on each one, you can see the number of the occurrences of each event while the SalesTransactions.xml file is being processed. This information can be useful if you want to know which category of products is being sold the most in real time.
Next, make a visual comparison between the quantities of the sold products based on their categories. To do this, you can use the Infoset feature of Enable 1.2. The Infoset can be used to aggregate and format real time data into feeds, which can be consumed by charts and graphs.
-
Click the Infoset tab under Views
in the Real-time section.
-
Type sales.quantity in the box as shown below and click the star button next to it to bring all the business events which
contain the word sales.quantity in them.
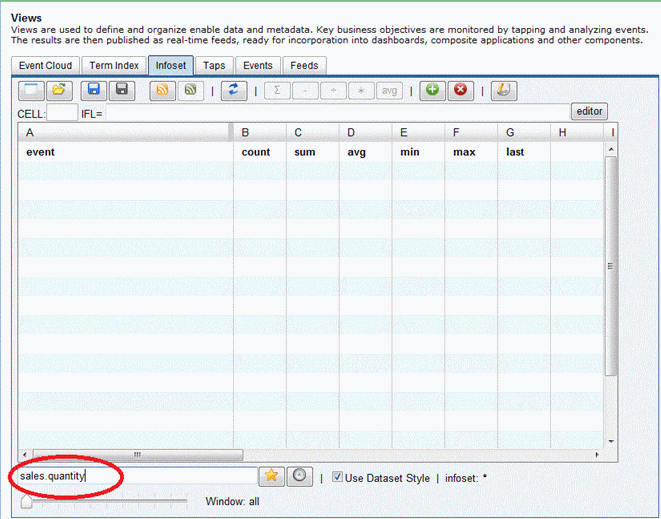
The result below lists the business events.
Note: When the events are being generated, the value of the quantity field in every transaction is assigned to the value column in the event table.
- Count: The number of occurrences of the events in real time.
- Sum: The sum of the quantities among all the counts.
- Avg: The average value of the quantities among all the counts.
- Min: The minimum value of the quantities among all the counts.
- Max: The maximum value of the quantities among all the counts.
- Last: The last value of the quantities among all the counts.
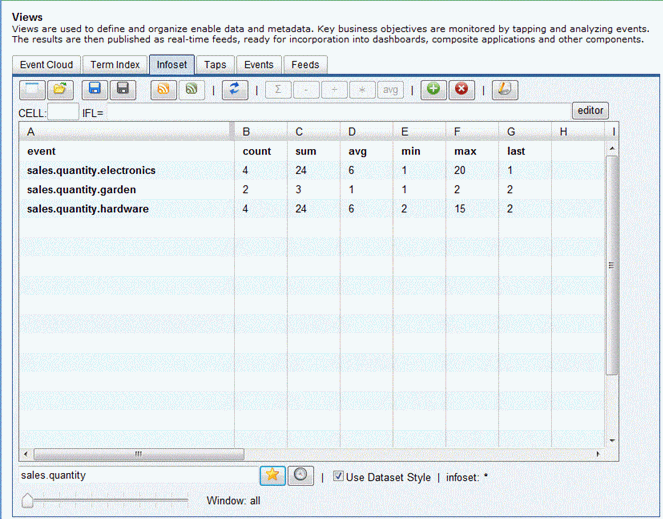
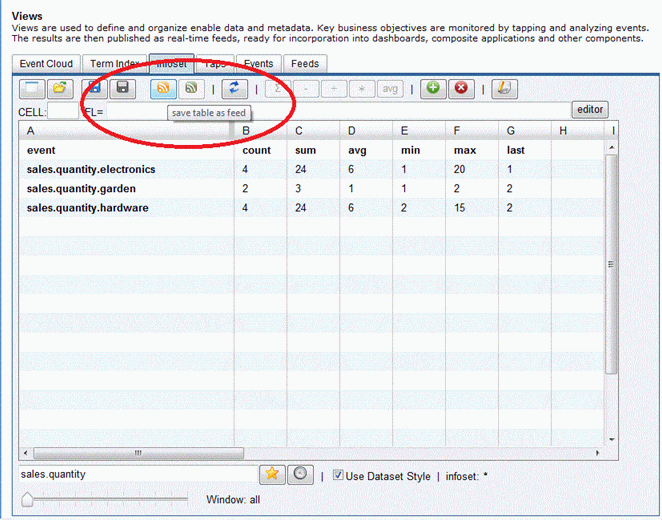
You can now create a feed to contain all the information you need for all three business events. This feed will be consumed by a Real Time Column chart in the later section to give us the visual representation of the quantity comparison in real time.
-
Click the orange button as shown below to save the desired
table as a feed.
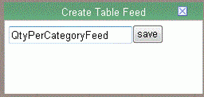
-
Type QtyPerCategoryFeed for the name of the feed and
save it.
-
Select Views under the Real-time
section and click the Feeds tab. Search for the feed that you
just created by typing the feed name into the filter box.
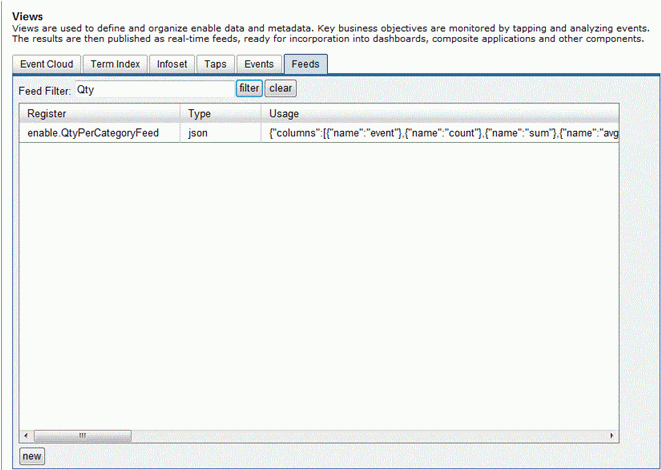
Double-click the Usage column to see the expression that was created by saving the feed. The feed has all the values you need for the three business events that were created earlier.
-
Click Tools in the top pane of
the iWay Service Manager Administration Console.
The iWay Service Manager Tools pane opens.
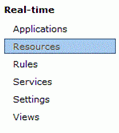
-
In the left pane, select Resources under
the Real-time section.
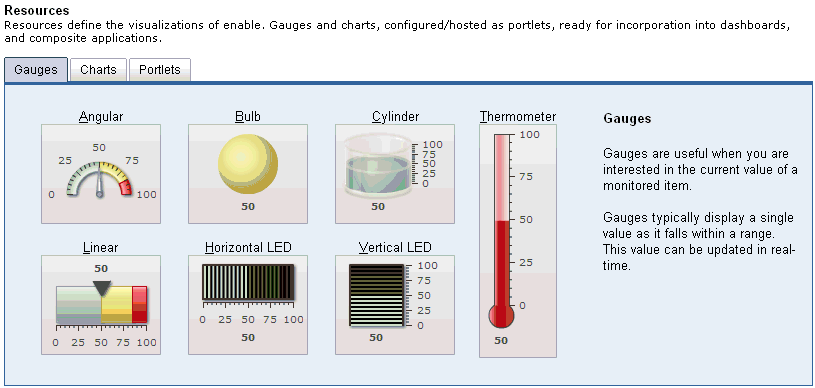
The Resources pane opens and displays the Gauges tab by default, as shown in the following image.
-
Click the Charts tab.
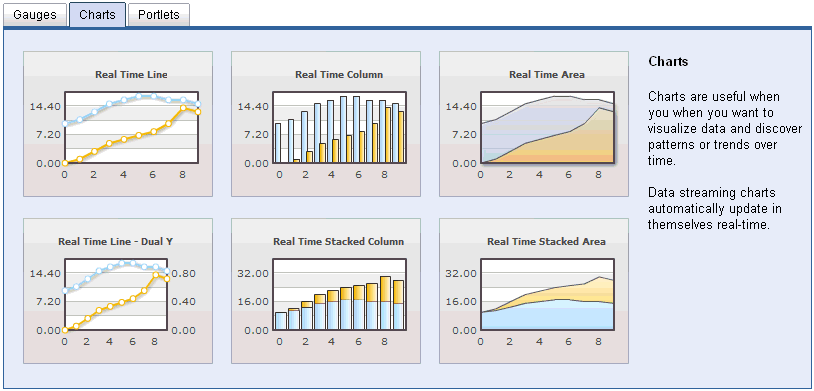
The Charts tab opens and displays the available charts that can be configured, as shown in the following image.
-
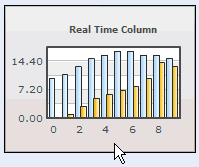
Click the Real Time Column chart.
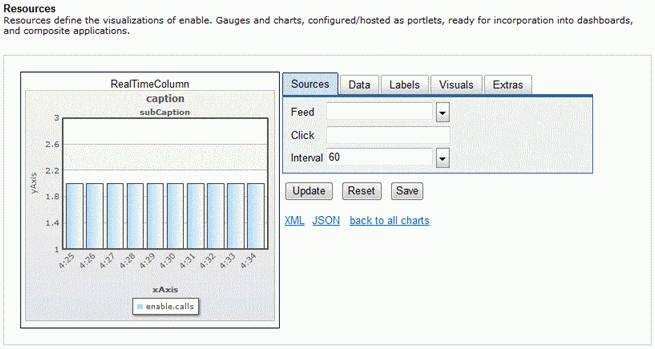
The Real Time Column Chart configuration pane opens, as shown in the following image. A visual representation of the selected chart (for example, Real Time Column) is displayed on the left. There are five configuration tabs (Sources, Data, Labels, Visuals, and Extras) located on the right. By default, the Sources tab is selected.
-
In the Feed field, select the "QtyPerCategoryFeed" and
in the Interval field, enter a value of 2, which indicates that
the chart will update every two seconds.
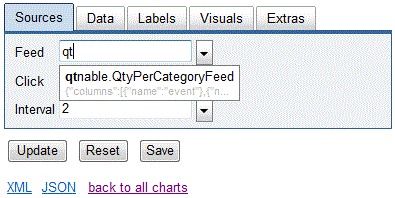
- Click Update.
-
Click the Data tab.

The Data tab is used to specify what events will be used to feed the data. Since you will be using the feed created earlier directly, click the Specified radio button.
- Click Update.
-
Click the Labels tab.
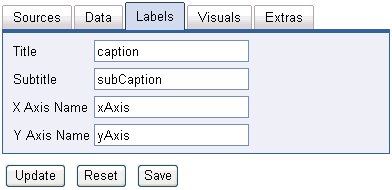
-
Provide the labels that will be used to identify the
data in the Real Time Line chart, as defined in the following table.
Parameter
Value
Title
Product Sales
Subtitle
Comparative Sales
X Axis Name
Time Line
Y Axis Name
Quantity
Notice that as you type values in the various label fields, the chart on the left updates to reflect the new data you entered.
-
Click Update and then Save.
The Save as Portlet dialog box opens.
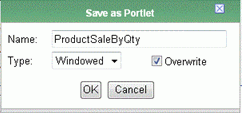
- In the Name field, type ProductSaleByQty.
- From the Type drop-down list, select Windowed, which indicates that a pop-up window will be used to display this portlet.
-
Click OK.
You are returned to the main Resources pane where the Portlets tab is now selected.

The new Real Time Column chart (ProductSaleByQty) is now added to the table.
-
Right-click ProductSaleByQty and
select View from the context menu. As a shortcut,
you can also double-click the chart name.
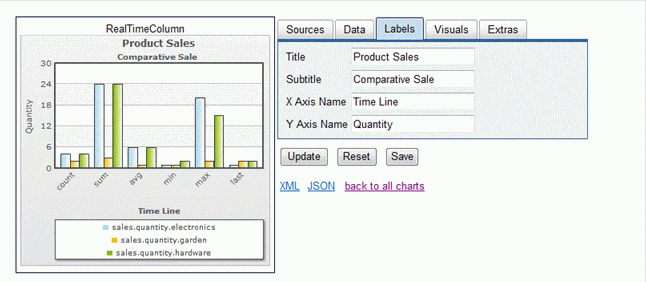
The ProductSaleByQty window opens and displays the Real Time Column chart you configured, showing the Quantity of the categories sold in the Y Axis. On the X Axis, you can see the count, sum, avg, min, max and the last number of the product that was sold as the latest sales batched file was processed.
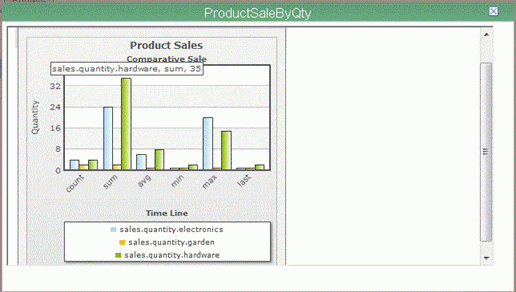
The Real Time Column chart contains multiple vertical columns, which represent the earlier runs of data (total product sales). This data will be updated using the two second interval that was configured. You can also click the name of the chart in the title bar to view the chart in full-screen mode.
-
On your file system, copy the SalesTransactions.xml file
that was created earlier into the following input directory:
C:\Sales_Demo\sales_data\in
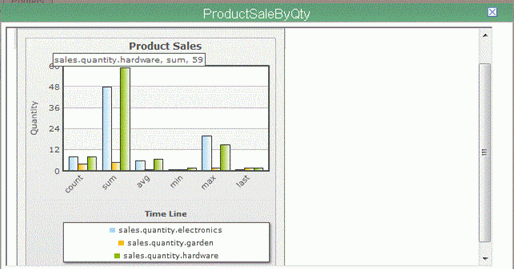
The Real Time Column chart will update in a few seconds to reflect new data.
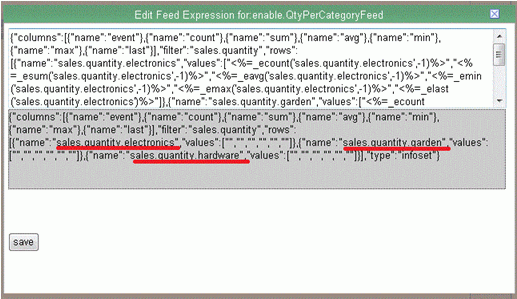
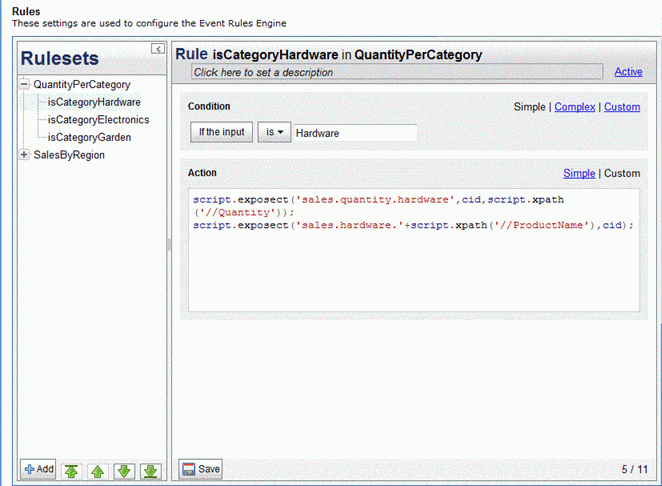
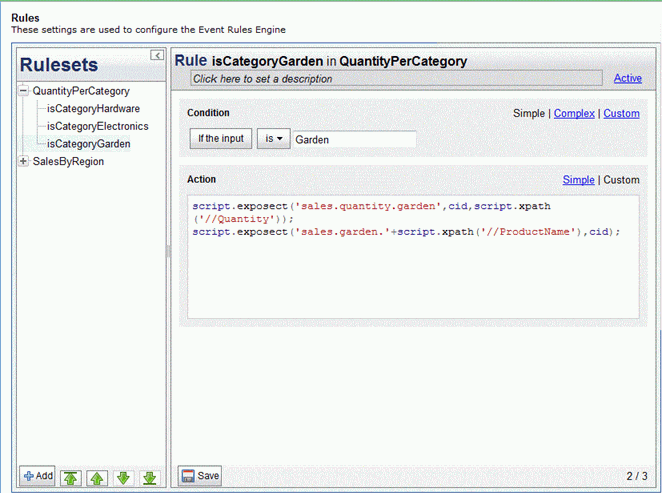
You will need to find the type of product (Product Name) being sold in each transaction. To do this you must modify the Action section of each Rule under the "QuantityPerCategory" Rule set and create business events to report the name of the product for each category.
- Go to the Rules Editor screen under Real-Time and click the QuantityPerCategory Rule set.
-
To expose another business event for each Rule in each
transaction, use the exposect() function to discover the name of
the product.
script.exposect('eventPrefix.'+script.xpath('//ProductName'),cid);The above function creates a business event with the following name convention:
eventPrefix.ProductName
-
Go to the Rules Editor screen under Real-Time and click
the QuantityPerCategory Rule set and for
each Rule, expose an event for the product name.
The following table shows the Rule configuration.
Rule
Action
isCategoryElectronics
script.exposect('sales.electronics.'+script.xpath('//ProductName'),cid);isCategoryHardware
script.exposect('sales.hardware.'+script.xpath('//ProductName'),cid);isCategoryGarden
script.exposect('sales.garden.'+script.xpath('//ProductName'),cid);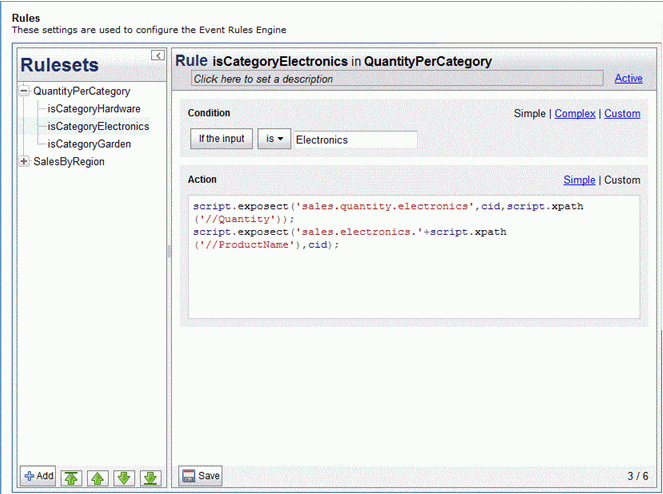
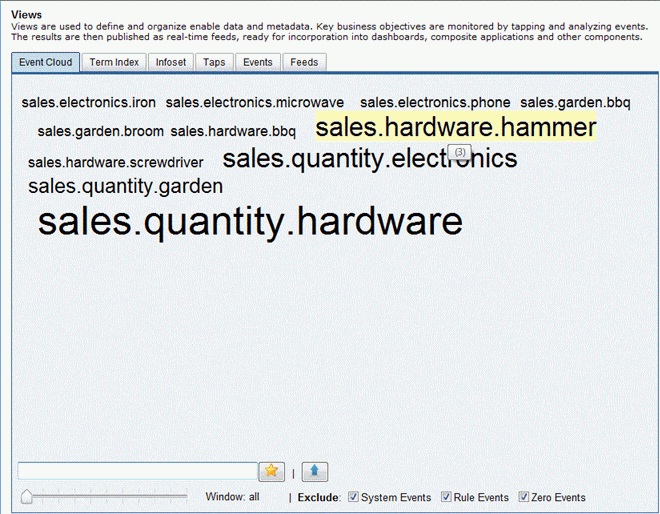
Now you can process another batched sales transaction to see the result. You will be able to see the new business events that are generated to report and the name of the product that is being sold for each transaction. You can then use the Event Cloud to see which product has the highest sales.
-
To process another batched sales transaction, repeat
steps 17 and 18 to run the batched sales transaction and step 19
to view the Views pane.
The Views pane shows all the newly created business events containing events with the prefix of the category appended to the name of the product that was sold, which is separated by a period. As you can see in the following image, the business event sales.hardware.hammer has a larger font in comparison with the other business events which were generated as a result of the processing of the latest batched transaction. This means that the hammer product has the highest sale in comparison to the rest of the products. You can also see the count of the sold product by moving your mouse on the name of the event.