Creating a Process Flow

How to:

A process flow enables the processing of business transactions. As the message flows through a process flow, it carries useful information, which can be monitored. In this example, you will create a simple process flow that receives a single batch document of sales transactions. This document will be split into individual transactions and each transaction will be processed accordingly. As the transactions are processed, the goal will be to capture real-time data about them.


Top of page

x
Procedure: How to Create an iWay Integration Tools Project and Start the Process Flow

To create an iWay Integration Tools project and start the process flow.

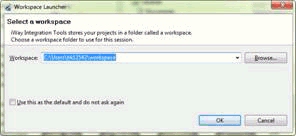
  1. Start your iWay Integration Tools by double-clicking the icon and selecting a workspace.

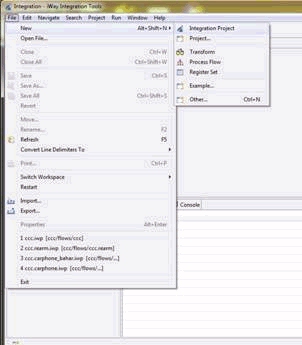
  2. Create a new project by clicking File, select on New, and then Integration Project from the context menu.

    The New Integration Project dialog box opens and prompts you for a new project name.

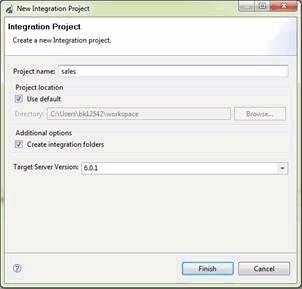
  3. In the Name field, type sales and leave the Target Server Version to be the default.
  4. Click Finish.

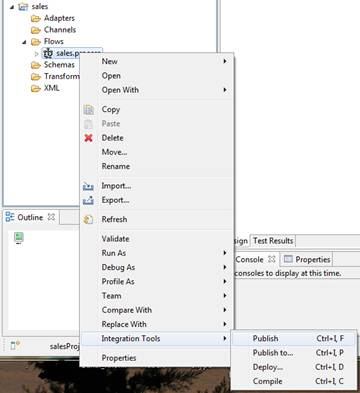
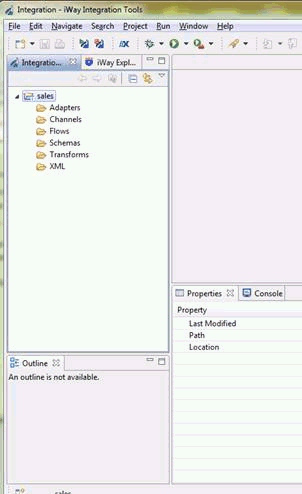
    The Project tree gets created as shown below.

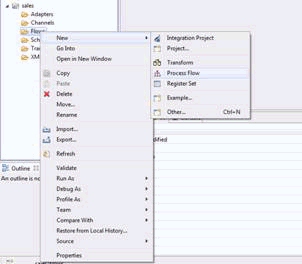
  5. Right-click the Flow folder and select New and click Process Flow from the context menu.

    The New Process Flow Wizard dialog box opens.

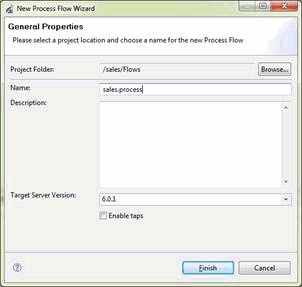
  6. In the Name field, type sales.process.
  7. In the Description field, type an optional description, for example, iWay process flow designed to process and monitor sales transactions.
  8. Click Finish.

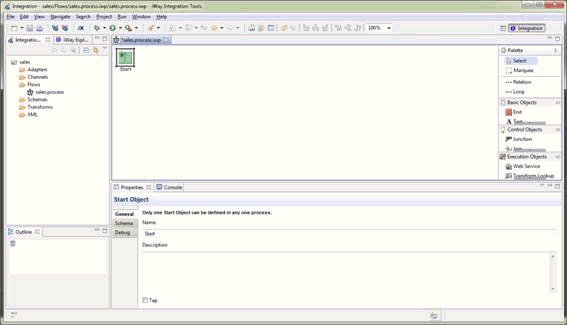
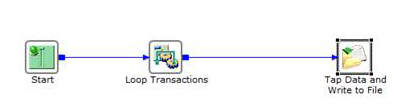
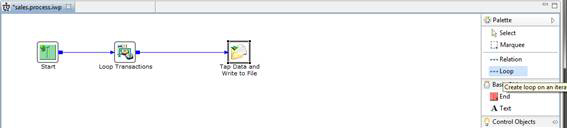
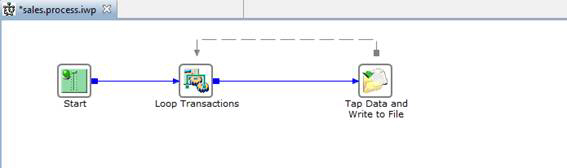
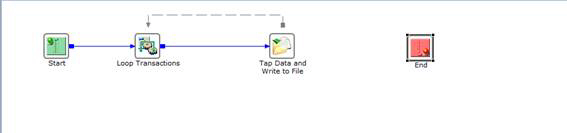
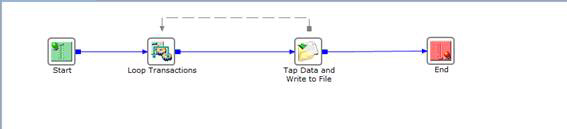
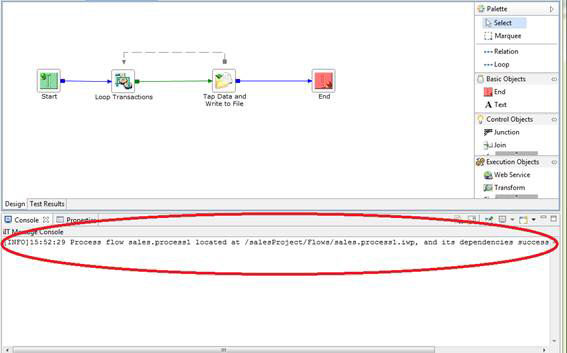
    The new sales.process node appears under the Flows folder, and the workspace displays a Start object.


Top of page

x
Procedure: How to Add and Configure an Iterator Object

In this iWay Enable application, the incoming document will contain multiple transactions. As a result, you will need to loop through each transaction and gather the appropriate data. This procedure describes how to add and configure an Iterator object to the process flow.

  1. Drag and drop the Iterator object from the Execution Objects box into the workspace.

    The New Iterator Object dialog box opens.

  2. In the Name field, type Loop Transactions, and leave the default value (Iterator object) in the Description field.
  3. Click Next.

    The Iterator Type dialog box opens.

  4. Select the XML Iterator from the drop-down menu.
  5. Click Next.

    The Iterator Object Properties dialog box opens.

  6. Provide the appropriate configuration properties that will split the incoming batched document into multiple transactions, as defined in the following table.

    Parameter

    Value

    Snip levels

    1

    Expression

    XPATH(/SALES/TRANSACTION)

    Cross Section

    false

    Output document type

    status

  7. Click Finish.

    The new Iterator object (Loop Transactions) is added to the workspace.

    Now you must connect the Start object to the Iterator object (Loop Transactions).

  8. Select the Relation object from the Palette menu box, select the Start object and drag the line into Loop Transactions object with the intention of connecting the two objects together.

    The Line Configuration dialog box opens.

  9. From the Event drop-down list, select OnCompletion and click Finish.

    This option indicates that there are no conditions that affect the path, and that the path between the two objects will always be followed.

    A connecting line with a forward arrow appears between the Start and Loop Transactions objects to indicate that a relationship has been established.


x
Procedure: How to Add and Configure a File Object

In this process flow, after the Iterator object (Loop Transactions) loops through each transaction and gathers the appropriate data, a File object is required to write the resulting transactions to an output directory.

In addition, the File object will be configured to contain two _etap() functions that will serve as a hook to indicate a point of interest to capture data along the process flow.

The following procedure describes how to add and configure a File object to the existing process flow and configure two _etap() functions.

  1. Drag and drop the File object from the Execution Object Box into the workspace and call the File object Tap Data and Write File and click Next.

  2. For the File Object Type, select File Emit Agent from the list.

  3. Click Next.

    The File Object Properties dialog box opens.

  4. Provide the appropriate configuration properties for the File object, as defined in the following table.

    Parameter

    Value

    Target Directory

    C:\Sales_Demo\data\out

    File Pattern

    sale_####.xml

    Avoid Preemitter

    true

    Return

    input

    Note: This value indicates that the message itself will remain on the processing bus and can be viewed later if required.

    Base64 Decode

    false

    Respect Transactionality

    false

    Call at EOS?

    false

  5. Click Finish.

    The new File object (Tap Data and Write to File) is added to the workspace.

  6. Use the Relation object to connect the Loop Transactions object to the Tap Data and Write to File object.

  7. Right-click the File object (Tap Data and Write to File) and select Properties from the context menu.

    The File Object dialog box opens.

  8. Click the Post-Execution tab.

  9. Click the green plus sign to add a variable to the Post-Execution tab.

    The Property Manager dialog box opens and displays the Run Time tab by default.

  10. Click the add sign (+) to define new variables.

    We need to define two taps within the Property Manager.

  11. Add the following variables that contain two _etap() functions, as defined in the following table.

    Name

    Value

    sales.process.tap1

    _etap(sales.process.tap1)

    sales.process.tap2

    _etap(sales.process.tap2)

  12. Enter the Name and the Value of the new variable as shown below for each tap.

    These variables represent the taps in the process flow that are used by the iWay Enable application. The _etap() function allows you to create taps at multiple points within the process flow without using predefined expressions. As a result, the actual process can be developed and shared between technical and business groups. Once created, each tap is made available to the iWay Service Manager Administration Console and can be configured to execute an expression to retrieve real-time data.

    Each tap can be activated and deactivated using the iWay Service Manager Administration Console. This flexibility allows you to modify real-time data capture specifications without the need to edit the existing process flow. The expressions that are used by the taps to extract real-time data must be configured using the iWay Service Manager Administration Console. As the process flow is running and transactions are flowing through the system, and each active tap is hit in the process flow, a configured expression is executed.

  13. Click OK.

    You are returned to the Property Manager dialog box.

  14. Click OK.

    When you click OK you are returned to the File Object dialog box and the first variable that you defined in the steps above will be added to the Post-Execution tab.

  15. Click the plus sign (+) one more time to add the second variable to the screen.

  16. Select sales.process.tap2 from the list and click OK.

    The File Object Properties pane appears, as shown in the following image.

    You must now create a Loop connection to be able to loop through the single batch document of sales transactions and create individual transactions.

  17. Select and drag the Loop object from the Palette menu into the workspace and click the File object (Tap Data and Write to File).

  18. Drag the line to connect the File object (Tap Data and Write to File) to the Iterator object (Loop Transactions) in the workspace.

    The following image shows how your workspace should appear.


x
Procedure: How to Add an End Object

All processing paths must terminate with an End object. To add an End object:

  1. Drag and drop the End object from the Basic Objects menu box.

    The New End Object dialog box opens.

  2. In the Name field, type End, and leave the default value (End object) in the Description field.
  3. Click Finish to accept all the default values and close the End Object Properties dialog box.

    The new End object appears in the workspace.

  4. Use the Relation object from the Palette to connect the File object (Tap Data and Write to File) with the End object.

    A connecting line with a forward arrow appears between the File object (Tap Data and Write to File) and the End object to indicate that a relationship has been established.


Top of page

x
Procedure: How to Publish the Process Flow to the iWay Registry

Once you have added and configured all the required process flow components, you are ready to publish your process flow to the iWay Registry:

  1. Right-click the sales.process process flow in the left pane and select Integration Tools and click Publish from the context menu.

    The Publishing Process 'sales.process' dialog box opens and you can select the server on which, you will be publishing your process to.

  2. Choose localhost from the list and click Finish.

    The following message on the iIT Message Console indicates that your process flow has been successfully published to the iWay Registry.


iWay Software