-
From the Windows Start menu select All Programs, iWay
6.0.1 Service Manager, and then Console.
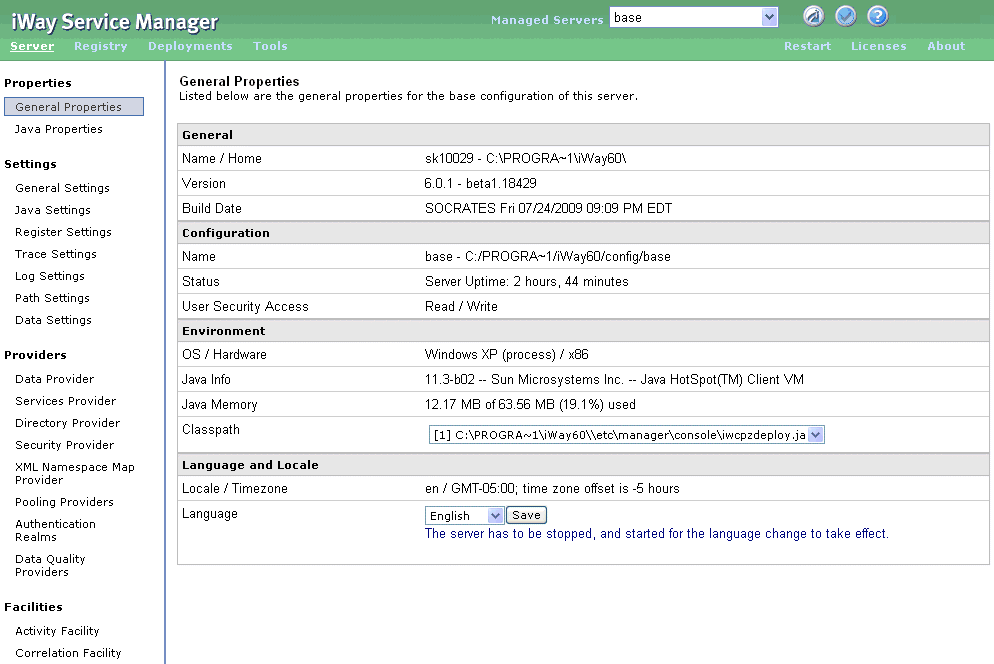
-
Click Deployments in the top pane of
the iWay Service Manager Administration Console.

The Deployments pane opens, showing links to Channels, Services, Metrics, and Web Services, in the left pane.

-
In the left pane, select Services.
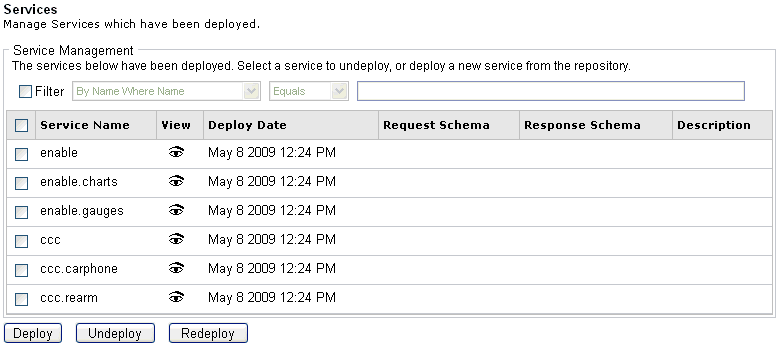
The Services pane opens, as shown in the following image.

-
Click Deploy.
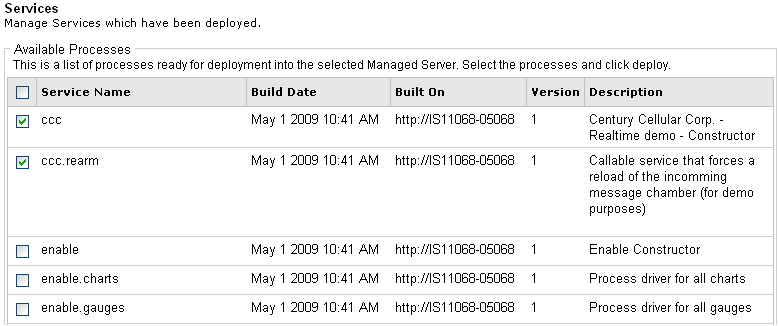
The Available Processes pane opens, as shown in the following image.
-
From the list of services available for deployment, select
the following:
- ccc (Century Cellular Corp real-time demo constructor)
- ccc.rearm (Callable service that forces a reload of the incoming message chamber)
Note: In iWay Enable, a constructor is a register set that has a process flow with the same name. It is used to initialize the feeds of an application and is automatically called as required.
-
Click Deploy.
You are returned to the Services pane, which is updated to display the services that you deployed.
The CCC demo application uses various registers, which are packaged with iWay Enable. You must import the ccc register set into the configuration to initialize the expressions for events that are related to the CCC demo. This allows for the transfer of register (event/feed) configuration from one configuration to another without having to recreate any components.
-
Click Tools in the top pane of the iWay
Service Manager Administration Console.

The iWay Service Manager Tools pane opens.
-
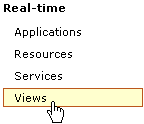
In the left pane, select Views under
the Real-time section.
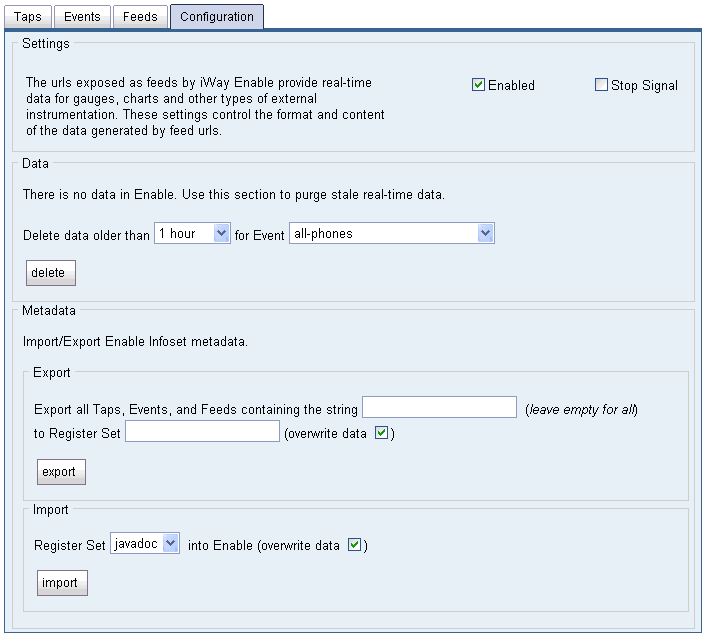
The Views pane opens, as shown in the following image.

-
Click the Configuration tab.
-
In the Import section, select ccc from
the Register Set drop-down list and click Import.

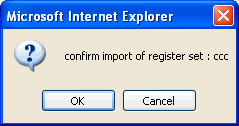
The following confirmation message is displayed.
-
Click OK.

-
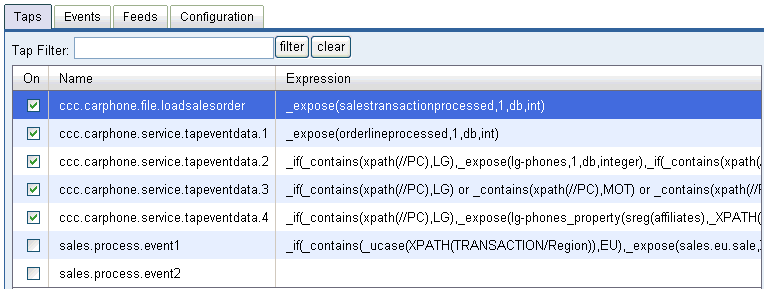
Click the Taps tab.
-
Select the check box next to the following taps to activate
them:
- ccc.carphone.file.loadsaleorder
- ccc.carphone.service.tapeventdata.1
- ccc.carphone.service.tapeventdata.2
- ccc.carphone.service.tapeventdata.3
- ccc.carphone.service.tapeventdata.4
You are now ready to build and deploy the channel, which is used to pick up incoming sales transactions from the file system.
-
Click Registry in the top pane of the
iWay Service Manager Administration Console.
-
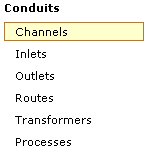
In the left pane, select Channels.
The Channels pane opens, as shown in the following image.

- Select the check box next to carphone-load, which is the File channel that is used by the CCC demo application to listen for batched sales transactions in an incoming directory. This channel will also run the process flow (ccc.carphone) and will process phone sales, which are being tapped.
-
Click Build.
The build result pane for carphone-load opens.
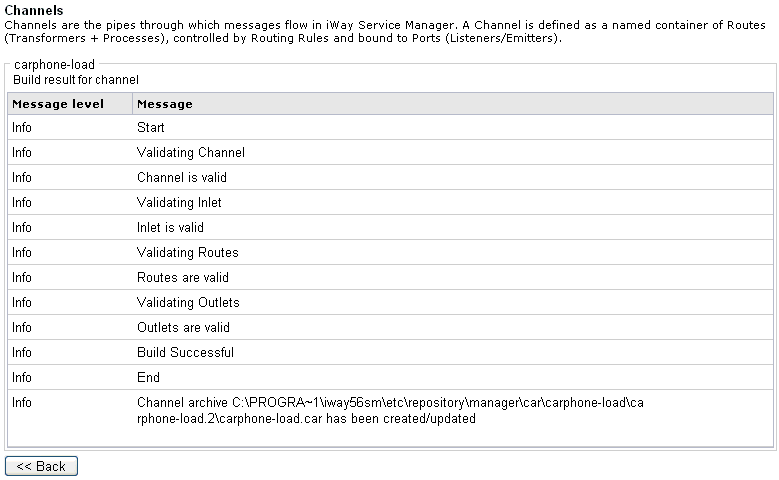
-
Click Deployments in the top pane of
the iWay Service Manager Administration Console.

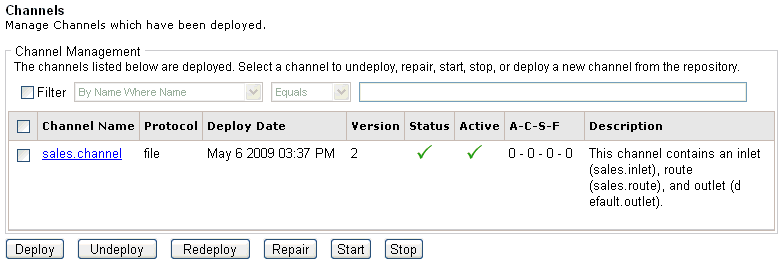
The Deployments pane opens, showing links to Channels, Services, Metrics, and Web Services, in the left pane. By default, Channels is selected and the Channel Management pane is displayed, as shown in the following image.
-
Click Deploy.
The Available Channels pane opens.

-
Select carphone-load and click Deploy.
You are returned to the Channel Management pane. Notice that carphone-load is now included in the list of deployed channels.
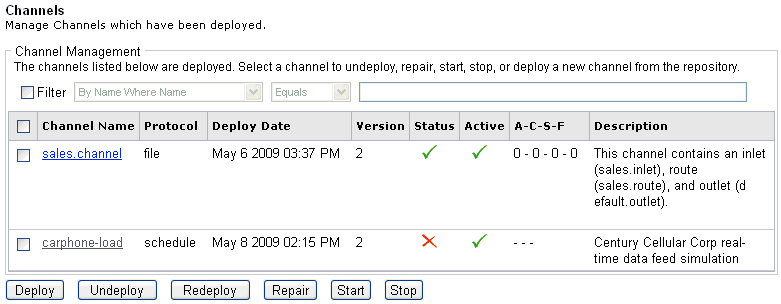
Note: Once a channel is deployed, you must also start it. A deployed channel is not started automatically. Notice the red X in the Status column for carphone-load.
-
Select the check box next to carphone-load, which
is already deployed, and click Start.
A green checkmark now displays in the Status column, indicating that carphone-load is started.
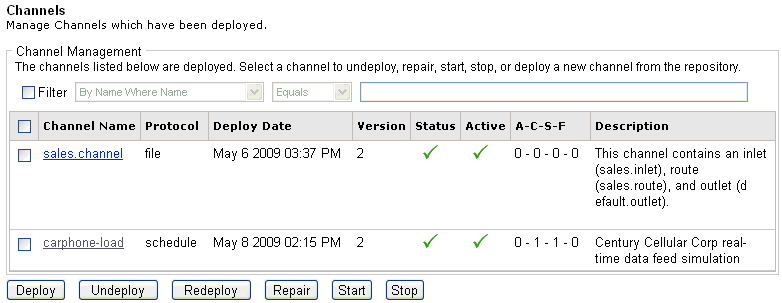
The channel (carphone-load) is now running and will process messages as they arrive.
-
Click Tools in the top pane of the iWay
Service Manager Administration Console.

The iWay Service Manager Tools pane opens.
-
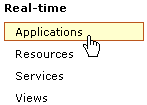
In the left pane, select Applications under
the Real-time section.
The Applications pane opens, as shown in the following image.

-
Click ccc, which is the predefined CCC
demo application that is packaged with iWay Enable.
The CCC demo application opens in a new pop-up window and displays the various gauges and charts that are used by this application.
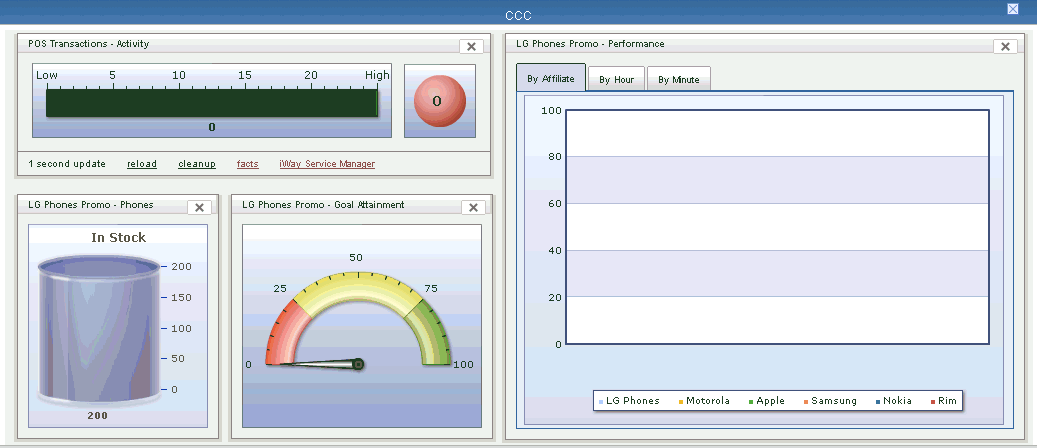
You can also click the name of the application (ccc) in the title bar to view the application in full screen mode.
Initially, the gauges and charts are inactive, since there is no incoming data to process.
-
To start the CCC demo application, click the reload link.

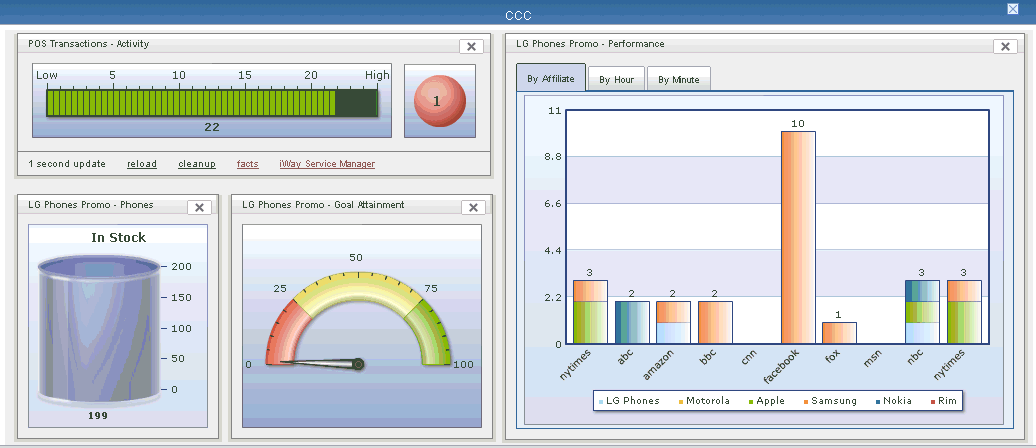
This action runs the process flow (ccc.rearm) in the background using the REST style HTTP GET call. The process flow unzips the sample messages into the incoming directory to be picked up by the the channel (carphone-load). The channel will start processing messages and in a few seconds, the gauges and charts become active to reflect the incoming mobile phone sales data.
-
Click the facts link.

A tabular view of the data is displayed, as shown in the following image.
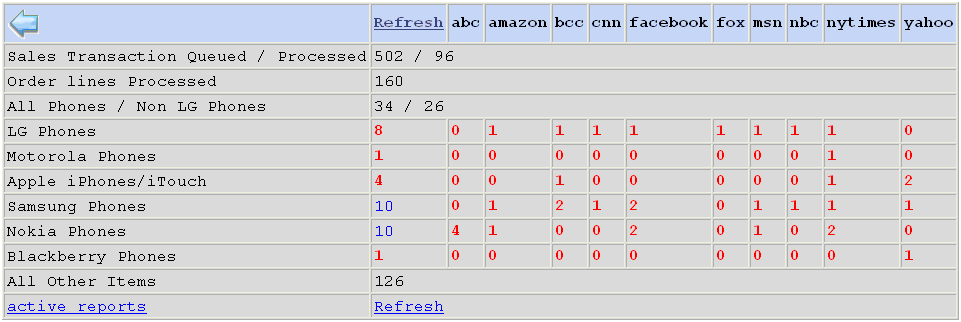
To access a more detailed view of the data, click active reports.
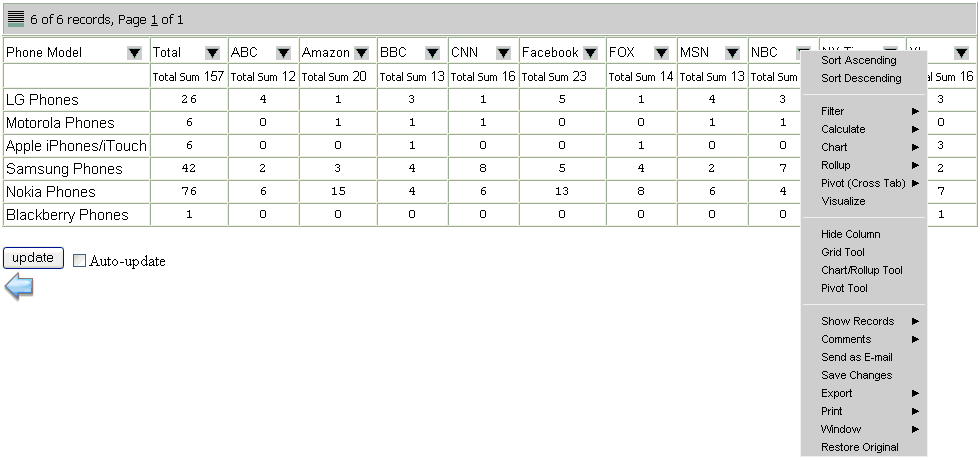
To change a particular data view, click the down arrow
 icon in any column and select
an available option. The default setting calculates a sum of phone models
sold by each affiliate. However, to change the data view to calculate
the maximum number of phones sold by a specific affiliate, click
the down arrow in a specific column, select Calculate and
click Max from the context menu, as shown
in the following image.
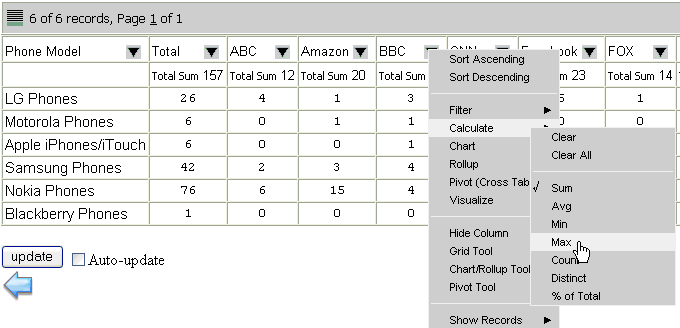
If you select the Auto-update check box, the active report is updated automatically as more date is processed. Otherwise the active report update can be performed manually by clicking the update button.