In this section:
Reference: |
The Project Properties dialog box displays the set of properties specific to your Ebix Entry project, such as project creation date and custom functions.
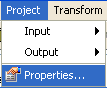
To access the Project Properties dialog box, select the Properties option from the Project menu.
The Ebix Entry Properties dialog box opens, as shown in the following image.
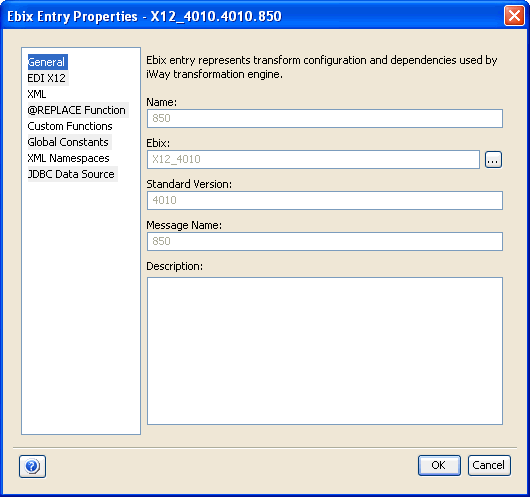
Note: In this image, Ebix entry properties of EDI X12 version 4010 are displayed, which is why the EDI X12 category is in the left pane. This category displays the properties specific to the name of the data format currently in use.
The Ebix Entry Properties dialog box includes the following categories:
The General category displays read-only information about your Ebix Entry project. You are allowed to enter or modify the description of the project (optional).
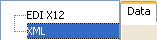
The Data Format (for example, EDI X12) category enables you to configure the metadata properties for the data format that is currently used for the Ebix Entry project. The category name is displayed exactly as the name of the data format, for example, EDI X12.
If you are configuring dictionary properties for:
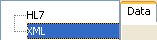
The XML category enables you to configure the XML output properties for the current message as it is being converted to XML during run time. For more information, see XML Properties.
The @REPLACE Function category is accessible via the Ebix Entry Properties dialog box. It provides a way to match and replace certain input data values instantaneously. Each individually configured replace function works similar to custom functions in that you must first define the function and then, apply it in the output node mapping value definition that you want to affect. For more information, see Using Functions.
The Custom Functions category is accessible via the Ebix Entry Properties dialog box. It enables you to manage the list of custom functions that you can build on-demand, when a Transformer pre-defined function does not exist to perform the task you require. Custom functions must be written in Java and stored in the following directory to be available for use with Transformer during design time:
<iWaySMHome>\tools\transformer\custom_functionswhere:
Is the directory where iWay Service Manager was installed.
Custom functions must be published for use at run time. For more information about using functions, see Using Functions.
The Global Constants category is accessible via the Ebix Entry Properties dialog box. It enables you to manage the list of global constants that can be utilized for your output node values. Using constants improves readability and usability of your output. You can use a defined constant in the output nodes mapping value through the @GETCONSTANT function.
Usage:
Click New to open the Global Constant Properties dialog box. In the Name column, type the name of the global constant you want to create. In the Value column, type its initial value.
Note: To define a pre-defined function (for example, @SREG) as the value, click the Browse button to the right of the Value field, which opens the Mapping Builder.
The main advantage of using global constants is reusability that ensures accuracy of your output. If the value of a particular constant should change, all instances of the constant can be changed in your mappings by modifying its value in the Global Constants Properties dialog box. Therefore, the mappings are untouched while the constant’s value is changed in every place the @GETCONSTANT function is used.
For example, a global constant called Company is defined with a value set to IBI, which will be referenced throughout a project. At some point a request to provide the company name as Information Builders, Inc. is received. If you change the value in the Global Constants Properties dialog box as shown in the following image, all instances of the Company global constant referenced in the mappings are changed automatically, without launching the Mapping Builder.
The XML Namespaces category is accessible via the Ebix Entry Properties dialog box. It enables you to load XML namespaces from other projects or to create your own. For more information, see Working With Namespaces.
The JDBC Data Source category is accessible via the Ebix Entry Properties dialog box. It enables you to manage the list of JDBC lookups used by the @JDBCLOOKUP function during transformation mappings. You can define multiple JDBC connections or add a connection from an existing project. In addition, you can define any function (for example, @SREG) as the URL. For more information, see Using Functions.
The following table lists and describes the tabs and fields for the HL7 (Health Level 7) format.
|
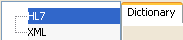
Dictionary tab: Allows you to select message, segment, datatype, and field metadata components to represent the dictionary of the HL7 message. For more information on each of these components, see Using Dictionary Builder.
| |
|
Field |
Description |
|
Message |
Represents a structural definition of an HL7 transaction in XML format. Messages consist of segments and segment groups in sequential order. To locate the file, type
the file name or click the Browse
To embed the message metadata component into your project, click the Browse button to access the Open window and then select the check box next to Embed content into transform project. |
|
Segment |
Represents a business entity, for example, Patient Identifier, in an HL7 message. Segments consist of fields in sequential order. To locate the file, type the file name
or click the Browse
To embed the segment metadata component into your project, click the Browse button to access the Open window and then select the check box next to Embed content into transform project. |
|
Datatype |
Represents the syntax for a field, for example, “ASCII String”. To locate the file, type the file name or
click the Browse
To embed the datatype metadata component into your project, click the Browse button to access the Open window and then select the check box next to Embed content into transform project. |
|
Field |
Represents a basic building block in an HL7 message. A field consists of syntax or data type. To locate
the file, type the file name or click the Browse
To embed the field metadata component into your project, click the Browse button to access the Open window and then select the check box next to Embed content into transform project. |
|
Import Dictionary from System Library |
Allows you to add metadata for your HL7 Ebix Entry project from a system library. For more information on adding system libraries, see Using Library Manager. |
|
Data tab: Allows you to configure the XML output properties for the current message as it is being converted to XML during run time.
For more information, see XML Properties. | |
The following table lists and describes the tabs and fields for the EDIFACT format.
|
Dictionary tab: Allows you to select a structure and header metadata component to represent the dictionary of the EDIFACT message. For more information on each of these components, see Using Dictionary Builder.
| |
|
Field |
Description |
|
Header |
Identifies the header component to be used for the dictionary of the Ebix Entry project. The header contains envelope details that include trading partner information and message layout. To locate the file, type its name or click the Browse
If you leave this field blank, default header information based on the respective EDIFACT standard will be provided for you. To embed this data dictionary into your project, click the Browse button to access the Open window and then select the check box next to Embed content into transform project. |
|
Structure |
Identifies the structure component to be used for the dictionary of the Ebix Entry project. The structure contains the layout and grammar of the document (or transaction of the EDI message). To locate the file, type the file name
or click the Browse
To embed this data dictionary into your project, click the Browse button to access the Open window and then select the check box next to Embed content into transform project. |
|
Import Dictionary from System Library |
Allows you to add a data dictionary from a system library. You can also select the header directly from a system library. For more information, see Using Library Manager. |
|
Data tab: Allows you to configure the EDIFACT output data of the transformation run time.
| |
|
Field |
Description |
|
Segment Delimiter |
Specifies the character that indicates the end of a segment. You can select a pre-defined segment delimiter character to use from the drop-down list. The default value is None. |
|
Segment Suffix |
Used in combination with a segment delimiter, the segment suffix is also used to indicate the end of a segment. You can select a pre-defined segment suffix to use from the drop-down list. The default value is 0A LF Line Feed. |
|
Element Delimiter |
Specifies the character that indicates the end of an element. You can select a pre-defined element delimiter character to use from the drop-down list. The default value is 2B + Plus. |
|
Component Element Delimiter |
Specifies the character that indicates the end of a component element. You can select a pre-defined component element delimiter character to use from the drop-down list. The default value is 3A : Colon. |
|
Escape Character |
Specifies the escape character to use when reading the input data. You can select a pre-defined escape character to use from the drop-down list. The default value is 3F ? Question Mark. |
|
Apply Defaults |
Applies the default values in the Data tab. |
|
Validation tab: Allows you to configure options to validate EDIFACT output data of the transformation run time.
| |
|
Field |
Description |
|
None |
To skip validation, select this option. This option button is selected by default. |
|
Use validation rule defined by the project’s output dictionary |
To validate the project using the rule defined by the output dictionary, select this option. This option is not selected by default. |
|
Apply Defaults |
Applies the default values in the Validation tab by selecting the None option. |
|
Data tab (XML Output): Allows you to configure the XML output properties for the current message as it is being converted to XML during run time.
For more information, see XML Properties. | |
The following table lists and describes the tabs and fields for the EDI HIPAA format.
|
Dictionary tab: Allows you to select a structure and header metadata component to represent the dictionary of the EDI HIPAA message. For more information on each of these components, see Using Dictionary Builder.
| |
|
Field |
Description |
|
Header |
Identifies the header component to be used for the dictionary of the Ebix Entry project. The header contains envelope details that include trading partner information and message layout. To locate the file, type the file name or click the Browse
If you leave this field blank, default header information based on the respective EDI HIPAA standard will be provided for you. To embed this data dictionary into your project, click the Browse button to access the Open window and then select the check box next to Embed content into transform project. |
|
Structure |
Identifies the structure component to be used for the dictionary of the Ebix Entry project. The structure contains the layout and grammar of the document (or transaction of the EDI message). To locate the file, type the file name or click the Browse button. To embed this data dictionary into your project, click the Browse button to access the Open window and then select the check box next to Embed content into transform project. |
|
Import Dictionary from System Library |
Allows you to add a data dictionary from a system library. You can also select the header directly from a system library. For more information, see Using Library Manager. |
|
Data tab: Allows you to configure the EDI HIPAA output data of the transformation run time.
| |
|
Field |
Description |
|
Segment Delimiter |
Specifies the character that indicates the end of a segment. You can select a pre-defined segment delimiter character to use from the drop-down list. The default value is 7E ~ Tilde. |
|
Segment Suffix |
Used in combination with a segment delimiter, the segment suffix is also used to indicate the end of a segment. You can select a pre-defined segment suffix to use from the drop-down list. The default value is None. |
|
Element Delimiter |
Specifies the character that indicates the end of an element. You can select a pre-defined element delimiter character to use from the drop-down list. The default value is 2A * Asterisk. |
|
Component Element Delimiter |
Specifies the character that indicates the end of a component element. You can select a pre-defined component element delimiter character to use from the drop-down list. The default value is 3A : Colon. |
|
Escape Character |
Specifies the escape character to use when reading the input data. You can select a pre-defined escape character to use from the drop-down list. The default value is 5C \ Backslash. |
|
Apply Defaults |
Applies the default values in the Data tab. |
|
Validation tab: Allows you to configure options to validate EDI HIPAA output data of the transformation run time.
| |
|
Field |
Description |
|
None |
To skip validation, select this option. This option button is selected by default. |
|
Use validation rule defined by the project’s output dictionary |
To validate the transform using the rule defined by the project’s output dictionary, you select this option. This option is not selected by default. Selecting this option activates the Ignore NTE Segment check box. |
|
Ignore NTE Segment |
Select this check box if you do not want to validate mapping rules specific to NTE. This check box is not selected by default. This allows NTE segment translations to appear in the XML document in the same sequence as that of the input document. However if not checked, specific rules can be applied (in the dictionary) to position them accordingly. NTE is a floating segment that can can occur in any place within a document and is applicable to versions prior to EDI X12 version 4010. Note: This check box is not available for EDIFACT. |
|
Apply Defaults |
Applies the default values in the Validation tab by selecting the None option. |
|
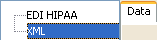
Data tab (XML Output): Allows you to configure the XML output properties for the current message as it is being converted to XML during run time.
For more information, see XML Properties. | |
The following table lists and describes the tabs and fields for the SWIFT format.
|
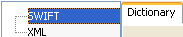
Dictionary tab: Allows you to select a structure metadata component to represent the dictionary of the SWIFT message. For more information on this component, see Using Dictionary Builder.
| |
|
Field |
Description |
|
Structure |
Identifies the structure component to be used for the dictionary of the Ebix Entry project. The structure contains the layout and grammar of the document (or transaction of the SWIFT message). To locate the file, you type the file
name or click the Browse
To embed the message into your project, click the Browse button to access the Open window and then select the check box next to Embed content into transform project. |
|
Import Dictionary from System Library |
Allows you to add a data dictionary from a system library. For more information on adding system libraries, see Using Library Manager. |
|
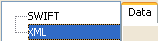
Data tab (XML Output): Allows you to configure the XML output properties for the current message as it is being converted to XML during run time.
For more information, see XML Properties. | |
The following table lists and describes the tabs and fields for the EDI X12 format.
|
Dictionary tab: Allows you to select a structure and header metadata component to represent the dictionary of the EDI X12 message. For more information on each of these components, see Using Dictionary Builder.
| |
|
Field |
Description |
|
Header |
Identifies the header component to be used for the dictionary of the Ebix Entry project. The header contains envelope details that include trading partner information and message layout. To locate the file, type the file name or click the Browse
If you leave this field blank, default header information based on the respective EDI X12 standard will be provided for you. To embed this data dictionary into your project, click the Browse button to access the Open window and then select the check box next to Embed content into transform project. |
|
Structure |
Identifies the structure component to be used for the dictionary of the Ebix Entry project. The structure contains the layout and grammar of the document (or transaction of the EDI message). To locate the file, type the file name
or click the Browse
To embed this data dictionary into your project, click the Browse button to access the Open window and then select the check box next to Embed content into transform project. |
|
Import Dictionary from System Library |
Allows you to add a data dictionary from a system library. You can also select the header directly from a system library. For more information, see Using Library Manager. |
|
Data tab: Allows you to configure the EDI X12 output data of the transformation run time.
| |
|
Field |
Description |
|
Segment Delimiter |
Specifies the character that indicates the end of a segment. You can select a pre-defined segment delimiter character to use from the drop-down list. The default value is 7E ~ Tilde. |
|
Segment Suffix |
Used in combination with a segment delimiter, the segment suffix is also used to indicate the end of a segment. You can select a pre-defined segment suffix to use from the drop-down list. The default value is None. |
|
Element Delimiter |
Specifies the character that indicates the end of an element. You can select a pre-defined element delimiter character to use from the drop-down list. The default value is 2A * Asterisk. |
|
Component Element Delimiter |
Specifies the character that indicates the end of a component element. You can select a pre-defined component element delimiter character to use from the drop-down list. The default value is 3A : Colon. |
|
Escape Character |
Specifies the escape character to use when reading the input data. You can select a pre-defined escape character to use from the drop-down list. The default value is 5C \ Backslash. |
|
Apply Defaults |
Applies the default values in the Data tab. |
|
Validation tab: Allows you to configure options to validate EDI X12 output data of the transformation run time.
| |
|
Field |
Description |
|
None |
To skip validation, select this option. This option button is selected by default. |
|
Use validation rule defined by the project’s output dictionary |
To validate the transform using the rule defined by the project’s output dictionary, select this option. This option is not selected by default. Selecting this option activates the Ignore NTE Segment check box. |
|
Ignore NTE Segment |
Select this check box if you do not want to validate mapping rules specific to NTE. This check box is not selected by default. This allows NTE segment translations to appear in the XML document in the same sequence as that of the input document. However if not checked, specific rules can be applied (in the dictionary) to position them accordingly. NTE is a floating segment that can occur in any place within a document and is applicable to versions before 4010. Note: This check box is not available for EDIFACT. |
|
Apply Defaults |
Applies the default values in the Validation tab by selecting the None option. |
|
Data tab (XML Output): Allows you to configure the XML output properties for the current message as it is being converted to XML during run time.
For more information, see XML Properties. | |
The following table lists and describes the XML properties that are available for each message format in the Project Properties dialog box (XML category).
|
Field |
Description |
|---|---|
|
Node Indent |
Used to format the output, it indicates the number of spaces to indent the node. The default value is 4. For example, if node indent is 0, then all elements are aligned at the margin as follows: <a> <b> </b> <c> </c> </a> If node indent is 4, all elements except root are indented 4 spaces as follows: <a>
<b>
</b>
<c>
</c>
</a> |
|
Optimization |
Enables you to retain or omit empty elements and attributes. To retain empty elements and attributes, select Do Not Optimize. This is the default value. To omit empty elements and attributes, select Remove All Empty Nodes. To omit empty elements, including empty nested groups, select Remove Empty Group Nodes. |
|
Include XML Declaration in the output data |
Automatically inserts an XML declaration into the output data structure. This option is selected by default. |
|
Character Encoding |
Choose the character encoding from the drop-down list. By default, UTF-8 is selected. |
|
Stylesheet Type (Optional) |
Choose either text/xsl or text/css. By default, text/xsl is selected. Note: This option is an HTML property that is rarely used in plain XML format. |
|
Stylesheet File (Optional) |
To locate the style sheet file you want to use for the output, type the full path or click browse (...) to navigate to the file. Note: This option is an HTML property that is rarely used in plain XML format. |
|
Header (Optional) |
Define the header information you want in the output. Note: This option is an HTML property that is rarely used in plain XML format. |
|
Footer (Optional) |
Define the footer information you want in the output. Note: This option is an HTML property that is rarely used in plain XML format. |
|
Apply Defaults |
Applies the default values in the Data tab. |
| iWay Software |
 button.