In this section: |
You can make changes to the Transformer user interface according to your preferences. For example, you can choose the location of project tabs or set the file path formatting used in the browse file dialogs.
Interface options are available through the Options dialog box, which you can access by selecting Options from the Tools menu.
When the Options dialog box opens, the General category appears by default as shown in the following image.
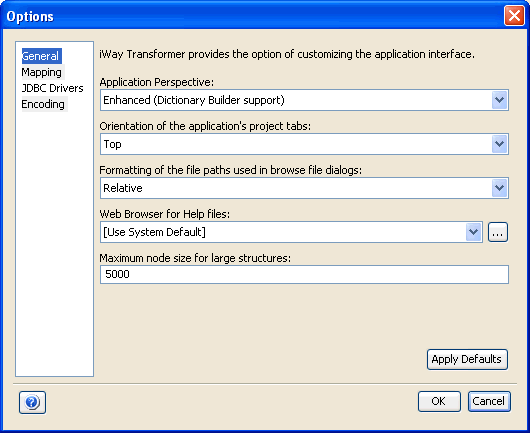
The General category includes the following options to customize the interface:
You can switch between two application perspectives in Transformer:
The enhanced perspective (enabled by default) provides support for Dictionary Builder in Transformer and allows you to work with both Transform and Ebix Entry projects. It also introduces a new and improved Graphical User Interface.
Note: The Enhanced (Dictionary Builder support) mode of iWay Transformer is now a preferred design-time environment for all transformations. As of iSM release 5.6, the Standard (Transform Project only) mode is functionally stabilized.
The standard perspective allows you to work only with Transform projects. Transform project files have .gxp extensions. For more information on how to switch to the standard (Transform project only) perspective, see How to Switch to the Standard (Transform Project Only) Application Perspective.
Specifies where the project tab appears within the working pane of Transformer. The options are Top, Left, Bottom, or Right.
Enables you to select the format of a file path in Transformer. The options are Absolute or Relative (default).
Enables you to select a Web browser that will be used to display Transformer online help. By default, Transformer uses your operating system's default Web browser. This option can be used if you want to display Transformer online help using a different Web browser, for example, Firefox.
Sets the maximum number of nodes that Transformer is allowed to display for your projects by default. You can increase this value if you expect to work with larger documents, particularly in XML format. The default value is 5000 nodes. When this limit is reached, you are prompted to load another batch of 5000 nodes. You can also increase this value. If a higher value is required, you may need to modify your Java Virtual Machine (JVM) options. For more information, see Customizing Java Properties.
To switch to the Standard (Transform Project Only) application perspective for Transformer:
The Options dialog box opens as shown in the following image.
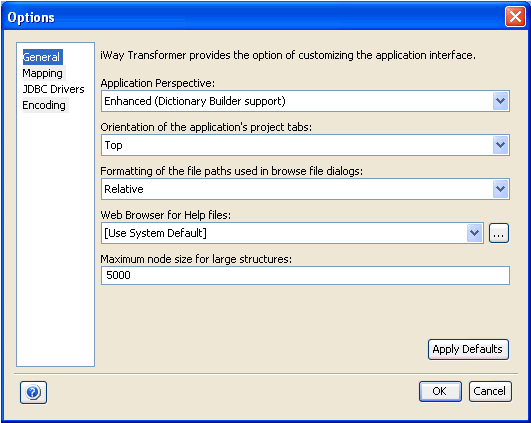
Notice that Enhanced (Dictionary Builder support) is selected in the Application Perspective drop-down-list.
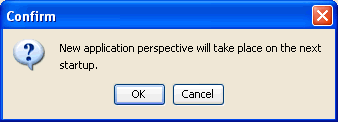
The Confirm dialog box opens.
The Mapping category allows you to customize options for the Mapping Builder facility and includes two tabs as shown in the following image. The Output Items tab has option buttons for selecting an alternative to illegal characters. You can use the Dragging Options tab to map between input and output nodes.
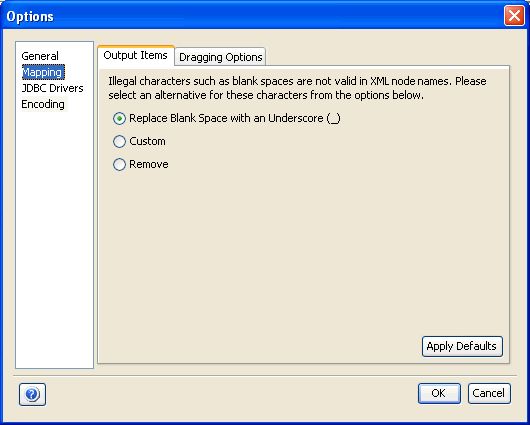
The following options are available on the Output Items tab:
Choose this option to replace blank spaces with an underscore. For example, a "Purchase Order" field in the input would be saved as "Purchase_Order" in the output document. This is useful if a certain data format is required by the receiver.
Choose this option to define a character to use in the place of a blank space.
Choose this option to remove blank spaces.
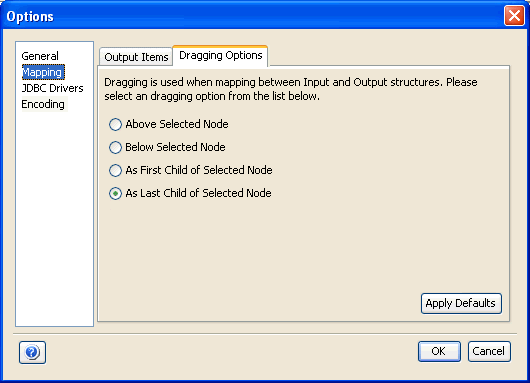
After dragging a node from the Input pane to the Output pane, you can select whether to have the node placed above or below a selected element or whether to have a node placed as the first or last child of a selected element.
The following image shows the Dragging Options tab with available option buttons for your input and output items.
The JDBC Drivers category allows you to specify JDBC driver configurations that can be shared between applications. The following image shows the JDBC Drivers category, which lists the Sun, Oracle, and IBM drivers. You can use JDBC drivers when configuring the REPLACE function (@REPLACE) and JDBC Data Source configuration of your project. For more information, see Introducing Transform Projects and Introducing Ebix Entry Projects.
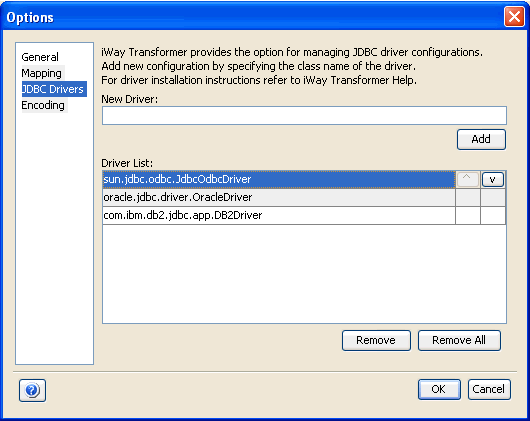
The drivers that are listed typically are not included with Transformer, but can be easily downloaded from the Web. They are listed because they are common JDBC drivers.
To use one of the drivers, you must copy the actual driver to the following directory:
<iWaySMHome>\tools\transformer\jdbc_driverswhere:
Is the directory where iWay Service Manager was installed.
Then, you must add the file name to the list of JDBC drivers by specifying the driver in the New Driver field and clicking the Add button.
Note: The JDBC drivers that are available here are only used during design time. For run-time usage, you must copy the JDBC drivers to the following directory:
<iWaySMHome>\etc\manager\transformations\jdbc_driverswhere:
Is the directory where iWay Service Manager was installed.
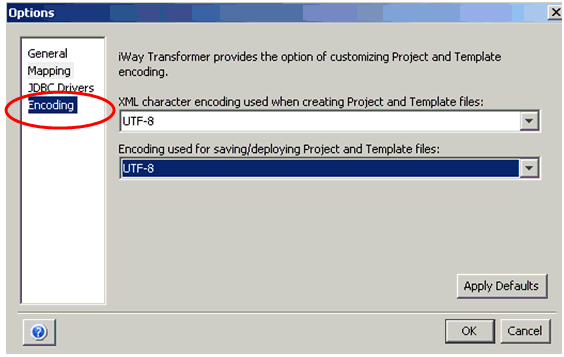
The following image shows the Encoding category, which provides the option of customizing Project and Template encoding.
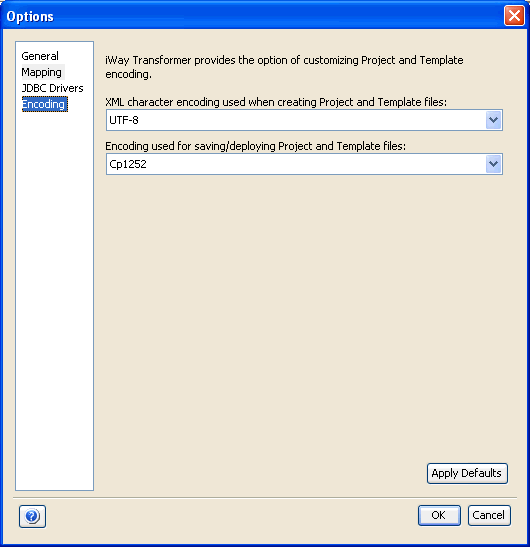
The following two encoding options are available from the drop-down lists:
You can select the encoding to use for the characters in the file. By default, the character encoding in Transformer is set to UTF-8.
You can select the default file encoding. Choose this if you are saving or deploying project and template files to a machine that uses a different language format. By default, the file encoding is set to the same value that is used by your operating system.
Character and file encoding options are useful if the mappings of your project contain characters of an encoding type that is different from the default specified type. As a result, you can customize these options to match your locale, which can be determined by checking your operating system properties.
You can select the encoding to use for the characters in the file. By default, the character encoding in Transformer is set to UTF-8.
For example, in the image on the previous page, the encoding values are chosen based on what the operating system is using, with the default language set as English. In this case, the character encoding is set to one byte Unicode format (UTF-8) and file encoding is set to Windows Latin-1 (Cp1252).
On the other hand, if you were working in an environment where the operating system's default language was Japanese, you would need to customize these options. In order to support the Japanese characters in your project, you have to set character encoding to two byte Unicode format (UTF-16). In addition, the file encoding would be set to Windows Japanese (MS932) by default.
iWay Transformer now supports encoding for IBM 1047 (z/OS platform).
This section lists the best practices that are recommended when handling special characters using iWay Transformer.

| iWay Software |