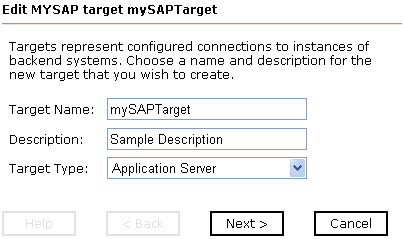
To connect to an mySAP system, you must define a new target. The target holds your logon parameters for the mySAP system.
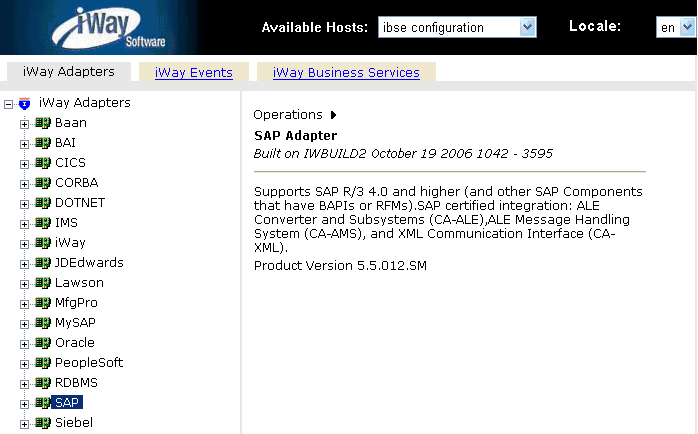
The following image shows a window with a navigation pane on the left that lists supported adapters. The right pane displays information about a selected adapter.
To create a new target:
-
In the left pane, click the MySAP node.
Descriptive information (for example, title and product version) about the iWay Application Adapter for mySAP ERP appears in the right pane.
-
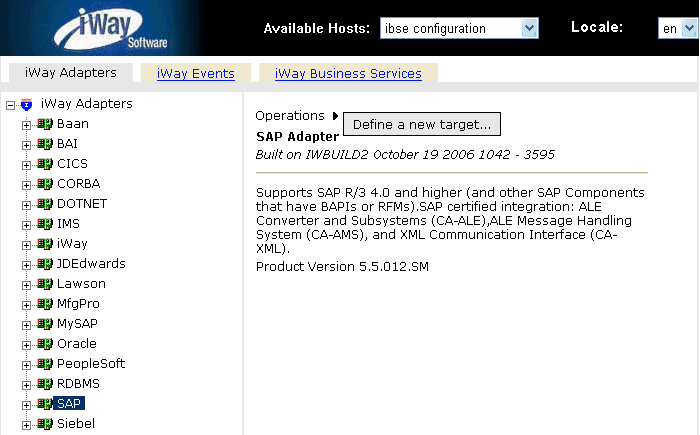
In the right pane, move the pointer over Operations.
The Define a new target menu option appears as well as title and product version information for the adapter in the right pane as shown in the following image.
-
Select Define a new target.
The Add a new MYSAP target pane opens on the right as shown in the following image.
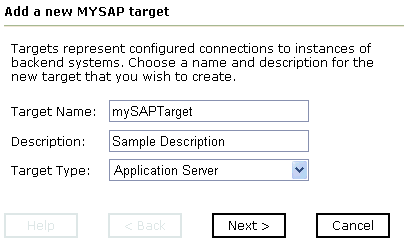
- In the Target Name field, type a name for the target, for example, mySAPTarget.
- In the Target Description field, type a brief description (optional).
-
From the Target Type drop-down list, select the type of target
to connect to.
The default value is Application Server.
-
Click Next.
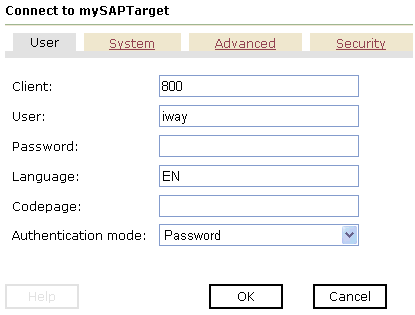
The Set connection info pane opens on the right. The following tabs are available: User, System, Advanced, and Security. The User tab is active as shown in the following image.
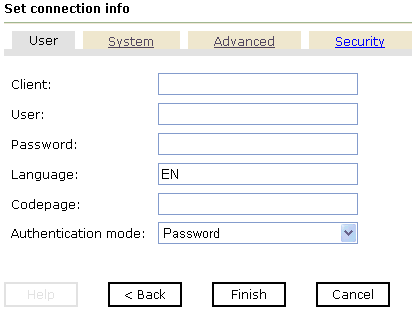
The User (required) tab enables you to provide authentication information for the mySAP system to which you are connecting.
Note: For systems based on 6.40 UNICODE, all parameter values are case sensitive. As a result, the values you specify using iWay Explorer must match those that have been configured on your system. This also applies to user names and passwords.
- In the Client field, type the client number defined for the mySAP application for client communications.
- In the User field, type a valid user ID for the mySAP application.
- In the Password field, type a valid password for the mySAP application.
-
In the Language field type a language key.
EN (English) is the default.
- In the Codepage field, type a character code page value.
-
From the Authentication mode drop-down list, select Password, Logon
ticket (SSO2), or Logon ticket (X509).
Secure Network Communications (SNC) provides protection for the communication links between the distributed components of an ERP System. Using SNC, mySAP ERP can support products that adhere to the GSS-API Version 2 standard. SNC supports application level (end-to-end security), Smartcard authentication, and Single Sign-On (SSO).
Note: Depending on the mySAP system release, logging on using SSO or X.509 certificates is supported.
For SSO, specify the user to be $MYSAPSSO2$ and pass the base64 encoded ticket as the passwd parameter.
For X509, specify the user to be $X509CERT$ and pass the base64 encoded certificate as the passwd parameter.
For more information, see your mySAP system documentation.
-
Click the System tab.
The System tab becomes available as shown in the following image.
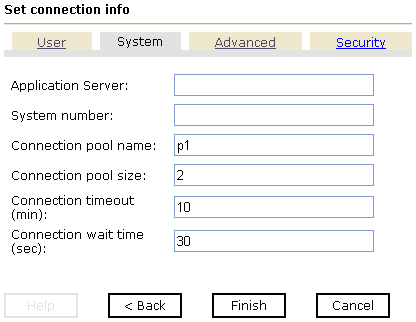
The System (required) tab enables you to provide the application server name, system number, and connection pooling information for the mySAP system to which you are connecting.
Note: The mySAP connection parameters are consistent with those found in your mySAP system. For more information on parameter values that are specific to your mySAP configuration, consult your mySAP system administrator.
- In the Application Server field, type the host name or IP address for the computer that is hosting the mySAP application.
- In the System Number field, type the system number defined to mySAP for client communications.
- In the Connection pool name field, enter the name of your mySAP connection pool. A default value (p1) is already provided.
-
In the Connection pool size field, specify the number of client connections
in a pool you want to make available to mySAP for Web service calls. A
default connection pool size of 2 is available by default.
Note: A value of 1 does not create a connection pool. Instead, a single mySAP connection with sequential processing is shared. A pooled connection invokes multiple connections to SAP with parallel processing.
If you are using iWay Explorer to create Web services, the connection pool size value is used by your Web service during runtime. As a result, ensure that the connection pool size is sufficient for your purposes.
- In the Connection timeout (min) field, specify a timeout value for your connection pool in minutes. 10 minutes is the default value.
-
In the Connection wait time (sec) field, specify a wait time
for your connection pool in seconds. 30 seconds is the default value.
Connections to an ERP server take up valuable resources on both the client and the remote server. You can create a pool of connections to minimize the resource and time constraints. In estimating the size of the pool, you may calculate pool size by the amount of server resources to be consumed, the number and size of the documents to be received, and the size of your Java Virtual Machine. The section of mySAP documentation "Memory Management (BC-CST-MM)" explains in detail the resources required on the mySAP system.
-
To view the Advanced tab, click Advanced.
The Advanced tab becomes available as shown in the following image.
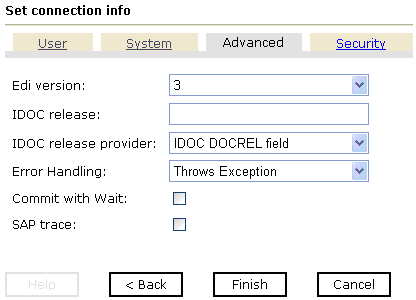
The Advanced tab enables you to specify your EDI and IDoc versions, and configure error handling. The following fields are available:
-
From the EDI version drop-down list, select the Electronic
Data Interchange (EDI) document version you are using with the iWay Application
Adapter for mySAP ERP.
Version 3 is the default value.
- In the IDOC release field, specify the IDOC versioning you want to use for your connection.
- From the IDOC release provider drop-down list, select, IDOC DOCREL field (default), SAP release, or user input.
-
From the Error Handling drop-down list:
If your application is Java centric, select Throws Exception so that code components can catch the exception and react accordingly.
If your application is document based, select Creates Error Document to create an XML document that contains the Java exception.
It is up to your application to read the XML document and obtain the error.
-
If a high degree of accuracy is required in your application, select
the Commit with Wait check box.
The adapter waits until all records are physically written to the database before returning from the function call. The "Commit With Wait" has a performance impact on adapter performance, so consider carefully before selecting it. The commit behavior of BAPIs is described in the mySAP documentation under "BAPI Programming Guide and Reference (CA-BFA)."
All mySAP Business Objects that change data must commit work to the database. Some BAPIs developed in version 3.1 of the ERP system use an internal commit behavior, and their commit behavior cannot be changed by the adapter. As soon as they are called, they commit the work they did.
BAPIs developed since release 3.1 use the external commit method. The adapter issues a commit command, and the commit is put in the database queue. If there is an application error in the first part of the commit, the error message "Posting could not be carried out" is returned, and the adapter rolls back the transaction. If in writing to the database, a database error occurs, a short dump is issued in the database records of mySAP, but no message is returned to the adapter about the failure.
This option is disabled by default.
- To enable SAP traces, select the SAP trace check box
-
From the EDI version drop-down list, select the Electronic
Data Interchange (EDI) document version you are using with the iWay Application
Adapter for mySAP ERP.
-
To view the Security tab, click Security.
The Security tab becomes active as shown in the following image.
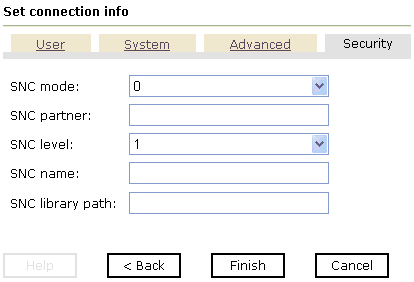
The Security tab enables you to specify Secure Network Communication (SNC) information for the mySAP system to which you are connecting.
SNC provides protection for the communication links between the distributed components of an ERP System. Using SNC, mySAP ERP can support products that adhere to the GSS-API Version 2 standard. SNC supports application level (end-to-end security), Smartcard authentication, and SSO.
If you are using SAP Enterprise Portal, the J2EE engine generates the SAP logon ticket automatically. A possible SNC scenario would be from SAP Enterprise Portal to the iWay Application Adapter for mySAP ERP.
If you want to use SAP logon tickets to enable SSO to non-SAP components, consult the SAP documentation regarding Pluggable Authentication Services. A possible SNC scenario in this case would be from a non-SAP Enterprise Portal to the iWay Application Adapter for mySAP ERP.
-
To enable SNC, select 1 from the SNC
mode drop-down list.
By default, SNC is disabled.
- In the SNC partner field, type the name of the RFC server or message server (load balancing) that provides the SNC services.
- From the SNC level drop-down list, select the version of the SNC library.
- In the SNC name field, type the name of the SNC library you are using.
- In the SNC library path field, type the path to the SNC library.
-
To enable SNC, select 1 from the SNC
mode drop-down list.
-
After you provide all the required information for your target,
click Finish.
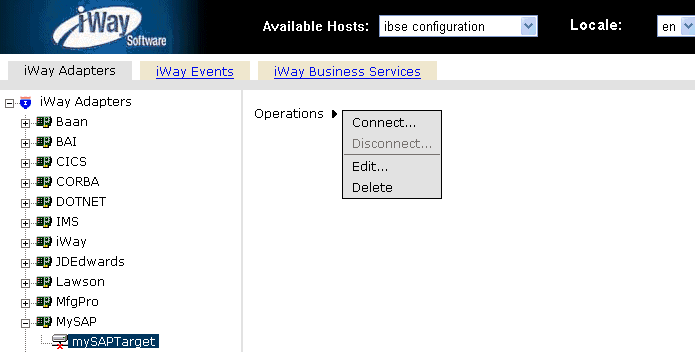
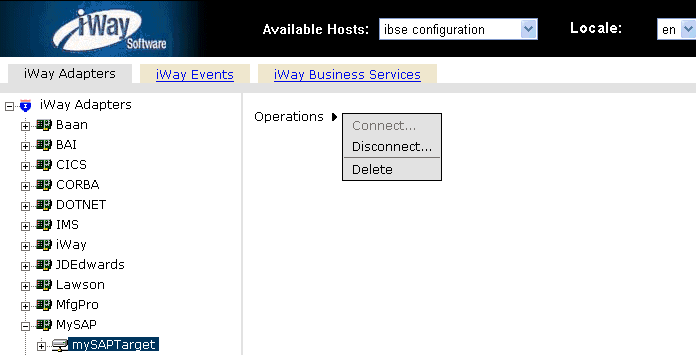
The mySAP target appears below the sap node in the left pane as shown in the following image. You are now ready to connect to your mySAP target.

