To create an outbound message using the Salesforce Web console:
- Log on to the Salesforce Web console.
-
Click Setup.
The Personal Setup page opens.
-
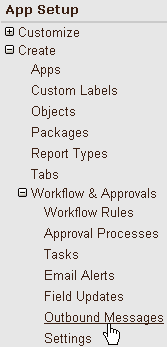
In the left pane, expand Create, Workflow
& Approvals, and click Outbound Messages.
The All Outbound Messages page opens.
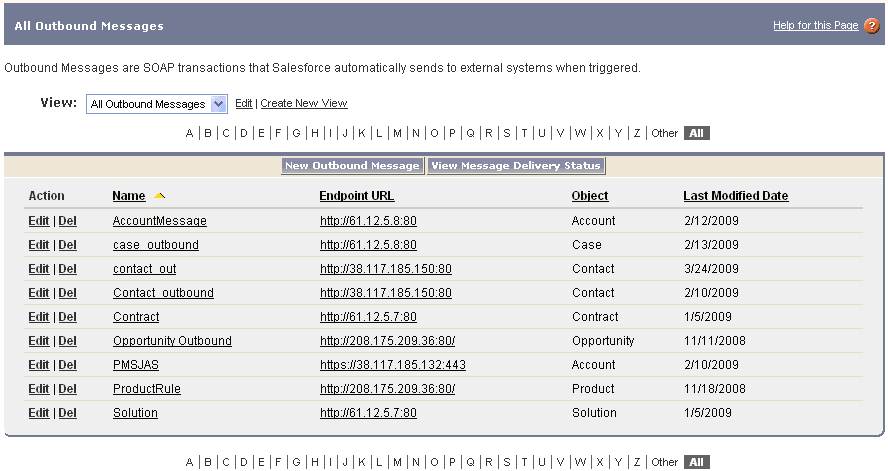
-
Click New Outbound Message to define
a new outbound message.
The New Outbound Message page opens and Step 1: Select object is displayed.
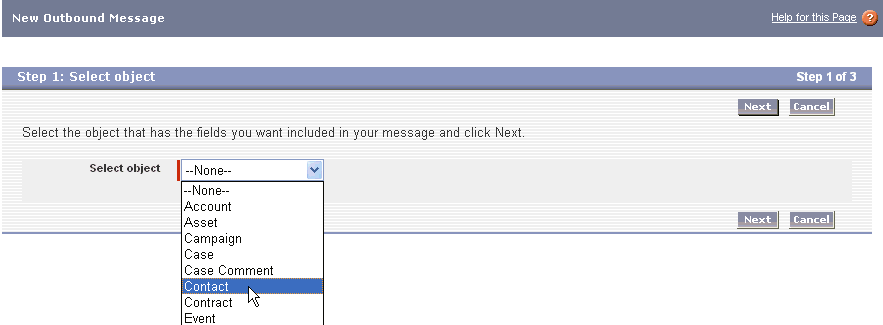
- From the Select object drop-down list, select the object that has the information you want included in the outbound message, for example, Contact.
-
Click Next.
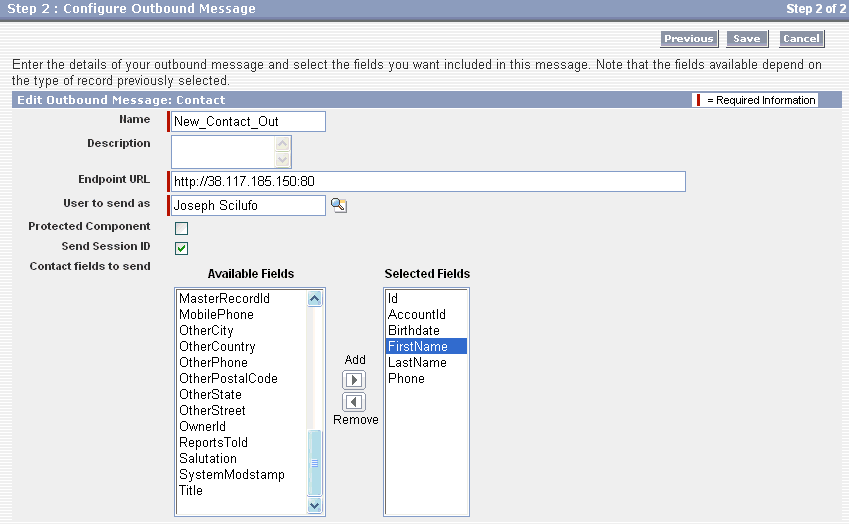
The Step 2: Configure Outbound Message page opens.
-
Perform the following steps:
- In the Name field, enter a name for this outbound message, for example, New_Contact_Out.
- In the Description field, enter a brief description for this outbound message (optional).
-
In the Endpoint URL field, enter the URL where the channel
that is configured using iWay Explorer is listening. The Salesforce
system sends a SOAP message to this channel.
For security reasons, Salesforce restricts the outbound ports you may specify to one of the following:
- 80: This port only accepts HTTP connections.
- 443: This port only accepts HTTPS connections.
- 7000-10000 (inclusive): These ports accept HTTP or HTTPS connections.
-
In the User to send as field, specify the Salesforce user to
use when sending the outbound message.
This user controls data visibility for the outbound message that is sent to the channel.
- Select the Send Session ID option if you want a Salesforce session ID to be included in the outbound message.
- From the Available Fields list, select the field(s) you want included in the outbound message and click Add to move them to the Selected Fields list.
-
Click Save.
The Outbound Message (New_Contact_Out) page opens.
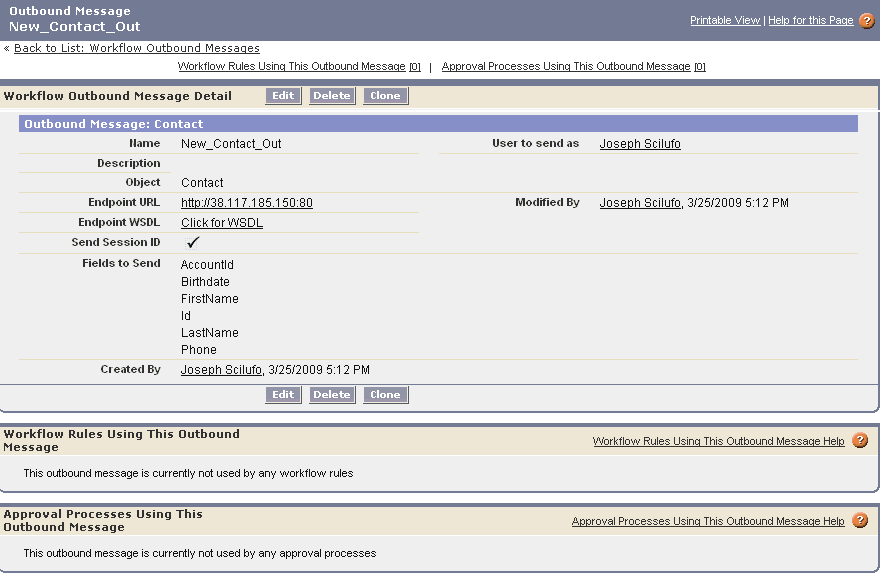
This page provides a detailed summary about the outbound message that you configured.
You are now ready to create a workflow rule to associate with this outbound message for event handling.