In this section: |
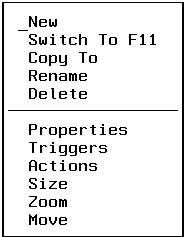
The Forms menu enables you to create and edit Winforms. You can edit the Winform you are currently working on, or you can create new Winforms in that same file. Selecting the Forms menu yields:

The Forms menu offers the following options:
Select New to create a new Winform while in an existing Winform.
Selecting New displays the Winform Properties dialog box shown in Properties.
When you have finished entering the properties information, to:
Select Switch To in order to change from one Winform to another within a Winform file. You may also switch from one Winform to another by pressing PF11 while in a Winform.
Selecting Switch To yields the Switch To dialog box which contains a list of all the Winforms in your current Winform file:
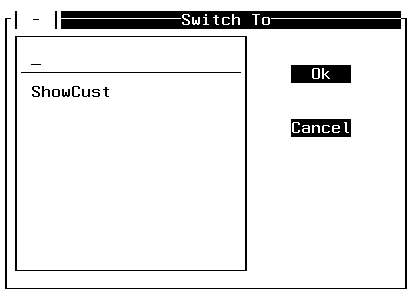
Enter the name of the Winform you would like to switch to and press PF4, or place the cursor under your selected Winform, and press the Enter key. This displays your selected Winform. If you place the cursor in the upper section of the box in the previous screen, and press PF4 or Enter, you can create a new Winform. Press PF3 to exit the Switch To screen.
Select Copy To to copy one Winform into another Winform within the same Winform file. Selecting Copy To generates the Copy dialog box:
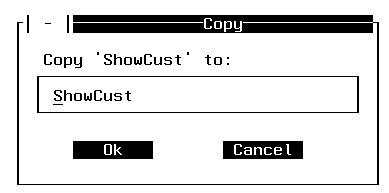
The name of the current Winform is automatically supplied. Enter the name of the Winform you wish to copy an existing Winform to. Press the Enter key or PF4 to copy the Winform. Press PF3 if you wish to cancel the action.
If you press PF4 or Enter, and the Winform already exists, the following dialog box is displayed:

If you wish to delete the Winform you are trying to copy to and replace it with the Winform you entered in the Copy dialog box, place the cursor under Delete and press the Enter key. If you wish to cancel the action, place the cursor under Cancel and press the Enter key.
Select Rename to change the name of a Winform. Selecting Rename displays the Rename dialog box:
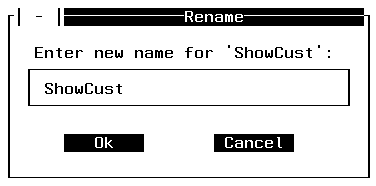
The name of the current Winform is automatically supplied. Enter the new name for the Winform and press the Enter key. Pressing PF3 cancels the action. If the name already exists, a dialog box similar to the warning dialog box in Copy To is displayed.
Select Delete to erase a Winform. Selecting Delete displays the Delete dialog box:
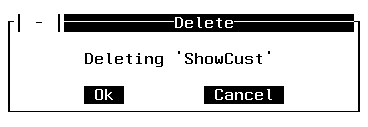
Place the cursor under OK and press the Enter key if you wish to delete the Winform. If you select OK to delete the Winform, the Switch To menu appears minus the name of the current Winform. If you do not wish to delete the Winform, place the cursor under Cancel and press the Enter key.
In this section: |
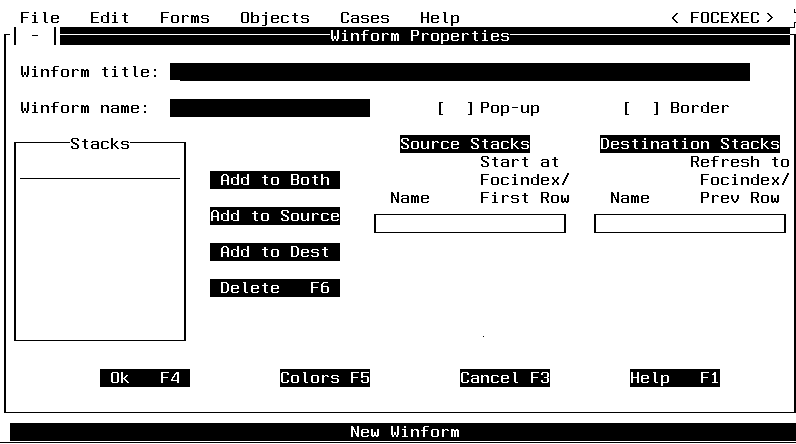
Select Properties to enter information about the Winform. The following is the Winform Properties dialog box before information is entered into it:
The following shows the Winform Properties dialog box after the stkcust and stkrent stacks have been specified as source and destination stacks:
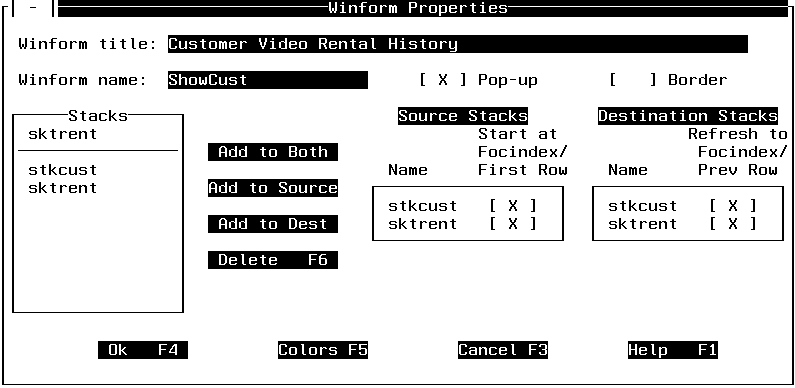
The Winform title is text that will be displayed on the screen in the Winform's title area, centered at the top of the Winform, if a Winform has a border. If a Winform does not have a border the title will not be displayed. Supplying a title is optional.
I changed FOCEXEC to Maintain procedure here. Each Maintain procedure can display many different forms, but all of the forms are stored in one file. Therefore, in order to be able to paint or display a specific Winform, all of the forms must be named within the file. In order to coordinate the Maintain procedure and the Winforms, both the Maintain procedure logic and the Winform information must have the same file name, but the file type (or ddname) must be either FOCEXEC or MAINTAIN for the processing logic or Winforms for the screen information. The Winform name is required.
In this dialog box, the Winform name is the name that you will use in the Maintain procedure to reference the Winform you are building now. For instance, if you supply a name of ShowCust for the Winform, in your Maintain procedure you could display the Winform by supplying the following line:
WINFORM SHOW ShowCust
By default, Pop-up is checked which means that after the user exits the form, it will no longer be displayed on the screen. If Pop-up is not checked, when the user exits the form, it is still displayed to the user, but it is not active. This is true as long as the user is still viewing a Winform. If you invoke a function in Winform1 that displays Winform2, and you exit Winform2, one of the following happens:
Border is used to put a border around a Winform. It is optional, but must be selected if you want to display a Winform title or Control box menu. The default is set to on.
A stack is a simple table: every stack column corresponds to a data source or calculated field, and every stack row corresponds to a data source record (a path instance). The stack itself represents a data source path. You can populate a stack by retrieving data from a data source, calculating values, or copying all or part of an existing stack.
The Current Area is Maintain's unnamed default stack, and has one row.
Winforms do not display data directly from a data source or directly update a data source; they display data from, and write data to, stacks or the Current Area. These are known as the source and destination stacks. For each Winform, you can use as many source and destination stacks as you wish.
You can select any of the stacks in the Stacks combo box as a source or destination stack for every field, browser, and grid that you create in all the Winforms in the Winform file. Simply select the desired stack, and then click the appropriate Add button to the right of the list. Depending upon the button you clicked, the stack name is copied into the Source Stacks and/or Destination Stacks drop boxes at the right of the dialog box.
You must select the same stacks for both source and destination.
For each stack in the Source Stacks list, you can check the Start at FocIndex check box, which determines the current row—that is, the current position within the stack—when the Winform is opened.
If you design the Winform:
Maintain accomplishes this by using the system variable FocIndex to determine the current row. This enables you to retain the stack's position when you open the Winform, and makes it possible for you to dynamically manipulate the current row by assigning a value to FocIndex.
If you do not specify any source stacks, the source defaults to the Current Area.
For each stack in the Destination Stacks drop box, you can also check the Refresh to FocIndex check box, which controls the Winform's behavior when someone invokes a trigger that interrupts—and later returns control to—the Winform. When control returns to the Winform, it refreshes the data that it was displaying in case the stack had been updated in the interim. If you design the Winform:
For example, if a trigger manipulates the stack and changes the current position—say, if the trigger calls a second Winform that also displays that stack, and a user moves to another row—Maintain retains that new stack position when you return to the original Winform. This also makes it possible for you to dynamically manipulate the current row by assigning a value to FocIndex within the intervening trigger.
If you do not specify any destination stacks, the destination defaults to the Current Area.
There are four buttons in the Winform Properties dialog box that allow you to perform actions on the stacks in the Winform.
You can choose a background color for a Winform by selecting Colors. This displays the Background Color dialog box:
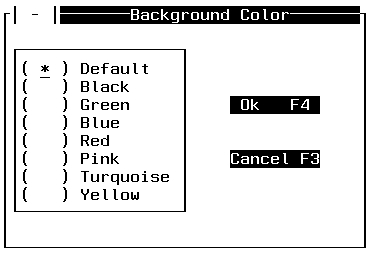
Check the desired background color and click OK, or click Cancel to exit the Background Color dialog box without saving any changes.
You can also change the background color dynamically at run time by issuing the WINFORM SET command in the Maintain procedure, as described in WINFORM.
Select Triggers to assign or change form-level triggers. Form-level triggers are triggered when an end user presses the specified function key when the cursor is anywhere on a form except for a spot occupied by a control. For more information about specifying triggers, see Using Triggers, Button Short Cuts, and System Actions.
Select Actions to assign or change system actions. System actions are similar to form-level triggers, but instead of invoking functions, they invoke special system-defined actions that do things like close the current form or exit the current procedure. For more information about specifying actions, see Using Triggers, Button Short Cuts, and System Actions.
Select Size to reduce or enlarge the size of the Winform. Selecting Size generates a screen similar to the following:
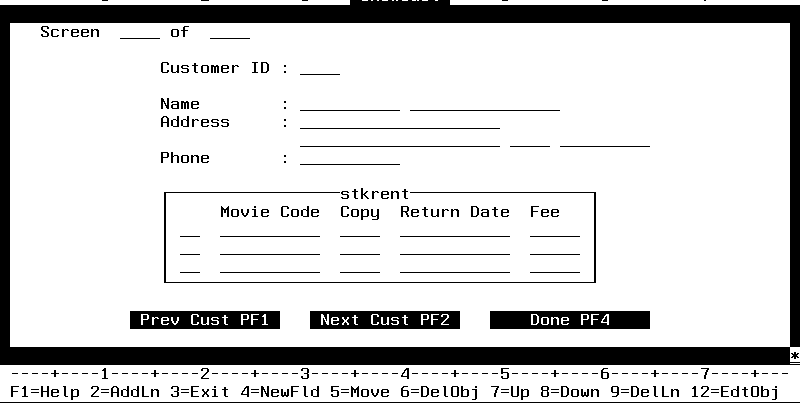
A solid border is generated around the Winform. The cursor is positioned at the bottom right-hand corner of the Winform. To reduce or enlarge the Winform, move the cursor to where you would like the new bottom right-hand corner to be and press the Enter key. If, while changing the size of the Winform, you eliminate a control, the following dialog box is displayed:

If you do not wish to remove the control from the Winform, place the cursor under Cancel and press the Enter key. The Winform is returned to its original size. If you want to accept the new size of the Winform, place the cursor under OK and press the Enter key. The Winform is saved as it appears and the controls are deleted.
Select Zoom to restore a Winform to full-size. Use this option if the Winform has been previously reduced with the Size option.
Select Move to move the Winform to a different position on your screen. This can be useful if you wish to clear part of the screen for additional controls such as a button. Selecting Move generates a screen similar to the following:
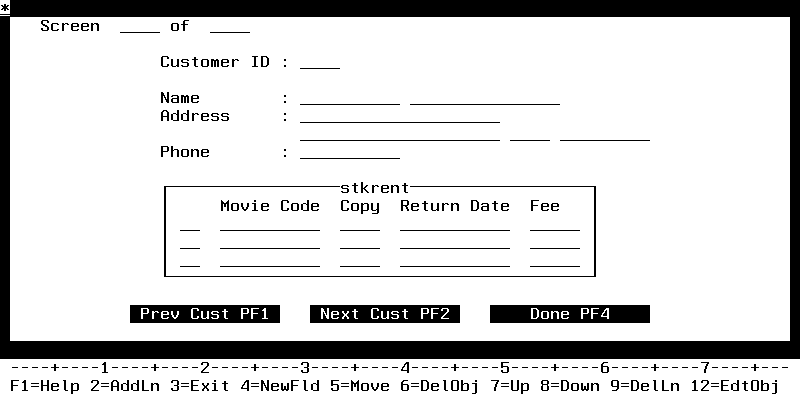
A solid border is generated around the Winform, and the cursor is positioned at the upper left-hand corner of the Winform. Move the cursor to where you would like the new upper left-hand corner to be and press the Enter key. The Winform is shifted to its new position.
| Information Builders |