Window Painter Screens

In this section:

The creation of windows is itself an automated window-driven process. There are six major screens:

These screens assist you whenever you create or edit windows.

Invoking Window Painter

How to:

To invoke Window Painter, type the WINDOW PAINT command at the FOCUS prompt and press Enter.

Syntax: How to Invoke Window Painter

WINDOW [PAINT [filename]]

where:

PAINT

Is optional.

filename

Is the name of the window file that you want to work with. This is a member name. The member must belong to ddname FMU.

If you do not specify file name, you begin your Window Painter session at the Entry Menu where you can choose a window file to use or create a new window file. If you do specify file name, you skip the Entry Menu and begin your Window Painter session at the Main Menu working with the window file you specified.

If the file name does not exist, you are asked if you want to create a new file. If not, the Window Painter Entry Menu is displayed.

Entry Menu

You can reach the Window Painter Entry Menu by typing

WINDOW [PAINT]

at the FOCUS prompt, and pressing Enter.

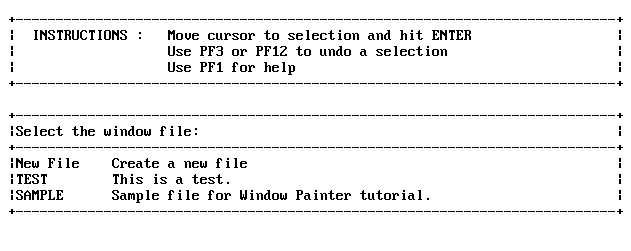
The Entry Menu is the first screen you see:

The Entry Menu invites you to choose a window file in which to work. If you are creating windows for a new application, you should start a new window file. If you are maintaining or creating windows for an existing application, use the window file that corresponds to your application.

When you become comfortable working with windows, you can write FOCEXECs that include branching between window files. Refer to Transferring Control in Window Applications for a detailed discussion on branching and transferring control.

Main Menu

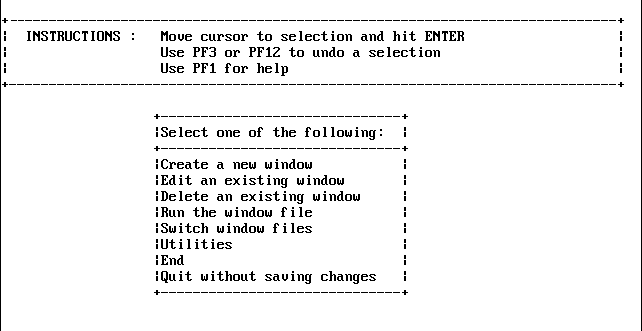
Once you have selected a window file from the Entry Menu, or entered the WINDOW PAINT command with the file name option, the Main Menu appears:

The following table summarizes the options on the Main Menu, along with illustrations of screens that appear when you select the options:

Menu Option

Description

Create a new window

Brings up the Window Creation Menu. You can select the type of window to create.

Edit an existing window

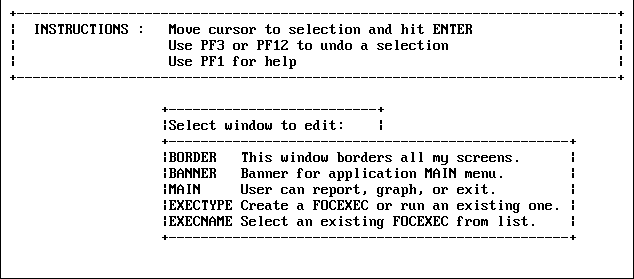
Brings up a list of windows in your current window file. You can select the one to edit.

Menu Option

Description

Delete an existing window

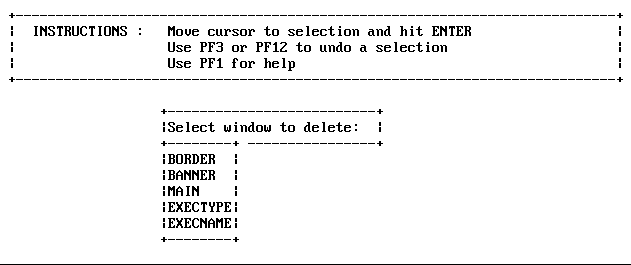
Brings up a list of windows in your current window file. You can select the one to delete.

Menu Option

Description

Run the window file

Brings up a list of windows in your current window file. You can select the one from which to start running the window file.

After the window file is run, the windows' amper variable values are displayed. The display includes the first 20 characters of each value.

This option shows you how your windows work without executing the FOCEXEC. Use this option to test your window file.

Switch Window files

Returns you to the Window Painter Entry Menu, from which you can select another window file. The previous window file is saved whenever you switch window files.

Utilities

Brings up the Utilities Menu, which is discussed in Utilities Menu.

End

Returns you to native FOCUS. All work saved during the Window Painter session is kept.

Quit without saving

Returns you to native FOCUS. All work saved during the Window Painter session is discarded.

Window Creation Menu

You can reach the Window Creation Menu by selecting

Create a New Window

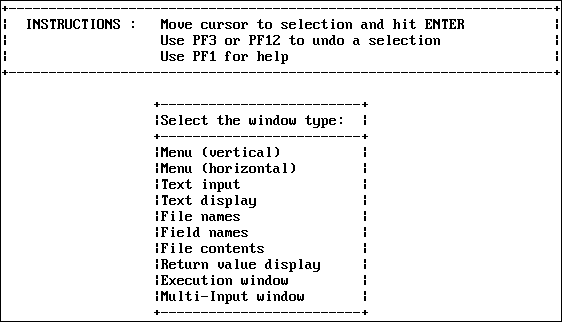
from the Main Menu. The following screen appears:

You need to select the type of window to create. You are asked to enter an 8-character name and an optional 40-character description. These are for your use only and do not appear in the window during execution.

For a vertical menu, horizontal menu, text input, text display, file names, field names, file contents, multi-input, or return value display window, you are prompted to supply a 60-character heading.

For a text input window, you are prompted to choose the format of the text entry field (alphanumeric, with all text translated to uppercase; alphanumeric, with no case translation; or numeric). Later, in the Window Design Screen, you can make the length of the text entry field shorter than the window's header length by typing a single character in the window immediately following the last desired field position, or by typing characters continuously from the first field position to the last desired field position.

For a file names, field names, or file contents window, you are prompted to produce file-identification criteria that can consist of an amper variable, a complete file identification, or (for file names windows) a file specification which includes an asterisk (for example, * MASTER).

The asterisk is used as a wildcard character indicating that any character or sequence of characters can occupy that position. The asterisk can be used as the member name but not in the ddname.

If an amper variable is used, you can prompt for the file identification criteria at run time.

File-identification criteria must specify the member name first and the ddname second.

If you are creating a field names window, your file-identification criterion is the name of a Master File.

In addition, you can create execution windows containing FOCUS commands such as Dialogue Manager commands or TABLE requests. You are prompted for the window name and heading. Once a window has been specified, the Window Design screen opens.

For complete information about the types of windows you can create in Window Painter, see Types of Windows You Can Create.

The next screen displayed is the Window Design Screen, discussed in the next section. This screen enables you to enter information, and position and size your window.
Window Design Screen

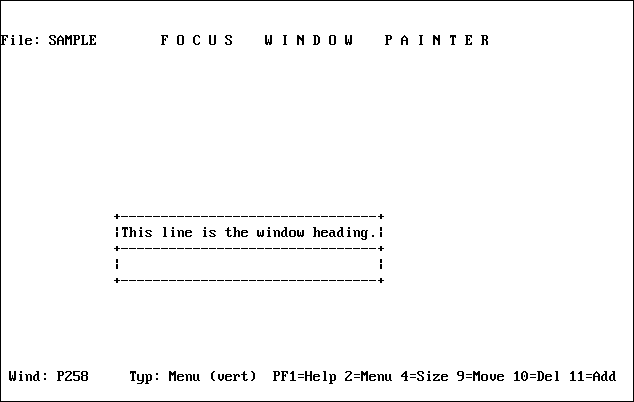
In this screen you design the appearance and functionality of your windows. It appears during the window creation process, when you press Enter after typing the heading of your window.

The Window Design Screen consists of a blank screen, a cursor, and text asking you to move the cursor to the starting position for the window. This starting position becomes the upper left corner of the window. Use the cursor arrow keys to move the cursor to the place where you want the upper left corner of the window to be, and press Enter.

The window appears with its heading at the top. You can enlarge it, type text in it, and move it around the screen.

The Window Design Screen allows you to use the keyboard to manipulate the window you are creating.

The following chart summarizes Window Design Screen key functions in all window types.

PF Key

Function

PF1

Displays a window of help information.

PF2

Displays the Window Options menu. This menu is discussed in Window Options Menu.

PF3

Displays the exit menu. You can select:

  • Exiting from the Window Design Screen while saving your work.
  • Quitting from the Screen without saving your work.
  • Continuing your work.

PF4

Resizes the window. First move the cursor to the desired position of the window's lower right corner. When you press PF4, the window's upper left corner remains in the same position; the window's lower right corner moves to the current cursor position.

If the window size is reduced, nothing in the window is deleted; all window contents beyond the window border can be seen by scrolling the window.

PF5

Gets the Return value, the GOTO value, and the FOCEXEC name for the active window.

PF6

Sets the return value of the line that the cursor is on.

PF7

Scrolls the window up if the window contents extend beyond the top border.

PF8

Scrolls the window down if the window contents extend beyond the bottom border.

PF9

Moves the window. First move the cursor to the desired position of the window's upper left corner. When you press PF9, the window's upper left corner (the + in the border) moves to the current cursor position. The rest of the window moves accordingly.

PF10

Deletes the line of window contents identified by the current cursor position. If the window contents do not extend beyond the window borders, the window itself is reduced by one line.

PF11

Adds one line of window contents beneath the line identified by the current cursor position. If the window contents do not extend beyond the window borders, the window itself increases by one line.

PF12

Provides the same function as the PF3 key.

PF13 - PF24

These keys provide the same functions as the corresponding keys PF1 - PF12.

If a window's contents extend beyond a top or bottom border, then the message

(MORE)

is displayed on that border to remind you of more lines of contents hidden beyond that border. You can view these lines by scrolling toward the border. When the window is used in an application, the user can also scroll the window to see all of the contents.

The display line at the bottom of the Window Design Screen shows instructions or information. When you first see the Window Design Screen, the display line tells you to move the cursor and press Enter. The display line shows the name of the window file, and the name and type of window being created; it also tells which keys to press for the HELP function, the SIZE function, and the Window Options Menu.

Window Options Menu

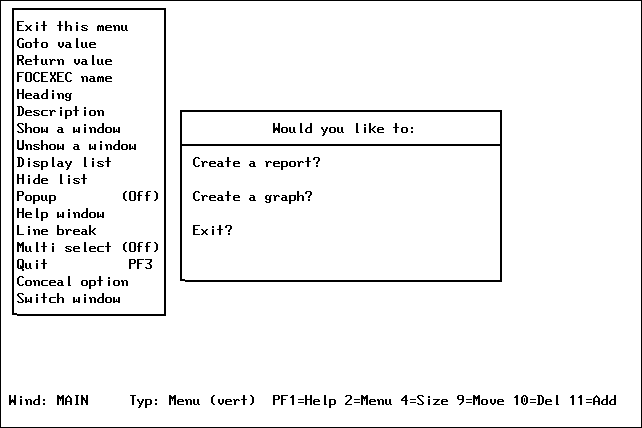
When the Window Design Screen is displayed, pressing PF2 brings up the following Window Options Menu:

The following table summarizes the options on this menu, along with illustrations of screens that appear when you select some of the options:

Menu Option

Description

Goto value

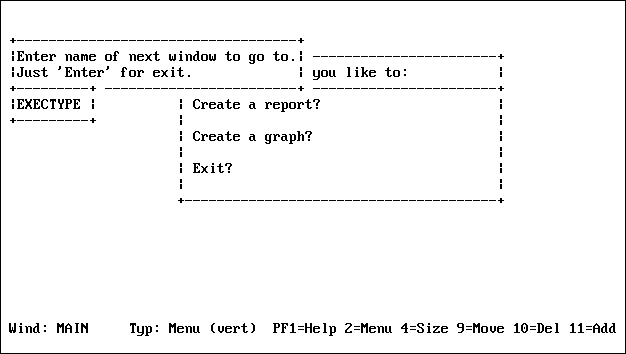
Selecting this option allows you to specify the next window in the path from this selection field or window. You are asked to supply the name of the window. (It does not matter whether or not this window exists. You can create it later, but remember the name chosen.)

In menu windows, goto values are assigned to each menu item. In other windows, there is a single goto value for the entire window.

To assign a goto value, your cursor must be on the proper line when the Window Options Menu is brought up. Select Goto value from the Window Options Menu. You are prompted to enter the name of the window that is the target of the goto. Type the name in the space provided and press Enter again. The goto value is assigned.

Menu Option

Description

Return value

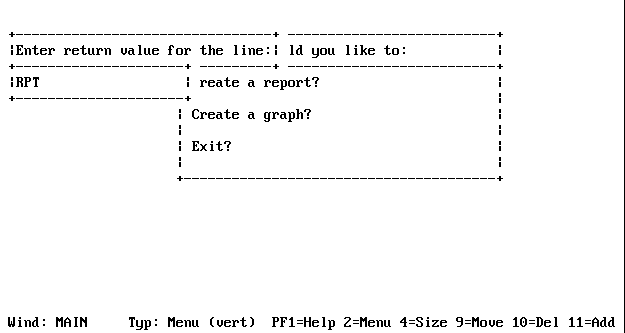
The return value supplies a value for an amper variable. If the user selects this field during execution, the return value you have assigned is plugged into the amper variable in your FOCEXEC. Return values are assigned to each menu item in menu windows, and one per window for other window types. The only exceptions are the multi-input window, where the return value is the name of the input field occupied by the cursor when you pressed Enter or a PF key, and the return value display window, which does not have a return value but instead displays other windows' return values. The return value for a Multi-Select window is the number of selections.

To assign a return value, your cursor must be on the proper line. Select Return value from the Window Options Menu and you are prompted to enter a return value. Note that for file names, field names, and file contents windows, the value that you enter is the file-identification criterion for that window. Type the value in the space provided and press Enter again to assign the return value .

Menu Option

Description

FOCEXEC name

Attaches a FOCEXEC to each menu selection of the window. The FOCEXEC is executed when the menu item is selected.

Heading

Changes the heading of any window you are working on. You can also add or remove a heading.

Description

Changes the description of any window you are working on.

Show a window

Used only during window editing, brings another window onto the screen for reference. You cannot edit the second window.

Unshow a window

Removes the shown window from the display.

Menu Option

Description

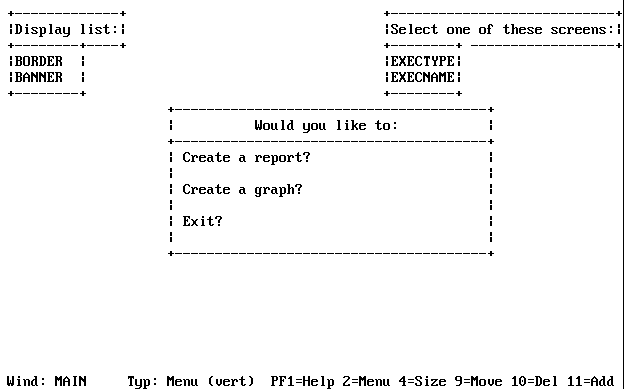
Display list

Enables you to specify a list of up to 16 windows that are visible when this window is displayed during execution. Note that if part of a window on the display list extends beyond the window border or does not fit on the screen, it cannot be scrolled.

As many as 16 windows can be displayed on the screen at one time. This applies to all windows on the screen (that is, a window displayed during execution, windows displayed when executed previously and not hidden afterward, and windows displayed because specified on a display list). The window facility interprets each window heading as a separate window: if all of the windows have headings, 16 can be displayed on the screen at one time.

Menu Option

Description

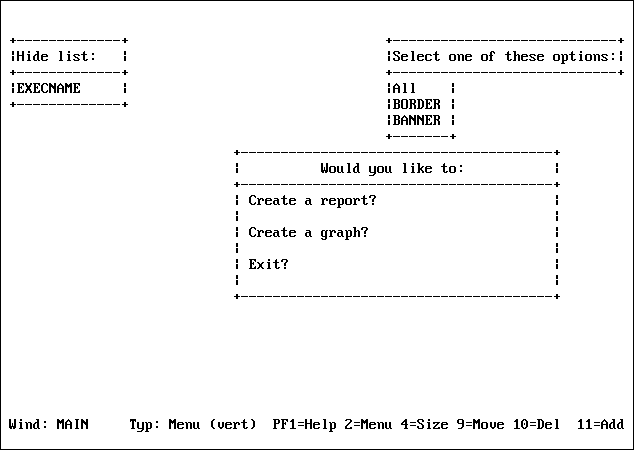
Hide list

Allows you to specify windows that does not appear when this window is displayed during execution. You can specify up to 16 specific windows or all windows in the window file. If you select "All", all the windows are hidden except those in the display list. If you do not hide a window that was displayed, it remains on the screen until another window that includes it on a hide list is displayed during execution.

Menu Option

Description

Popup (Off/On)

Makes the window disappear when the user presses Enter during execution. Defaults to OFF, which leaves the window on screen. Set Popup to OFF with text display windows as they do not work even if set to ON.

Help window

Allows you display information about a window or a menu item when a user presses PF1 (the Window facility HELP key) during execution. The information displayed is text within a specified Help window.

Note that if the PFKEY option is specified in the -WINDOW command, you have to explicitly set a PF key as the HELP key, as described in Testing Function Key Values.

When selecting the Help window option, you are asked to supply the name of the Help window file that contains the Help window. Next, you are asked to supply the name of the Help window itself. The Help window can be an existing window, or one that you created.

If the Help window displays field names, it qualifies duplicates with the segment name.

You can use any window type for a Help window. A text display window is easiest, except when supplying different help information for each item in a vertical menu, horizontal menu (that is, item-specific help).

To assign item-specific help, use a file contents window that displays a file containing text in the following format

=>HELPFILE
=> menu item 
this is the Help message you want the user to see.

where:

=>

Is entered with an equal sign (=) and a greater-than sign (>).

HELPFILE

Must be uppercase.

menu item

Is the exact text of the menu item. Any blank spaces that precede this text in the menu must also precede this text here in the Help file. Note that at least one blank space always precedes the menu item text in a vertical menu, horizontal menu, or multi-input window.

Help window (continued)

For example, if the first three lines of a vertical menu are

(1) Generate a sales report
(2) Generate a stock report

and there are three blank spaces between the left border of the window and the beginning of the text, the file containing help text could look like this:

=>HELPFILE
=>   (1) Generate a sales report
This option displays a list of existing sales report
requests, and lets you select one of these requests
to execute.
=>   (2) Generate a stock report
This option displays a list of existing stock report
requests, and lets you select one of these requests
to execute.

The lines immediately following the menu item text are displayed when the user positions the cursor on the menu item and presses PF1.

In some cases you may assign topic-specific help, but want the help text for some of the topics to be contained in a separate file. In this case, on the line following the menu item text, replace the help message with the file identification of the file containing that menu item's help message.

Use this file-identification format:

FILENAME= membername ddname

Help window (continued)

To assign one set of instructions that can be used for multiple menu items, use the following syntax:

=>DEFAULT
This text appears when you have not written
topic-specific help.

The DEFAULT text must be the last section in the Help file.

Lines beginning with an asterisk (*) are comment lines that are not displayed.

What follows is an example of a topic-specific Help file for the Main Menu used in the tutorial.

=>HELPFILE
*Help file for tutorial/Main Menu
=> Create a report?
Choose this option if you wish to create a new report.
=> Create a graph?Select this option if you wish to create pie charts, bar charts or other graphics.
=> Exit?
If you wish to leave the application, choose this option.

Line-break

Formats the contents of the return value display window. This option is set when designing the windows from which you collect the return value(s) to be displayed.

When you select this option, you see:

None
New line before value
New line after value
Both

where:

None

Places return value directly after preceding value. If there is not enough room on this line, return value is placed on the next line.

New line before value

Places return value on the next line.

New line after value

Places return value on the same line as preceding value. Places next return value on next line.

Both

Places return value on a line by itself.

Multi-Select

Enables you to select multiple items from one window. The number of items you select is collected as the return value from that window; each selected item's return value is stored in a temporary file in memory. You can later retrieve these stored values for use in a FOCEXEC. Values for up to 8 windows can be stored at one time.

When you select this option, you see:

-Select Multi(On )

During execution, the user selects individual values by pressing PF9. After all selections have been made, the user presses Enter.

Note that when the -WINDOW command is issued with the PFKEY option, the PF9 key cannot be used to make selections unless a SET command is issued before the -WINDOW command. For example:

SET PF09=SELECT

You can also set a different PF key for selecting multiple items.

A Multi-Select window can have no more than one goto value. Although in a vertical menu window you can assign a different goto value to each menu item, only the value assigned to the first item is effective.

The return value collected for a window using the Multi-Select option is the number of values selected by the user.

To retrieve the individual values, issue a special WINDOW call, as follows

-WINDOW windowfile windowname GETHOLD

where:

windowfile

Is the name of the window file.

windowname

Is the name of the Multi-Select window.

GETHOLD

Is the special parameter that retrieves one value at a time from the temporary file.

Multi-Select (continued)

The value is assigned to the variable &windowname.

The GETHOLD option requires at least two -WINDOW commands in your FOCEXEC. The first -WINDOW command (without the GETHOLD option) transfers control to the Window facility where a Multi-Select window is used. The second and subsequent -WINDOW commands use the GETHOLD option to retrieve the stored amper variables collected in a particular Multi-Select window.

For each value to be retrieved, you need a -WINDOW command with the GETHOLD option. Each value is stored in &windowname. To use this value, assign it to another variable. For example, if the return value has the value 4, issue the special -WINDOW command four times; each time you would collect the value from &windowname. Alternatively, you could perform a loop.

Note that -WINDOW with the GETHOLD option does not transfer control from the FOCEXEC to the Window facility.

Quit

Returns you to the Window Painter Entry Menu.

Input fields

Input fields pertain to Multi Input Windows. Selecting the field takes you to that field.

Menu text

Specifies a line of descriptive text, up to 60 characters long, for items on a horizontal menu. Use the Text line option to position the text.

Text line (x+1)

On a horizontal menu, positions descriptive text one or two lines above or below the menu. Valid values are x+1 or x+2 to place the text above the horizontal menu, x-1 or x-2 to place the text below the horizontal menu. Use the Menu text option to define the descriptive text.

Pulldown (off/on)

If the setting is ON, placing the cursor on an item in a horizontal menu can display an associated pull-down menu. The default setting is OFF. Turn the setting ON by positioning the cursor on this option and pressing Enter. The pull-down menu must be a vertical menu and must be assigned as the goto value for the horizontal menu item. Note that setting Pull-down ON automatically shuts off Menu Text.

Switch window

Enables you to work on and move between two windows. When you select this option, you can create a new window or edit an existing window without returning to the Main Menu.

Utilities Menu

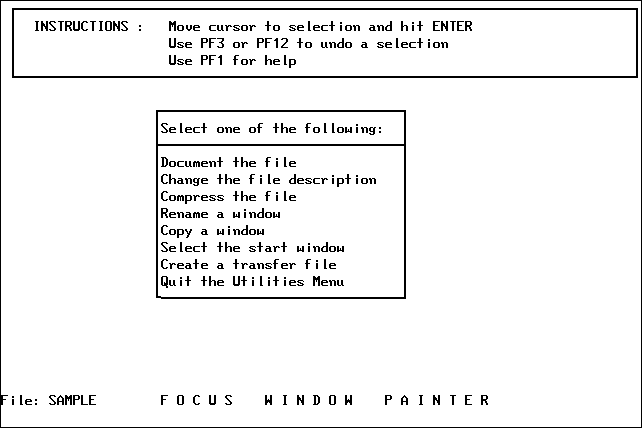
If you select the Utilities option from the Window Painter Main Menu, the Utilities Menu is displayed:

The following table summarizes the options on this menu, along with illustrations of screens that appear when you select some of the options:

Menu Option

Description

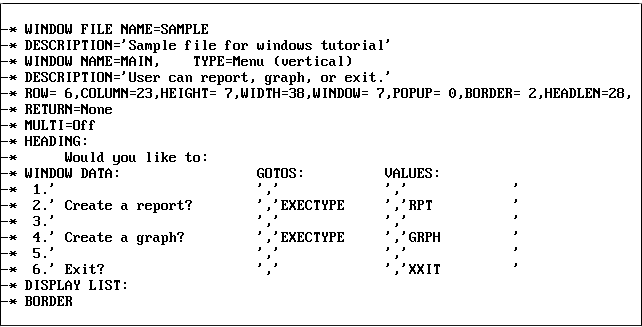
Document the file

When you select this utility, Window Painter creates documentation of the window file. You can display the document on the screen using TED or another system editor, or send it to a printer or disk file.

This option creates a member of the TRF PDS; that PDS must have already been allocated. However, creating a PDS is not necessary if you are only going to use the documentation file during the current FOCUS session: Window Painter temporarily allocates the PDS.

This document contains detailed information about all the windows in the window file. It shows you the kinds of windows, the structure and format, and any options you have assigned from the Window Options Menu, including return and goto values. The text you enter when prompted for a window file description or individual window description is part of this document. The document is especially useful when creating a FOCEXEC, since it provides return and goto values in addition to other information.

Note: If you create another file with the same name, the file is not overwritten. It is appended.


Menu Option

Description

Change the file description

Changes the description of the current window.

Compress the file

This utility is provided to help you save space in memory. It allows space made available by deleted or edited windows to be reused.

Rename a window

When you select this utility, you see a list of the windows in the current window file. You can change the name of any of these windows.

Copy a window

This function copies a window from one window file to another, or duplicates it within the same file.

The copy function is useful when you create a new application, or need to add windows to an existing application, and want the windows to look like those you have already created. You can copy any window and edit it to conform to the new application.

Select the start window

Enables you to choose a default start window. This window is the first to be entered if a specific window is not selected upon startup. If a default start window is not explicitly chosen, FOCUS selects the first window created to be the start window.

Create a transfer file

Creates a file to be transferred for use with the Window facility in another FOCUS environment.

This option creates a member of the TRF PDS; that PDS must have already been allocated.

Quit the utilities menu

Returns you to the Main Menu.


Information Builders