In this section: |
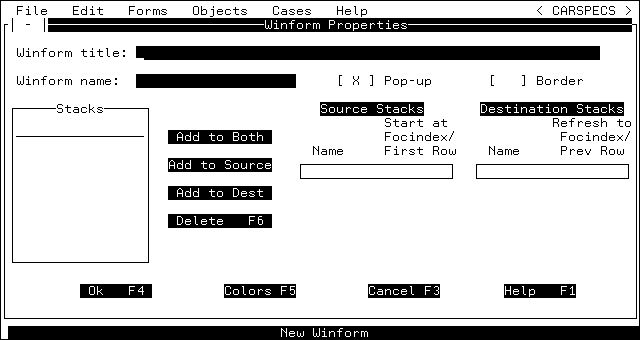
The Winform Properties dialog box opens and requests information about the form. It looks similar to the following.

The Winform title is optional. The title is centered in the Winform's top border. When a Winform has no border, it does not display a title.
Try it now: Type Car Editing Form as the title of this Winform and tab to the Winform name field.
Winform Name is the name used to identify the Winform to FOCUS. You refer to the Winform by its name in the WINFORM command and in the Winform Painter.
The Winform name is required.
Try it now: Type ShowCars as the Winform name.
A check box is a switch that lets you select or deselect an option. Square brackets or angle brackets are used to indicate a check box (depending on your terminal emulation and on how your Painter session is configured in the Terminal suboption in Preferences of the File menu). You select a check box by typing an "X" or other character into it.
If a Winform is a pop-up, it disappears when it is closed (by a WINFORM CLOSE command). By default, the Pop-up check box is selected.
Try it now: Keep the default setting as the tutorial requires this Winform to be a pop-up.
When you select this attribute, it displays a box around the perimeter of the Winform. It is optional, but must be selected to display a Winform title or a Control menu.
Try it now: Select the Border check box, as this tutorial requires a border.
A stack is a simple table. Every stack column corresponds to a data source or user-defined variable. Every stack row corresponds to a data source record (a path instance). The stack itself represents a data source path. You can populate a stack by retrieving data from a data source, calculating values, or copying all or part of an existing stack.
The Current Area is Maintain's unnamed default stack and has one row.
Winforms do not display data directly from a data source and do not directly update a data source. They display data from, and write data to, stacks or the Current Area. These are known as the source and destination stacks. For each Winform, you can use as many source and destination stacks as you wish.
You can select any of the stacks in the Stacks list box as a source or destination stack for every field, browser, and grid that you create in all the Winforms in the Winform file. You select the desired stack and then click the appropriate Add button to the right of the list. Depending on the button you clicked, the stack name is copied into the Source Stacks and/or Destination Stacks list boxes at the right of the dialog box.
The source and destination stacks always must be identical or none.
If you do not specify any source stacks, the source defaults to the Current Area. Similarly, if you do not specify any destination stacks, the destination defaults to the Current Area.
Since this is a new Winform file, the Stacks list is empty. You can add stacks to this list by typing the desired stack name in the entry field (above the line in the box), and then clicking the appropriate Add button. The stack name is copied to the Stacks list box, as well as to the Source Stacks and/or Destination Stacks list boxes.
Try it now: Type CarStack in the Stacks entry field and then press Enter (which clicks the default Add to Both button). Next, backspace over your first entry, type BodyStack, and press Enter.
CarStack and BodyStack appear in the Stacks, Source Stacks, and Destination Stacks list boxes.
For each stack in the Source Stacks list, you can check the Start at FocIndex check box. This determines the current row (the current position within the stack) when the Winform opens.
If you design the Winform with Start at FocIndex checked, when the Winform opens, the stack starts out with the same position it had just prior to opening the Winform.
This ensures that the stack's position is consistent inside and outside the Winform. Maintain accomplishes this by using the system variable FocIndex to determine the current row.
This enables you to retain the stack's position when you open the Winform and makes it possible for you to dynamically manipulate the current row by assigning a value to FocIndex.
If you design the Winform without Start at FocIndex checked, when the Winform opens, the stack's current position is the first row, regardless of where it was prior to opening the Winform.
Other aspects of FocIndex are described in Maintain Concepts.
Try it now: For all of this application's stacks, check Start at FocIndex (the default).
For each stack in the Destination Stacks list box, you can check the Refresh to FocIndex check box. This controls the Winform's behavior when a user invokes a trigger that interrupts—and later returns control to—the Winform. When control returns to the Winform, the data that it displayed previously is refreshed (in case the stack had been updated in the interim).
If you design the Winform with Refresh to FocIndex checked, when the Winform refreshes its data from the stack, it also refreshes its position within the stack.
This ensures that the Winform reflects the most recent changes not only to the stack's data, but also to its position. It accomplishes this using the system variable, FocIndex, to determine the current stack row.
When a trigger manipulates the stack and changes the current position, for example, if the trigger calls a second Winform (that also displays that stack), and a user moves to another row, Maintain retains that new stack position when the user returns to the original Winform.
This also enables you to dynamically manipulate the current row by assigning a value to FocIndex within the intervening trigger.
If you design the Winform without Refresh to FocIndex checked, the current row is unchanged by anything that happened during the trigger.
Other aspects of FocIndex are described in Maintain Concepts.
For all of this application's stacks, check Refresh to FocIndex (the default).
When you have finished completing the form, the screen should look similar to the following:
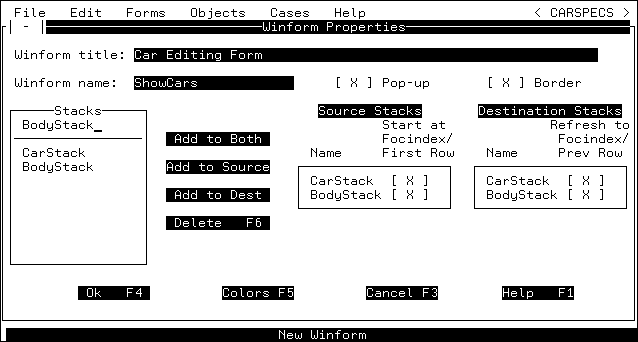
Try it now: When you are done, click the OK button.
You have completed the Painter's preliminary dialog boxes. After you click the OK button, the Painter displays the Design Screen where you can paint your Winform.
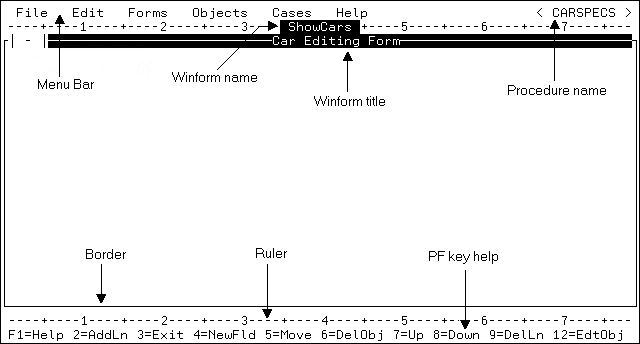
The following diagram identifies the different parts of the Winform Design Screen:
To view the menus available to you in the Maintain Winform Painter, display the pull-down menus. To select a menu from the menu bar you can press:
Function keys. Press PF10 or the Home key to position the cursor on the space immediately to the left of the first menu. You can press Tab or PF11 to move forward though the menu bar. Press Shift+Tab to move backward through the menu bar. When you are on the desired menu, press Enter.
Arrow keys. Use the arrow keys to move the cursor to the desired menu and then press Enter.
Once you have opened a menu, you can move through the menu options using Tab or the arrow keys. To select the desired menu option, position the cursor on the option's line and press Enter.
Try it now: Press PF10 and then Enter to display the File pull-down menu:
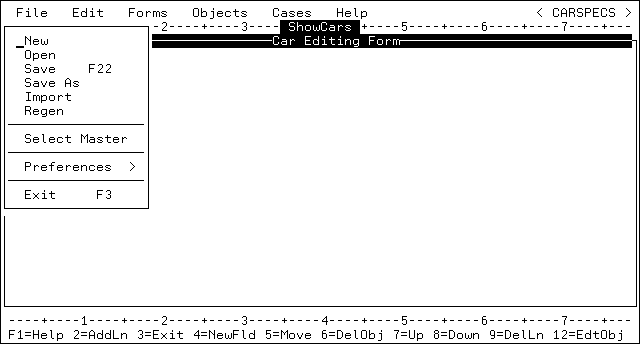
Press PF3 to close a pull-down menu. In most Painter contexts, PF3 cancels the current activity.
Note: While the cursor is positioned on an empty part of the design screen (not on a menu or the menu bar), pressing PF3 quits the Painter session (after asking you to confirm that you want to quit).
If you press PF3 by mistake, press PF3 again to cancel the quit operation.
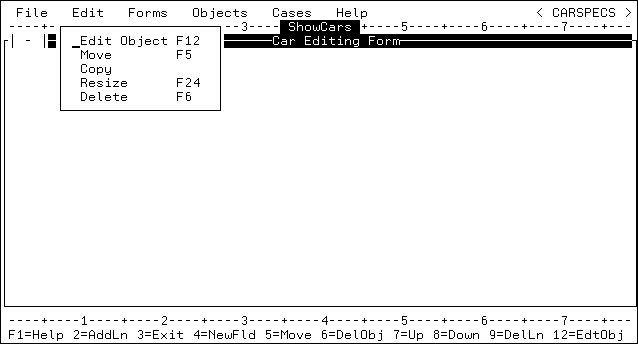
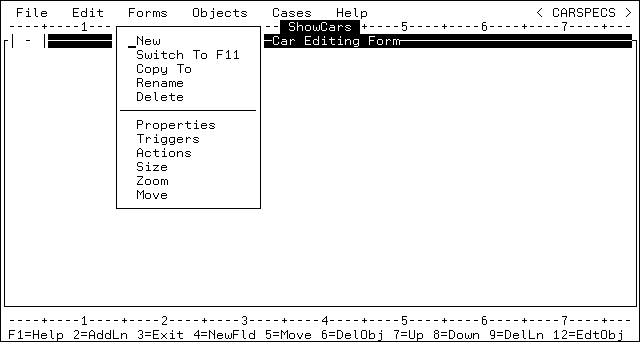
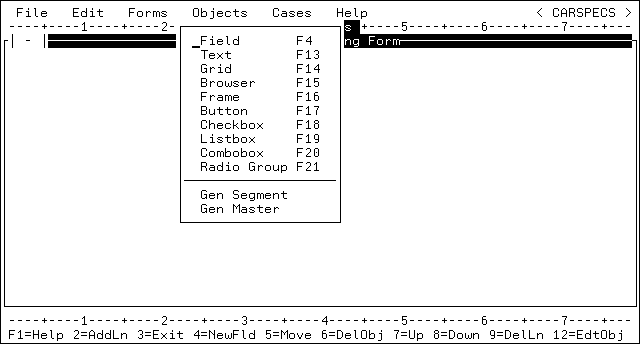
As you cycle through the menus, notice that some of the pull-down menu items have a function key displayed to the right of the item name. This identifies the key as the shortcut key for the menu item. For example, in the Objects menu, F4 appears to the right of the Field option. This indicates that you can press PF4 to select Objects and Field from the menu bar. Using the shortcut keys saves menu navigation (and therefore saves time).
Try it now: Display the Edit, Forms, and Objects menus to become familiar with the Painter's functions.
| Information Builders |