The Monitored Records Maintenance option provides information about the records of report requests and allows you to delete redundant or unrepresentative request records to keep the Usage Monitoring databases to an efficient size. |
How to: Review Data Only or Review Data Before Deleting Example: Generating a Number of Monitor Records Report |
You can delete data from the system tables, the Usage Monitoring databases, or both. This feature also includes a review option to let you see monitored data in report form and preview the potential results of deletion criteria. In addition, when databases change significantly, you can use the Monitored Records Maintenance option to delete records collected before the change.
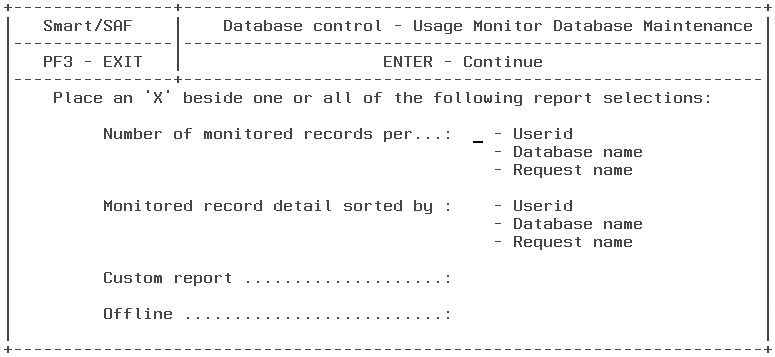
Select the Monitored records maintenance option in the Database control menu and press Enter. The following screen opens:

The following options are available:
The following sections describe these options.

The following examples use sample data to show reports for reviewing data before you decide what to delete.
The following is a sample report that results when you select the Number of monitor records per userid option:

This report displays the field you specified, in this case, userid, sorted, and the number of records for each entry.
The following is a sample report when you select the Monitor record detail sorted by userid option:

This report shows a number of request details for all records, sorted by the Userid field.
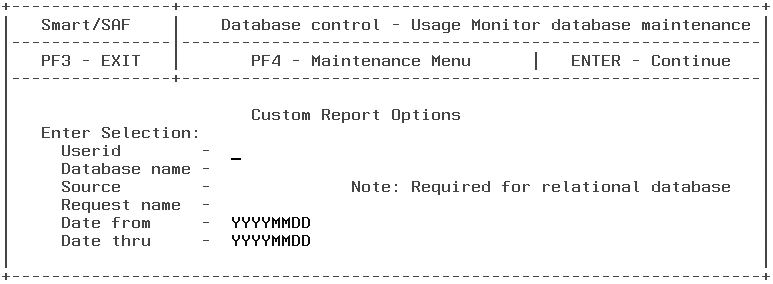
When you select Custom report from the menu, the following screen is displayed allowing you to specify the information you want to include in the report:

The report generated from this screen shows all the same columns as the detail report in the previous example, but only for the criteria you specify. You can provide values for the date fields, and you can provide values for Userid, Data name, Source, and Request name. If you do not provide values for any of these four selection fields, you must provide values for the date fields.
Once you have entered your specifications, press the Enter key to review a report that matches all your criteria. Press PF4 to bypass the Custom report and return to the Usage Monitor database maintenance menu or PF3 to return to the Database Control menu.
The following report would be generated if you entered the Request name CAR01 in the Custom Report Options menu:

Perform the following steps to define deletion criteria for your records.
Note: Before you define any deletion criteria, it is recommended that you first review the data. For more information, see How to Review Data Only or Review Data Before Deleting.


The options in this menu enable you to specify deletion criteria.
SmartMode does not immediately delete any records. Instead, it displays the following screen, which shows the deletion criteria specified and allows you to confirm the delete:

SmartMode immediately deletes all records that meet the specified criteria without displaying them first. As a result, it is recommended to review the information thoroughly before you delete.
| Information Builders |