Creating the Project

How to:

As an application developer for the WebFOCUS Electronics Corporation, you have been asked to create a reporting application that can be used during a monthly sales meeting. Your reporting application should contain a report that allows management to view data about products and sales over the course of a specific time period, as well as a user-selection form that shows this information in a graphical display.

After you have connected to the WebFOCUS Retail data source, you create a project named Retail using the Project Wizard. You build your reporting application in this project under the Projects node.


Top of page

x
Procedure: How to Create the Retail Project
  1. In the Environments Tree panel, right-click Projects, and click New Project.

    The Project Wizard opens.

  2. In the first input field of the Create a Project - Step 1 of 2 dialog box, type the project name Retail, as shown in the following image.
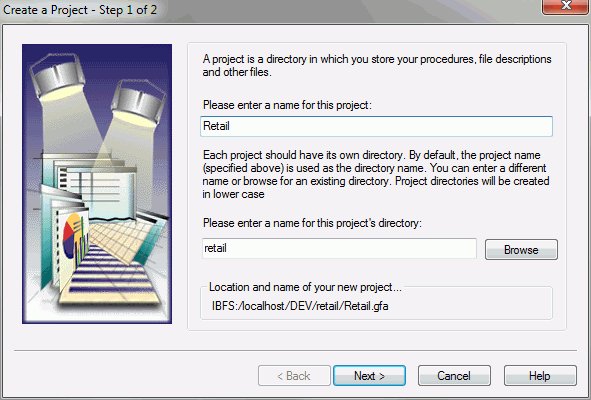
    Create a Project wizard

  3. Click Next.
  4. When prompted by a message indicating that the directory does not exist and requiring an affirmative response to create one, click Yes.

    The Create a Project - Step 2 of 2 dialog box opens. From here, you can add other directories to the project path.

  5. Click Add.

    The Browse For Folder dialog box opens.

  6. Select the ibiretail folder and click OK.
  7. Click Finish.

    The Retail project now appears below the Projects node in the Environments Tree panel, as shown in the following image.
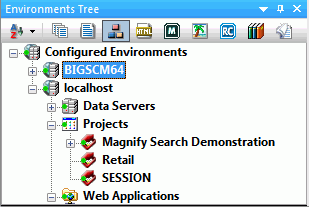
    Environments Tree panel with Retail project


WebFOCUS