Procedure: How to Edit a Distribution List
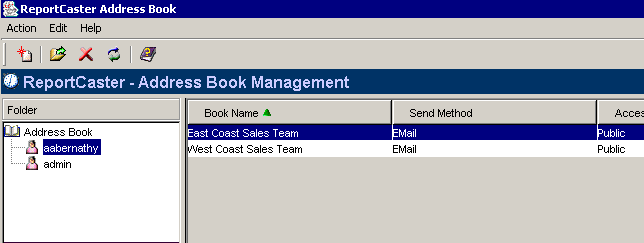
- From the ReportCaster - Address Book Management window, select the user who owns the Distribution List you want to edit. The right pane of the interface displays the Distribution Lists owned by the selected user, the send method for each Distribution List (Email, FTP, Printer), and the access of each Distribution List (Public or Private).
-
Select
the Distribution List you want to edit. For example, East Coast Sales
Team, as shown in the following image.

-
Double-click
the list, click the Open
 icon,
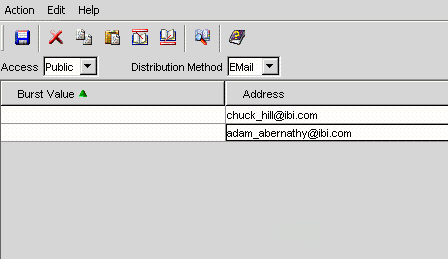
or select Open from the Edit menu. A window opens
displaying the properties of the Distribution List, as shown in
the following image.

-
From
this window, you can perform the following functions:
- Change the values of existing entries. For example, you can make the Distribution List Private instead of Public or change the Email, FTP, or Printer address.
- Delete burst values and addresses by selecting the row and either clicking the Delete icon or selecting Delete from the Edit menu.
- Copy and paste burst values and addresses from one row to another. Select the row you want to copy and either click the Copy the selection and put it on the Clipboard icon, or select Copy from the Edit menu. Next, place the cursor where you want to paste the contents and then either click the Insert Clipboard contents icon, or select Paste from the Edit menu.
- Insert additional burst values and addresses by clicking the Insert Above icon, or by selecting Insert Above from the Edit menu. A new row appears above where your position the cursor, enabling you to insert additional entries.
- Insert additional burst values and addresses by clicking the Insert Below icon or by selecting Insert Below from the Edit menu. A new row appears below the cursor position, enabling you to insert additional entries.
- Retrieve e-mail addresses defined in an LDAP data source. For more details, see How to Retrieve E-mail Addresses for a Distribution List Using Address Search.
-
Once
you have completed making the necessary changes, perform one of
the following:
- If you do not want to rename the Distribution List, click the Save icon, or select Save from the Action menu.
- If you want to rename the Distribution List, click the Save As icon, or select Save As from the Action menu. This will save the list as a new Distribution List without changing the contents of the original Distribution List.