You can define a complex data flow that extracts information from multiple data sources and copies it into multiple data targets, using extract transformations, joins, filters, and sorts to refine the results.
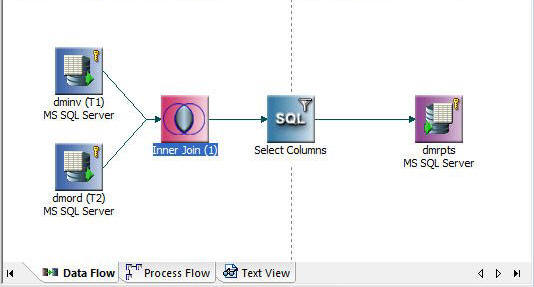
This data flow consists of two data sources, an extract transformation, a Join, a filter, a sort, an SQL object, and two data targets.
To create a complex data flow:
The Data Flow tab opens by default, with an SQL object in the center of the workspace.
The data sources are connected by a join object, which is linked to the SQL object.
Note: The default setting of the DMC automatically adds a join object to the workspace. If the DMC is not automatically adding join objects, you can change the setting by checking Add Join Object if needed in the Data Flow Designer branch of the User Preferences tree from the Options dialog box.
An inner join is the default. If you are using the default setting for the DMC, an inner join is created automatically for columns that are identically named and formatted, if one of them is a key column.
Note: An inner join is created if Automatically add join conditions is checked in the Data Flow Designer branch of the User Preferences tree from the Options dialog box.
Tip: If Automatically select all columns is checked in the Data Flow Designer branch of the User Preferences tree from the Options dialog box, you do not need to manually select columns.
The columns in the new data target are mapped automatically.
Tip: If Automatically map all columns is checked in the Data Flow Designer branch of the User Preferences tree from the Options dialog box, you do not need to map columns manually if the source and target column names are the same.
Note: Flow names can be up to 64 characters.
Tip: You can create this data flow by completing Exercise 1: Creating the Data Flow. In addition, the exercises in Advanced DataMigrator Tips and Techniques, include several complex data flows that illustrate a range of useful options.
| iWay Software |