The Source Transformations window opens.
 button.
The Transformation Calculator window opens.
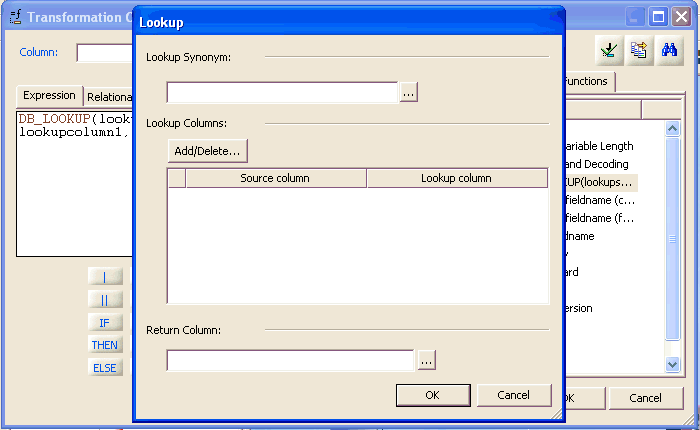
The prototype for DB_LOOKUP appears in the Expression window and the Lookup window opens, as shown in following image.
 button after
the Lookup Synonym field.
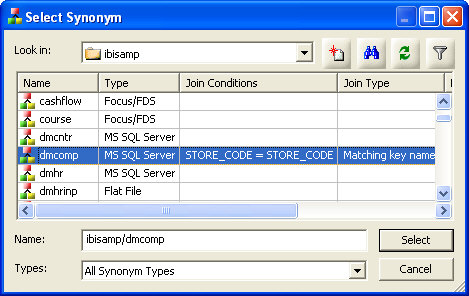
button after
the Lookup Synonym field.The Select Synonym dialog box opens.
Note: If you have Automatically add join conditions checked in Tools/Options/Data Management, the Lookup is added automatically since both data sources have a column with the same name and format and that column is a key column in the lookup table.
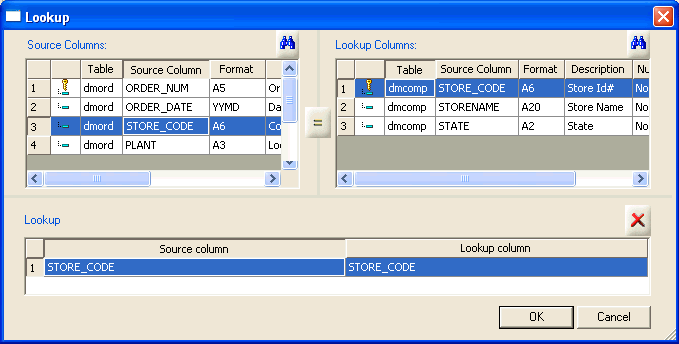
When you have selected the columns, the Lookup window should appear as shown in following image.
button
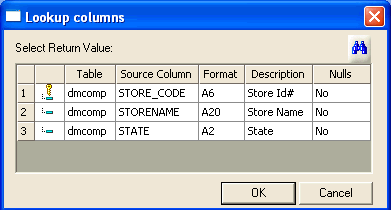
after the Return Column field.The Lookup columns window opens, as shown in following image.
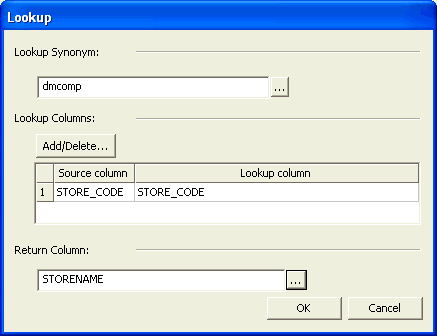
The Lookup window should appear as shown in following image.
The expression in completed in the Transformation Calculator window.
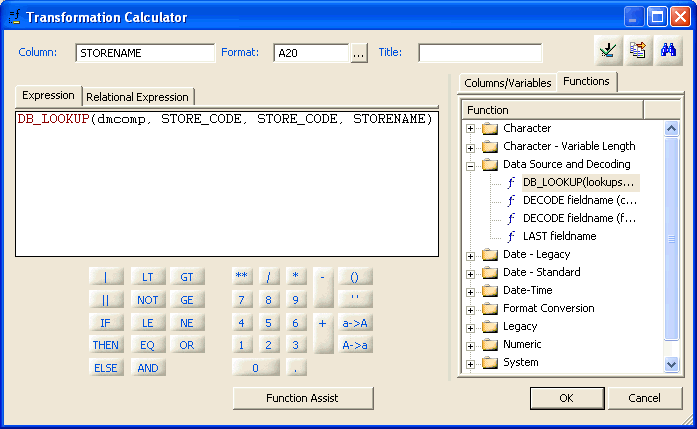
The Transformation Calculator should now appear as shown in the following image.
The STORENAME source transformation is added to the Source Transformations window.
|
Parameter |
Column Name |
|---|---|
|
Lookup Synonym |
DMINV |
|
Source Column |
PROD_NUM |
|
Lookup Column |
PROD_NUM |
|
Return Value |
PRODNAME |
|
Column |
PRODNAME |
|
Format |
A30 |
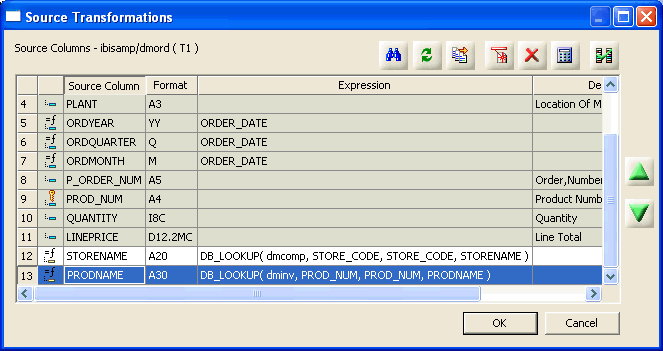
When you are done, the Source Transformations window should appear as shown in following image.
The Column Selection window opens.
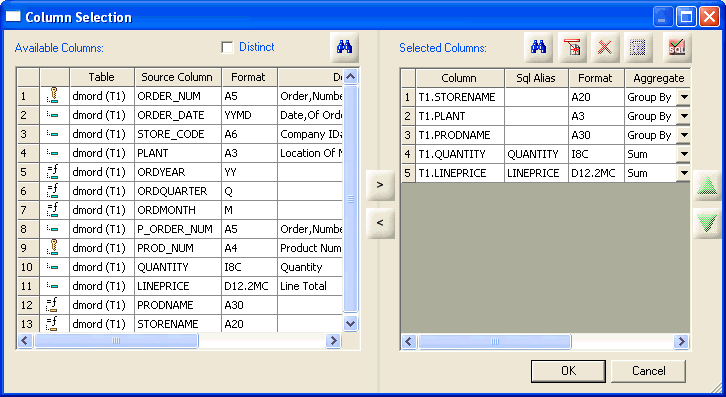
The Columns Selection window should appear as shown in following image.
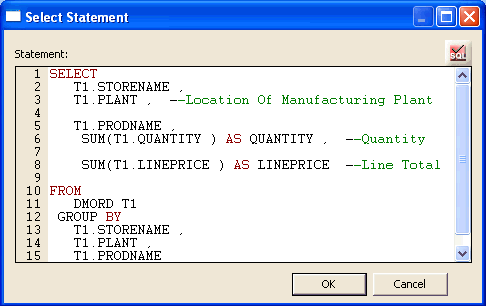
The Select Statement window opens, as shown in following image. Note that there are no joins in the SQL statement.
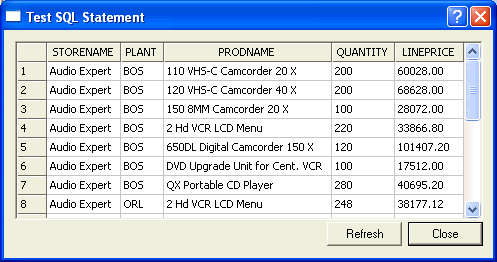
The Test SQL Statement window opens, as shown in following image. Note that the answer set includes columns from DMCOMP (STORENAME), DMORD (PLANT, QUANTITY, LINEPRICE), and DMINV (PRODNAME). The sum of QUANTITY and LINEPRICE may vary depending on your database and your setting for Maximum number of rows for test reports in Tools/Options/Run Options.