Working with Projects

In this section:

How to:

The new PMF Project system allows you to not only measure projects, but gives you the ability to also manage them:

Projects no longer have separate budget and schedule metrics. Instead, project budget metrics are based on analyzing the task-level spend vs. the project-level budget. Project schedule metrics are based on analyzing the task schedules (start dates, completed dates, and Progress) of each task.

Classic PMF Project reports report summaries of the tasks of a project. The reports available are:

Each migrated project will have a single task pre-determined. The task will be named after the project (similar to what happens when you create a project and save it without altering it). Note that the start date of a migrated project, completed date, and total budget will reflect the data of the migrated project. Any project-level budget or schedule records will be deleted from the system.

Procedure: How to Create a New Project

To create a new project, perform the following steps:

  1. In the Author page, click the Projects panel button.
  2. Click New.

    The New Project panel opens.

  3. Enter a name for the project.
  4. Click Save.

    Note: If you choose Save now, one Task will be automatically created in New mode. Every project must have at least one Task assigned to it. The name of the Task will be the name of the project.

  5. You can enter a Description or Budget, or set tolerances at any time.
  6. Click the Tasks tab, as shown in the following image.
    Tasks tab

    You can enter tasks at will, or press the Tab key to move to the next row.

  7. Click Save.

    For more information on the available options on this panel, see Projects.

Procedure: How to Assign a Task

Note: You can drill into any individual Task from the Tasks panel in Projects, or the end-user Tasks gadget.

From the Tasks tab:

  1. Select Assigned from the Status drop-down menu.
  2. Select the Owner assigned to the task from the Assigned to drop-down menu.
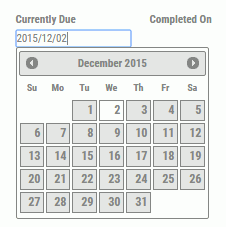
  3. Enter the current due date of the task from the calendar provided, as shown in the following image.
    Calendar
  4. Click Save.

Procedure: How to Set Progress in a Task

Note: You can drill into any individual Task from the Tasks panel in Projects, or the end-user Tasks gadget.

From the Tasks tab:

  1. Select In Progress from the Status drop-down menu.
  2. Specify a Start Date using the calendar provided and modify the Currently Due date, if necessary.
  3. Set the current progress of the project by dragging the progress bar, as shown in the following image.
    Progress bar
  4. Click Save.

Note: If you switch the status from In Progress to Assigned, the Start Date will be cleared.

Procedure: How to Add Feedback or Expenditure to a Task

From the Tasks tab:

  1. Click the task for which you want to add feedback or spending.

    The Edit Task panel opens.

  2. Click the Feedback & Expenditures tab.
  3. For the Effective Date, click the box and select the date from the calendar that opens.
  4. Type any expenditure and task feedback items in the boxes provided, as shown in the following image.

    Task feedback

    Note: An Owner can only edit or delete their own Effective Date, Feedback, or Expenditure entries.

  5. Click Save.

    The Info Tab in the Edit Task panel will display the aggregated Spend data in the Task Expenditure field.

Control Drill Menus for Projects and Tasks

How to:

You can control the content visible from the drill for each Project or Project Task in PMF using the Content tab on the Project panel. Any Content managed within PMF can be added to the menus.

There are two menus available. These options control the drill menu that is activated when you click:

Procedure: How to Add a New Drill Menu for a Project

By default, all Projects in PMF use the same menu. You do not need to do anything to configure this menu. It is automatically configured whenever a new Project is created in the system.

If you want to configure a menu for a particular Project:

  1. In the Author page, click the Projects panel button.

    The available projects display.

  2. Select the project that you want to use.

    The Edit Project panel opens.

  3. Click the Content tab.

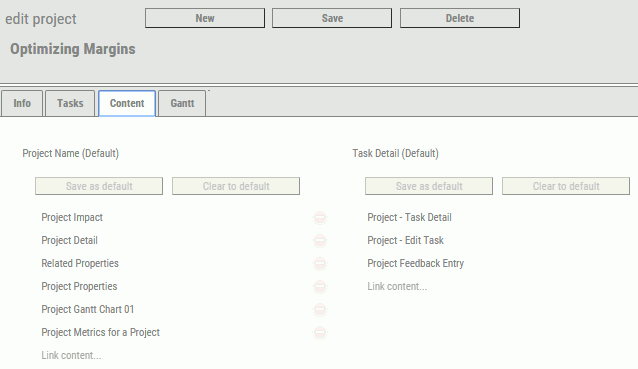
    The Content menus configured for that project display, as shown in the following image.

    Content tab
  4. If you click the Link Content box, you can:
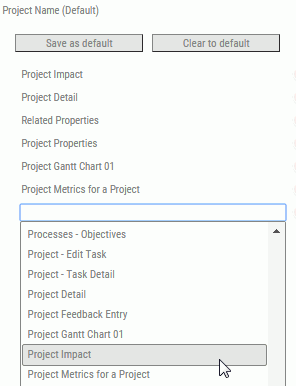
    • Add new (link) content to the Project Name or Task Detail menu by selecting the content item that you want to add from the drop-down menu, as shown in the following image.
      Content item
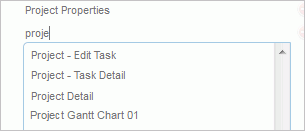
    • Add new (link) content by entering the name of the item in the box, as shown in the following image.
      Content list
    • Change the order of menu items by clicking the arrows next to the link name, and dragging the item up or down, as shown in the following image.
      Dragging item
    • Remove (unlink) any content from the Project Name or Task Detail menu for that metric by clicking the Remove this item button next to the item, as shown in the following image.
      Remove this item button
  5. Click Save once you are done configuring the menu.

    The new menu is now configured. Whenever you select the name or values for that project, PMF displays the Content menus that you configured.

Procedure: How to Make a Content Menu the System Default

You can quickly design a default menu that all Projects will use. This gives all Projects that do not have specific menus a fallback. The system ships with a default menu configured. Performing the steps in the following procedure will override those settings.

To change the default menu for Project Name or Task Detail drills:

  1. In the Author page, click the Projects panel button.

    The available projects display.

  2. Select the project that you want to use.

    The Edit Project panel opens.

  3. Click the Content tab.

    The Content menus configured for that project display,

  4. Click Save as default for the menu that you want to make the system default.

The menu that you specified is now configured as the default. Whenever you click the name or task for any Project that does not already have a specific menu configured, PMF will display the default Content menu that you configured here.

Procedure: How to Clear a Specific Metric Menu to the Default

You can clear any specific metric menu that was previously configured for a Project. When you do this, the Project Name or Task Detail menu of the project will always display the default as currently configured.

  1. In the Author page, click the Projects panel button.
  2. Select the project that you want to use.

    The Edit Project panel opens.

  3. Click the Content tab.

    The Content menus configured for that project display,

  4. Click Clear to default for the menu that you want to restore to the system default.

Any specific metric menu for the Project is deleted, and the Project will now use the default. Whenever you click the name or task detail items for the project, depending on which menus you cleared, PMF will display the default Content menu that you configured here.

Procedure: How to Complete a Task

Note: You can drill into any individual Task from the Tasks panel in Projects, or the end-user Tasks gadget.

From the Tasks tab:

  1. Select Completed from the Status drop-down menu.
  2. Specify the Completed On date using the calendar provided.
  3. Click Save.

WebFOCUS