Working With iWay Resources

In this section:

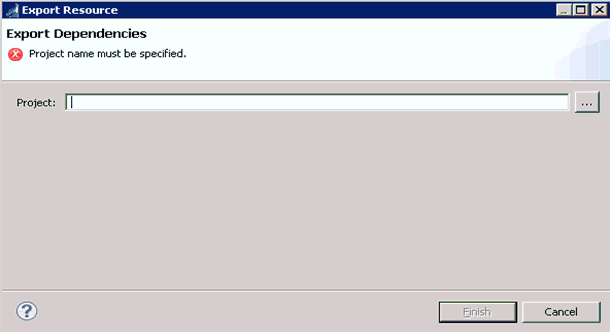
Publishing an iWay Resource

Publishing an iWay resource to the iSM registry allows the resource to be available for all your integration projects.

To publish an iWay resource to the iSM registry:

  1. From the Integration Explorer, select a resource you wish to publish (for example, Hello_Pflow).
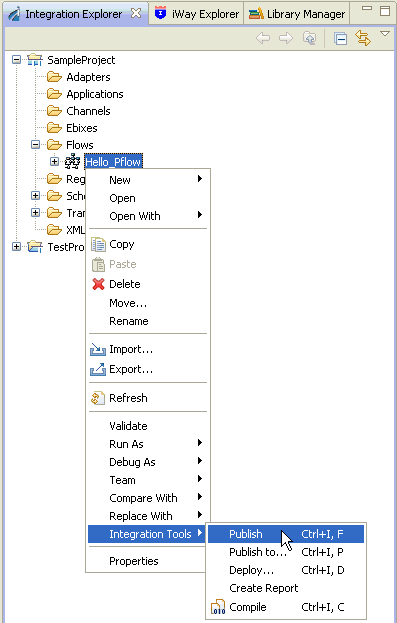
  2. Right-click the resource, select Integration Tools and click Publish from the context menu.

    The Publish Resource Wizard opens, as shown in the following image.

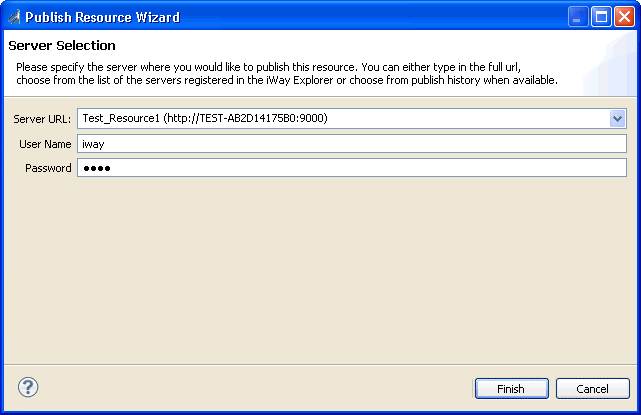
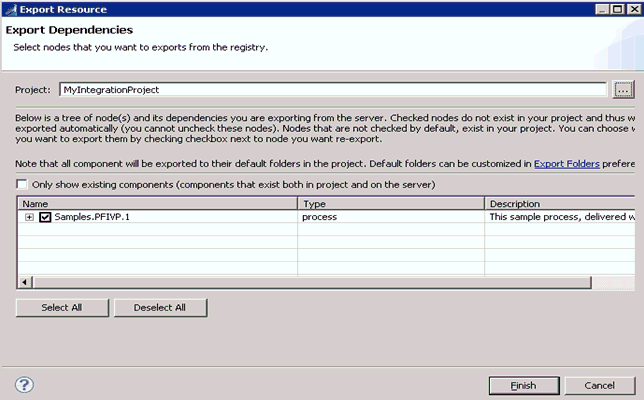
  3. Type the URL with the SOAP port in the Server URL field, or select a pre-configured URL from the drop-down list.

    The drop-down list provides all of the servers you have defined in iWay Explorer.

  4. Click Finish.

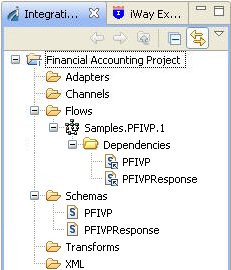
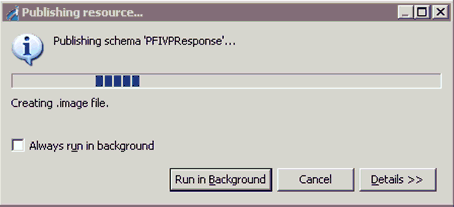
    The resource is published to the iSM registry.

    Note: If the publish process fails, diagnostic information can be found in the Eclipse Error Log view.

    Tips:

    • The list of servers in the Server URL drop-down list is created from the server entries that are found in iWay Explorer.
    • Once a resource has been published you can publish it to any previously published iSM URL by selecting the URL in the Previously Published table.

Exporting a Resource From an iSM Registry

You can use the Registry component in iWay Explorer to browse resources available in the registry of an iSM server and export a selected resource from the registry to an integration project in your workspace. You can then modify the resource and publish it back to the registry, or use it in a process flow.

  1. Connect to an iSM instance using the Registry component in the iWay Explorer view.
  2. Right-click on a resource that you would like to export to iIT and select Export.

    The Export Resource dialog box opens.

  3. Specify a target project in the Project field.
  4. If you have not created a project, click the Browse button and then the Create Project button.

    All dependencies of the resource will be exported with the parent by default. For example, if you have a process flow containing a transform, the transform will be exported to the default containing folder during the process flow export process.

  5. Select all of the nodes that need to be exported to the Integration Project and click Finish.

    After the process is complete, the selected resource can be found in the Integration Explorer under the target folder.

    In the following image, the Integration Explorer tab is selected. The resource named Samples.PFIVP.1, which is a process flow, was exported from an iSM registry to an integration project named Financial Accounting Project. Samples.PFIVP.1 is stored in the default export folder, named Flows. Samples.PFIVP.1 has two dependencies, which are schemas named PFIVP and PFIVPResponse. Those dependencies are also stored in the default export folder, named Schemas.


iWay Software