Using Outbound Synchronous Messages
Starting with PeopleTools 8.4, you can send
outbound synchronous messages. From a high-level point of view,
the primary difference between outbound synchronous and asynchronous
is that with outbound asynchronous, the transaction is completed
whether or not the message is actually sent or received.
For synchronous outbound messages:
- The transaction
must wait for a response from the external system before continuing.
- The transaction
must process the response message.
- The external
system must ensure that the response message is correctly formatted.
You can use an existing node, or you can create a new node to
configure outbound synchronous messages. For information on creating
and configuring a node, see How to Create and Configure a New Gateway Node. In either case, you must configure your
outbound synchronous transaction.
The iWay Application Adapter for PeopleSoft can work with PeopleSoft
outbound synchronous messages. Outbound synchronous messages involve
additional configuration steps, both within PeopleSoft and in your
application server.
Note: The instructions in this topic build upon the instructions
for outbound asynchronous messages. It is strongly recommended that
you familiarize yourself with outbound asynchronous messaging before
attempting outbound synchronous. For more information on outbound
asynchronous messages, see Configuring Integration Broker in PeopleSoft 8.4.
Ensure that both outbound and inbound messages are created and
active. PeopleSoft provides template examples called IB_INST_VER_SYNC_MSG
and IB_INST_VER_RESP_MSG. For information on examining these messages,
see How to Ensure the Message Is Active and Is Routed Correctly.
Example: Configuring an Outbound Synchronous Message
The
following example uses a node and transaction delivered by PeopleSoft.
However, this example is for illustrative purposes only and does
not work as delivered without additional steps. As of Financials
release 8.42, there are no pre-configured outbound synchronous transactions
that you can use for testing purposes.
- Navigate to
the Node Definitions page and open the PT_LOCAL node.
- Click the Transactions tab.
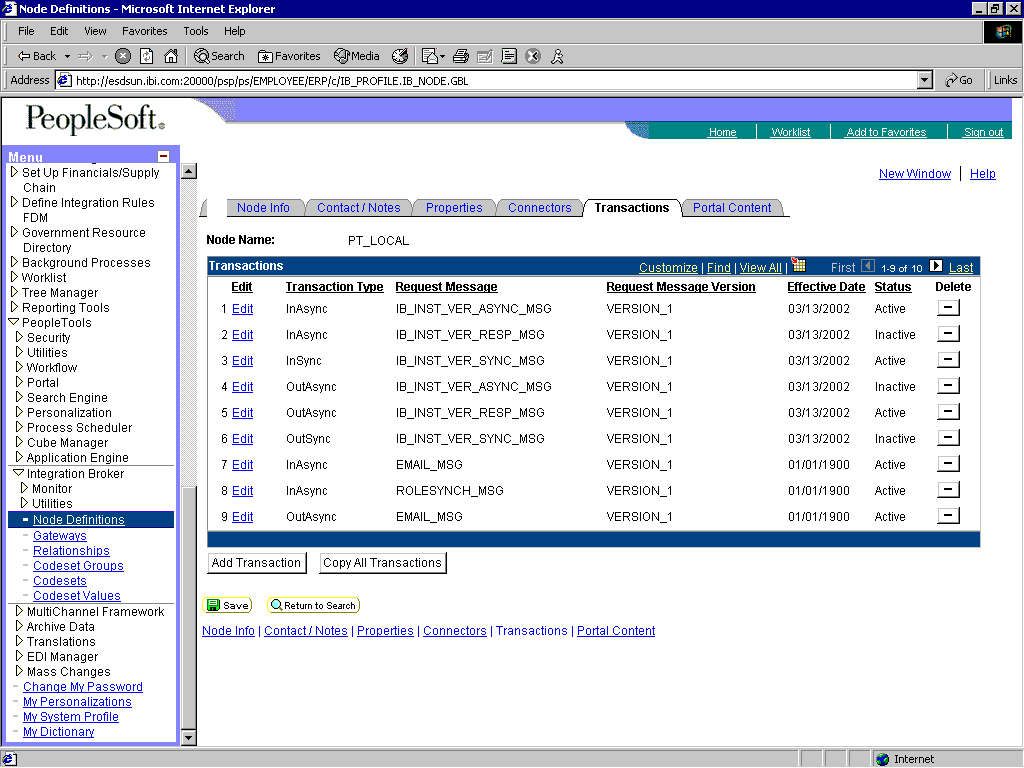
The
Transactions pane opens where you can edit transaction types and
request messages as shown in the following image.

One outbound synchronous
message, IB_INST_VER_SYNC_MSG, appears in the Transaction Type list.
- In the IB_INST_VER_SYNC_MSG
row, click the Edit hyperlink.
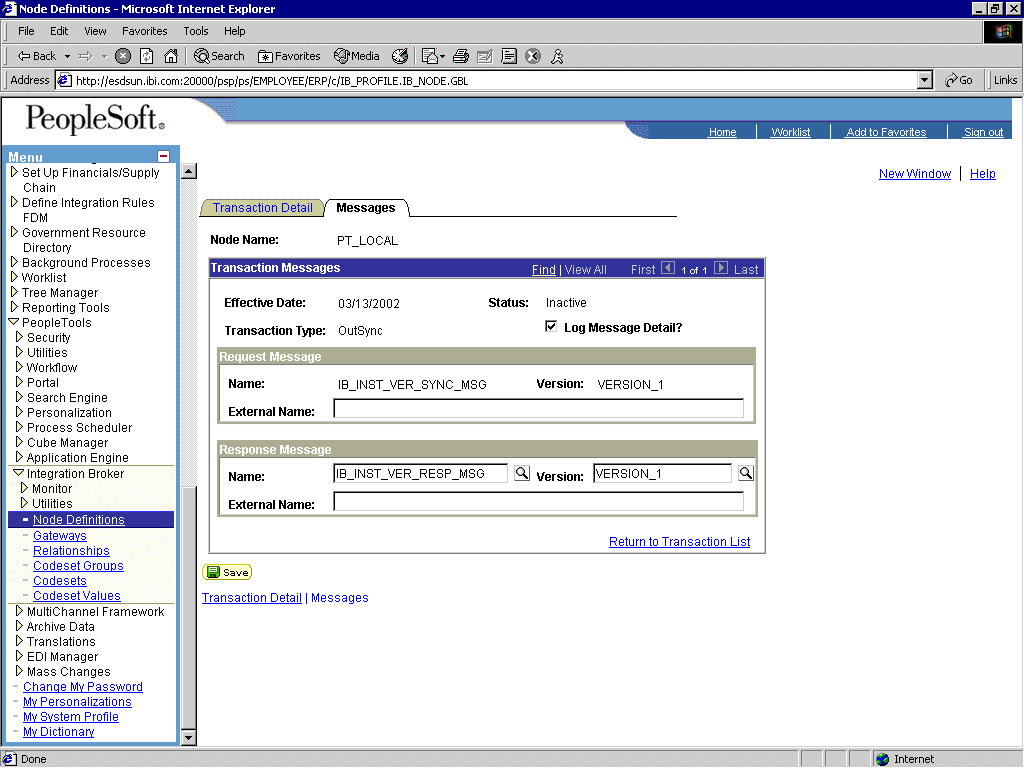
The Transaction
Detail and Messages tabs become available, as shown in the following
image.

- Click the Messages tab.
Request
and response messages appear. The target system must ensure that
the response message follows the format of the request message.
As the target system is your application server, you must transform
the XML that is sent and returned from your final destination.
Note: You
must use the PeopleSoft-supplied HTTP target connector when you are
working with synchronous outbound messages. You cannot use the TCPIP84TARGET connector
for outbound synchronous messages.
Example: Viewing the PeopleCode for a Financials Synchronous Outbound Message
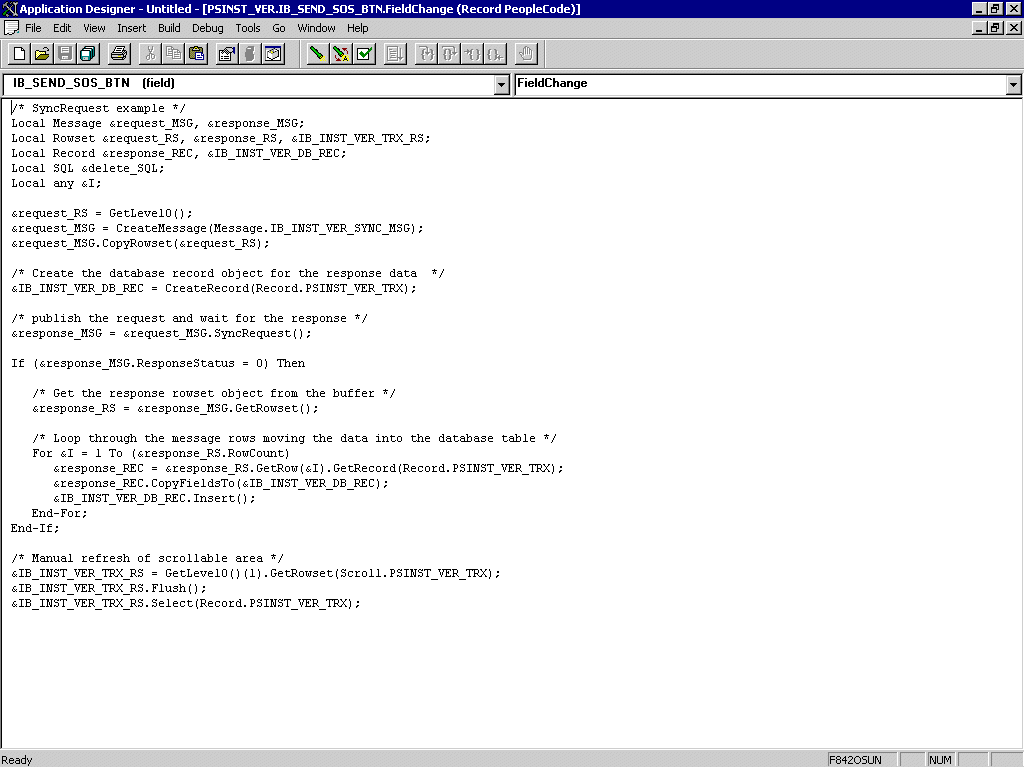
The
sample PeopleCode in the following example is for a synchronous
outbound message. It differs from asynchronous outbound in that
it must handle a response message.
The following sample code
is supplied with the Financials application and is associated with
the two messages IB_INST_VER_SYNC_MSG and IB_INST_VER_RESP_MSG.
To
view the PeopleCode:
- From iWay Explorer,
open the PSINST_VER record.
- Select the PeopleCode display
option.
- Select the Field
Change (FCh) box for the IB_SEND_SOS_BTN field.
The
following code appears as shown in the following image.


