Creating the Window File
|
In this section: |
The -WINDOW command SAMPLE FOCEXEC tells FOCUS to look for a window file named SAMPLE and a window named MAIN. The complete list of windows used in this application is:
|
BORDER |
A text display window used as a background display for the other windows. |
|
BANNER |
A text display window that introduces the application. |
|
MAIN |
A vertical menu from which the user can choose to create a graph or a report, or exit the application. |
|
EXECTYPE |
A vertical menu from which the user chooses to execute an existing procedure or create a new one. |
|
EXECNAME |
A file names window displaying all FOCEXEC files, from which the user can select one to execute. This window is seen only if the user opts to execute an existing report in EXECTYPE. |
All these windows are included in the window file named SAMPLE. Start by building that window file.
Before you can use Window Painter to create a window file, a PDS must be allocated with ddname FMU, LRECL 4096, and RECFM F. BLKSIZE 4096 is recommended.
You can reach the FOCUS Window Painter Entry Menu by typing
WINDOW [PAINT]
at the FOCUS prompt, and pressing Enter.
The Entry Menu is the first screen you see:

Since you are creating a new window file, choose NEW FILE, and press Enter. The next screen you see prompts you to name the window file.
Since the FOCEXEC looks for a window file named SAMPLE, type
SAMPLE
and press Enter.

A screen appears asking for a description of the window file.
Type
Sample file for Window Painter tutorial
and press Enter.

Creating the Text Display Window Named BORDER
Now you are ready to create the first window. The Window Painter Main Menu screen appears. Select
Create a new window
and press Enter.
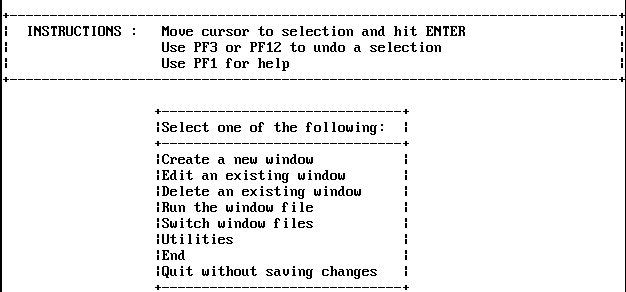
The Window Creation Menu asks what kind of window you want to create.
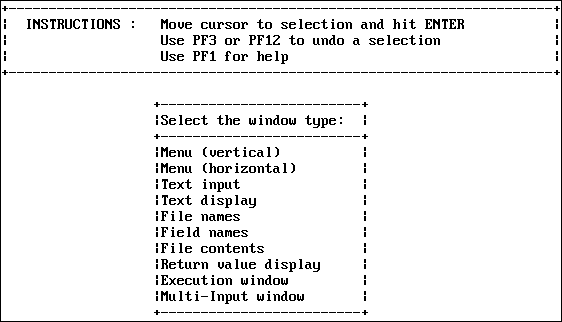
The BORDER window is the first window you create for the application. BORDER supplies a background border for other windows. It is a text display window, so select
Text display
and press Enter.
Next, you are asked to name the window. Type
BORDER
and press Enter.

The Window Description Screen appears next. This description does not appear when the window is displayed, but becomes part of the document file that Window Painter creates describing all windows in the file. Since the document file is very useful when writing your FOCEXEC, it is a good idea to enter a functional description here. To describe this window, type
This window borders all my screens.
and press Enter. The ability to annotate screens in this manner is very useful when selecting windows to edit.

The Window Heading Screen comes next. Since you do not want a heading displayed on this window, simply press Enter to bypass it.
The Window Design Screen displayed now is nearly blank, with a cursor for you to position where you want the upper left-hand corner of BORDER to be. Leave the cursor where it is and press Enter.
A small box appears around the cursor: this is the window. Make the window larger. Using the arrow keys, move the cursor to the right edge of the screen, on the line just above the status line: this is the new lower right corner of the window. Now press PF4 to resize the window. (PF4 functions as the SIZE key in the Window Design Screen.) The window has been resized so that its lower right corner is where you positioned the cursor: the window now fills the entire screen.
When resizing a window, remember that the window's lower right corner refers to the lower right corner of the window border, which is shown as a plus sign (+) on the screen. It is this corner that you are moving when you resize the window. On the other hand, the last row of the window refers to the last row that can contain data or text: this is the row immediately above the bottom border.
This window's border forms the background border for the other windows in this application.
If you need help using the keyboard while in the Window Design Screen, press PF1 (the Window Painter Help key) to see the following display:
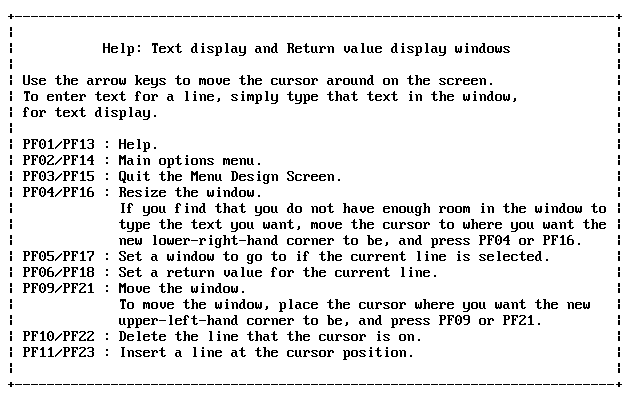
Press Enter to continue.
Now that the window is complete. Press PF3 and save the window.
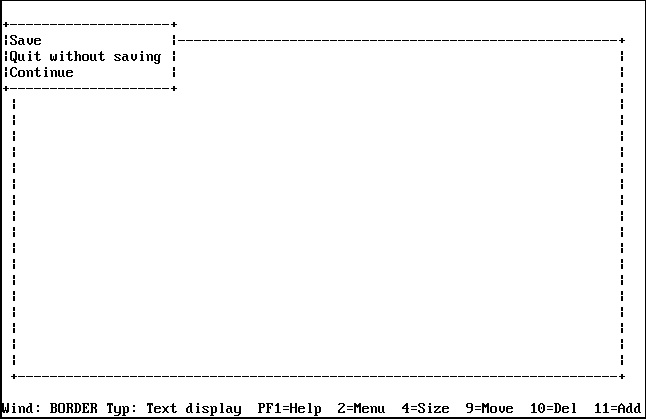
Press Enter to select Save. You return to the Main Menu.
Creating the Text Display Window Named BANNER
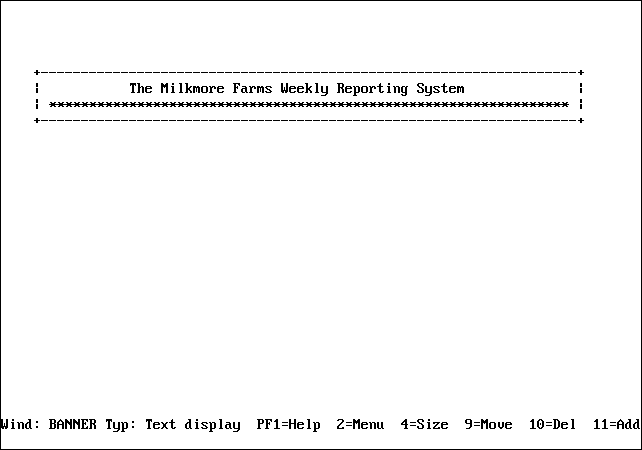
BANNER is also a text display window, but is smaller than BORDER and contains text that identifies this application.
From the Window Painter Main Menu, select
Create a new window
and press Enter. Select
Text Display
and press Enter. The name of this window is
BANNER
and its description is:
Banner for application MAIN menu.
Enter this name and description just as you did for the BORDER window. When prompted for a heading, press Enter.
At the Window Design Screen, use the arrow keys to move the cursor two spaces to the right, and press Enter. Now position the cursor 64 more spaces to the right and two rows down, and press PF4 to resize the window.
Enter text to be displayed in the window. Reposition the cursor on the first line within the window, 10 spaces to the right of the window's left border, and type:
The Milkmore Farms Weekly Reporting System
Type a line of asterisks (*) across the window's second line. (Begin at the second column within the window, because the first column of every window is protected.)
Center the banner in the width of the screen. Estimate where the upper left corner of the window would be if the window were centered. Position the cursor there, and then press PF9. The window moves to its new location. Repeat the process if you need to center it more precisely.
The window should look like this:
Press PF3 and save the window.
Creating the Vertical Menu Window Named MAIN
You will now create the MAIN vertical menu window, which collects the amper variable &MAIN. Select
Create a new window
and press Enter.
BORDER and BANNER are text display windows, from which no options may be selected. Since MAIN, however, is a menu from which a selection must be made, choose
Menu (vertical)
and press Enter. Name the window:
MAIN
On the Description screen, type
User can report, graph, or exit.
and press Enter.
When prompted for a heading, type 10 spaces, then
Would you like to:
and press Enter.
On the Window Design Screen, move the cursor five rows from the top and 20 columns from the left, and press Enter. The window is created wide enough to contain the heading. Now position the cursor six rows below the window's bottom edge, and 10 columns to the right of its right edge. Press PF4 and the window is resized.
Type the following menu options as they appear below:
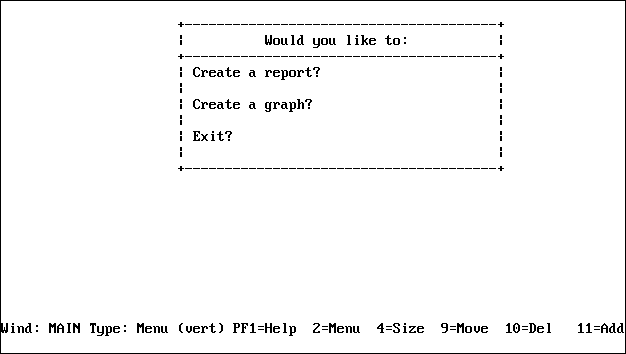
You assign goto and return values for each menu option. To assign either value to an option, the cursor must first be on that option.
Move your cursor back to
Create a report?
and press PF2 to display the pop-up Window Options Menu.
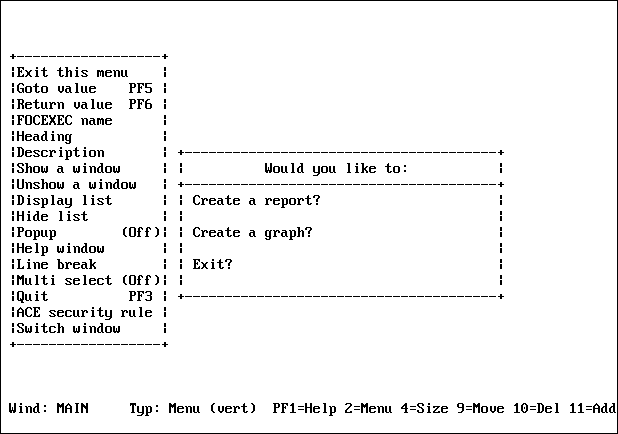
Assigning a goto value tells the Window facility to display another window when this item is selected during execution.
In the next window of this application, the user is prompted to either execute an existing report or create a new one. The window that displays the prompt is called EXECTYPE, so the goto value of the first two menu options is EXECTYPE.
Move the cursor to
Goto value
and press Enter.
In the space provided, type
EXECTYPE
and press Enter.
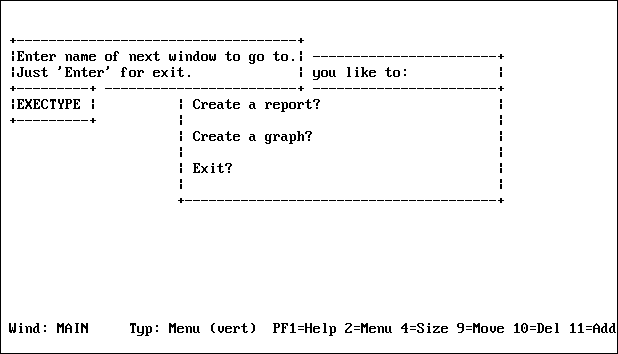
The return value collected by this window—&MAIN—is tested in the FOCEXEC:
-START
-WINDOW SAMPLE MAIN
-IF &MAIN EQ XXIT     GOTOEXIT;
-IF &MAIN EQ RPT      GOTO GENERATE;
-IF &MAIN EQ GRPH     GOTO GENERATE;
.
.
.
Now move the cursor to
Return value
and press Enter.
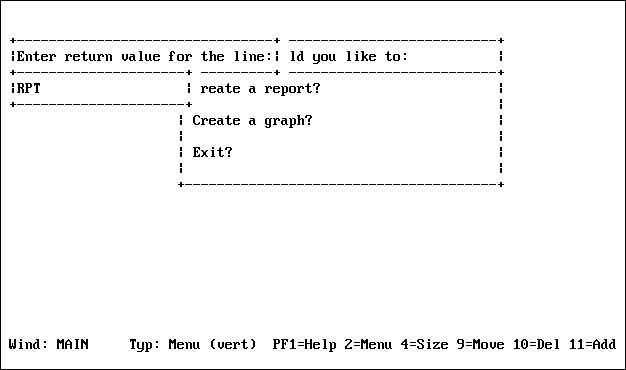
Type the value
RPT
as shown, and press Enter.
Exit the Window Options Menu by moving the cursor to
Exit this menu
and pressing Enter.
Set the values for:
Create a graph?
Move the cursor to the second menu item, and press PF2.
Repeat the steps you just performed, assigning the goto value
EXECTYPE
and the return value:
GRPH
Leave the Window Options menu and move the cursor to
EXIT?
For this option, you do not assign a goto value. Since it exits to the FOCEXEC, there is no other window to be displayed.
Repeat the steps to assign the return value:
XXIT
With the Window Options Menu still on the screen, move the cursor to
Display list
and press Enter.
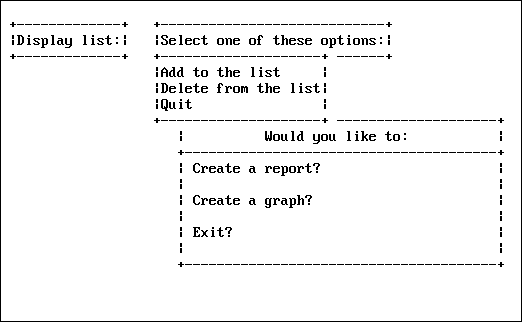
The display list may specify up to 16 windows to be displayed when this window is visible during execution. Since you want BORDER and BANNER to be displayed with MAIN, you must add each to the list.
Select:
Add to the list
A list of windows appears, from which you select by moving the cursor and pressing Enter. The windows must be selected in the order in which they should appear, because they are overlaid one on top of another when displayed. Select BORDER and BANNER for MAIN's display list, being certain to select BORDER first so that it is displayed behind BANNER.
When you have finished, choose Quit to return to the Window Options Menu.
Quit the Window Options Menu and press PF3 to save MAIN.
Before moving on, look at what you have done so far. Select
Run the window file
and press Enter.
Select
MAIN
as the starting screen. Press Enter, and the following appears:
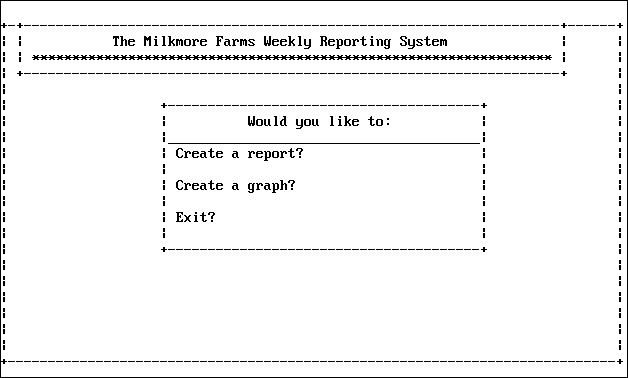
Position the cursor on the "Create a report" line. When you press Enter to continue the display, you see an error message because EXECTYPE—the goto value—has not been created yet. Ignore it, and press Enter to continue. You see a screen displaying amper variables for this window and the values. Press Enter to return to the Main Menu.
Creating the Vertical Menu Window Named EXECTYPE
So far you have created two text display windows and a vertical menu. The next window we create is also a vertical menu.
Select
Create a new window
from the Main Menu, and choose
Menu (vertical)
from the Window Creation Menu. Enter
EXECTYPE
as the window name.
When prompted for a description, type
Create a new FOCEXEC or run existing one
and press Enter. When prompted for a heading, press Enter.
When the Window Design Screen appears, move the cursor 12 rows down the screen and 22 columns to the right, and press Enter. Now reposition the cursor four rows beneath the bottom edge of the window and 32 columns to the right of the right edge of the window, and press PF4 to resize it.
Type the following two menu options as they appear below:
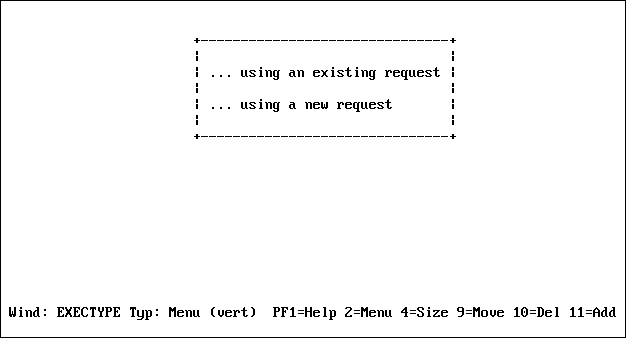
When you created the MAIN window, you used the Window Options Menu to set each return value and goto value. There is an easier way to set return and goto values using the PF6 and PF5 keys.
Pressing PF5 prompts you successively for a Return value, a GOTO value, and a FOCEXEC name. When prompted for the Return value, enter EXIST and press PF5. You are prompted for A GOTO value. Press Enter, and you are prompted for a FOCEXEC name. Press Enter.
If you select
... using an existing request.
from the EXECTYPE menu, the file names window EXECNAME displays next. EXECNAME contains a list of existing FOCEXEC files from which you may choose.
Move the cursor to the second menu item.
Consider the return and goto values for this option.
If you choose to create a new report or graph request, EXECNAME is not displayed. Rather, control must pass back to the FOCEXEC, which executes these lines:
.
.
.
-IF &EXECTYPE EQ EXIST GOTO RPTEX ELSE GOTO NEWRPT;
.
.
.
-NEWRPT
-SET &PROCNAME=IF &MAIN EQ RPT THEN TABLETALK
ELSE IF &MAIN EQ GRPH THEN PLOTTALK;
&PROCNAME
-RUN
For control to pass to the FOCEXEC if this option is chosen, do not assign a goto value to it. Remember that during execution, control passes to the FOCEXEC when an option without a goto value is selected.
The return value may be anything other than EXIST. For now, press PF6, and enter
NEXIST
Rather than create display and hide lists for EXECTYPE, make a pop-up window. A pop-up window is displayed like any other window, but disappears when the user presses Enter. EXECTYPE pops up in front of MAIN.
Press PF2 to display the Window Options Menu, move the cursor to
Popup(Off)
and press Enter. (Off) changes to (On).
Exit the Window Options Menu, press PF3, and save the window.
Creating the File Names Window Named EXECNAME
Your final window is the file names window that displays a list of existing FOCUS report requests. On the Window Creation Menu, select:
File names
Name the window
EXECNAME
and type in the description:
Select an existing FOCEXEC from list.
Enter an explanatory heading:
Select the request you want to execute and press ENTER:
You are prompted for file-identification criteria. Type
* FOCEXEC
and press Enter.

When the application is executed, this selects all members of ddname FOCEXEC.
On the Window Design Screen, move the cursor two rows down and press Enter. Use PF9 to center the window on the screen. Resize the window: reposition the cursor two columns to the right of the window's right edge and 10 rows below the window's bottom edge, and press PF4.
Since only BORDER should be displayed with this window, add BANNER, MAIN, and EXECTYPE to the hide list and add BORDER to the display list.
When the user selects a file name from this window during execution, that file name is automatically collected as the return value. You cannot set the return value any other way for this type of window.
In the FOCEXEC, that return value is plugged into the line
EX &EXECNAME
and the report or graph request is executed.
In order for this to happen, you must return control to the FOCEXEC assigning no goto value to this window.
To change the file identification criteria of a file names window (or of a field names or file contents window) after it has been created, change the "return value." Although these two window types cannot have actual return values set when the window is created or edited, the "return value" that can be set is actually the window's file identification criteria. You can change the file identification criteria just as you would change the actual return value of a vertical menu window.
Exit from the Window Options Menu, press PF3, and save the window. The window file is complete. Exit from Window Painter.