This section identifies the differences between Developer Studio and App Studio upon startup. Both products are launched by clicking on their respective icons.
Developer Studio opens with the Explorer window, which displays your environments, projects, and files. You can use the Main toolbar, Command toolbar, and the Menu bar to access specific tools for creating different files.
App Studio opens with a Welcome screen, which provides you with links to the Getting Started With WebFOCUS App Studio manual, introductory video, and App Studio Information Center. The Environments Tree panel displays your WebFOCUS environments. The Home tab provides commands for creating content, options to manage and edit your environments, and accessing the Command Console. Because App Studio focuses on what you are creating, instead of how you create it, you no longer need to know how to access the many tools found in Developer Studio. You only need to know what content you want to create and where you want to create it.
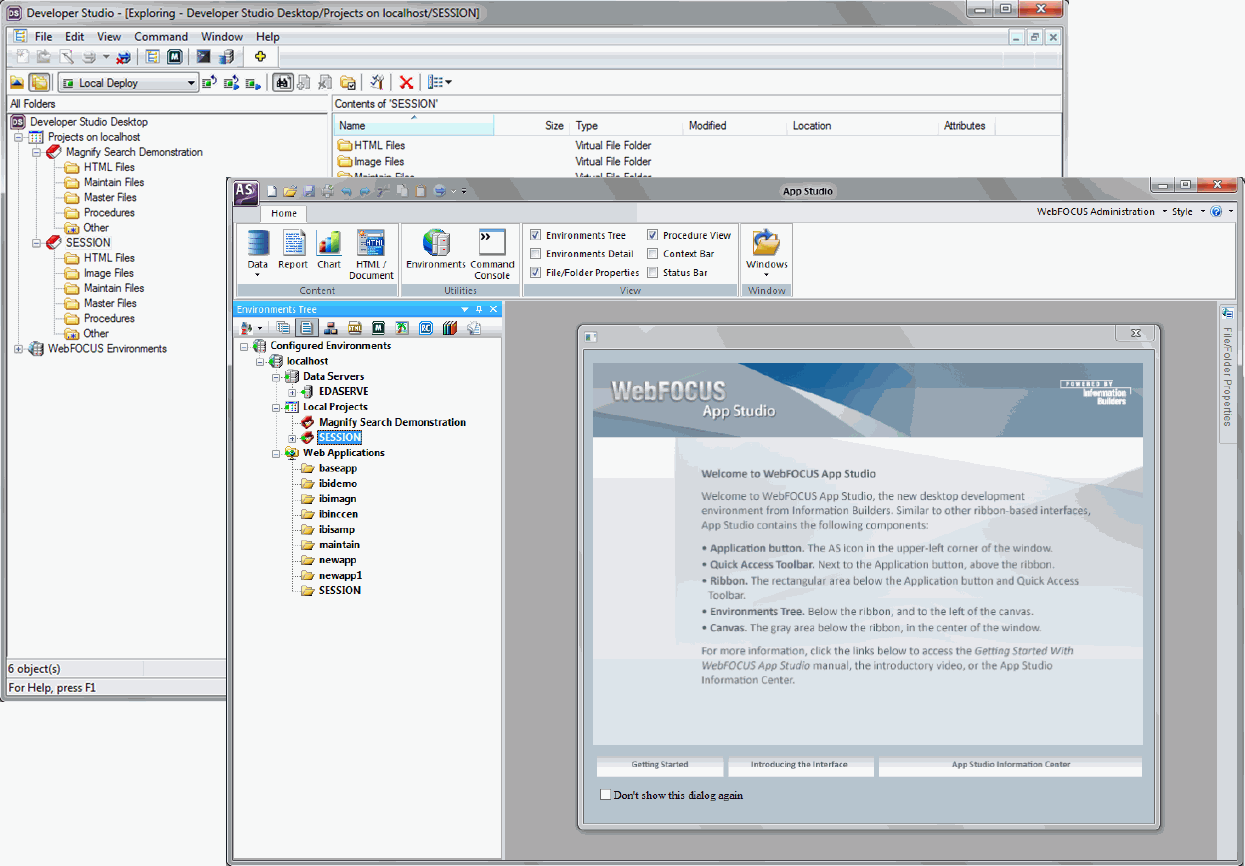
The following image shows a comparison of the default Developer Studio and App Studio interfaces.

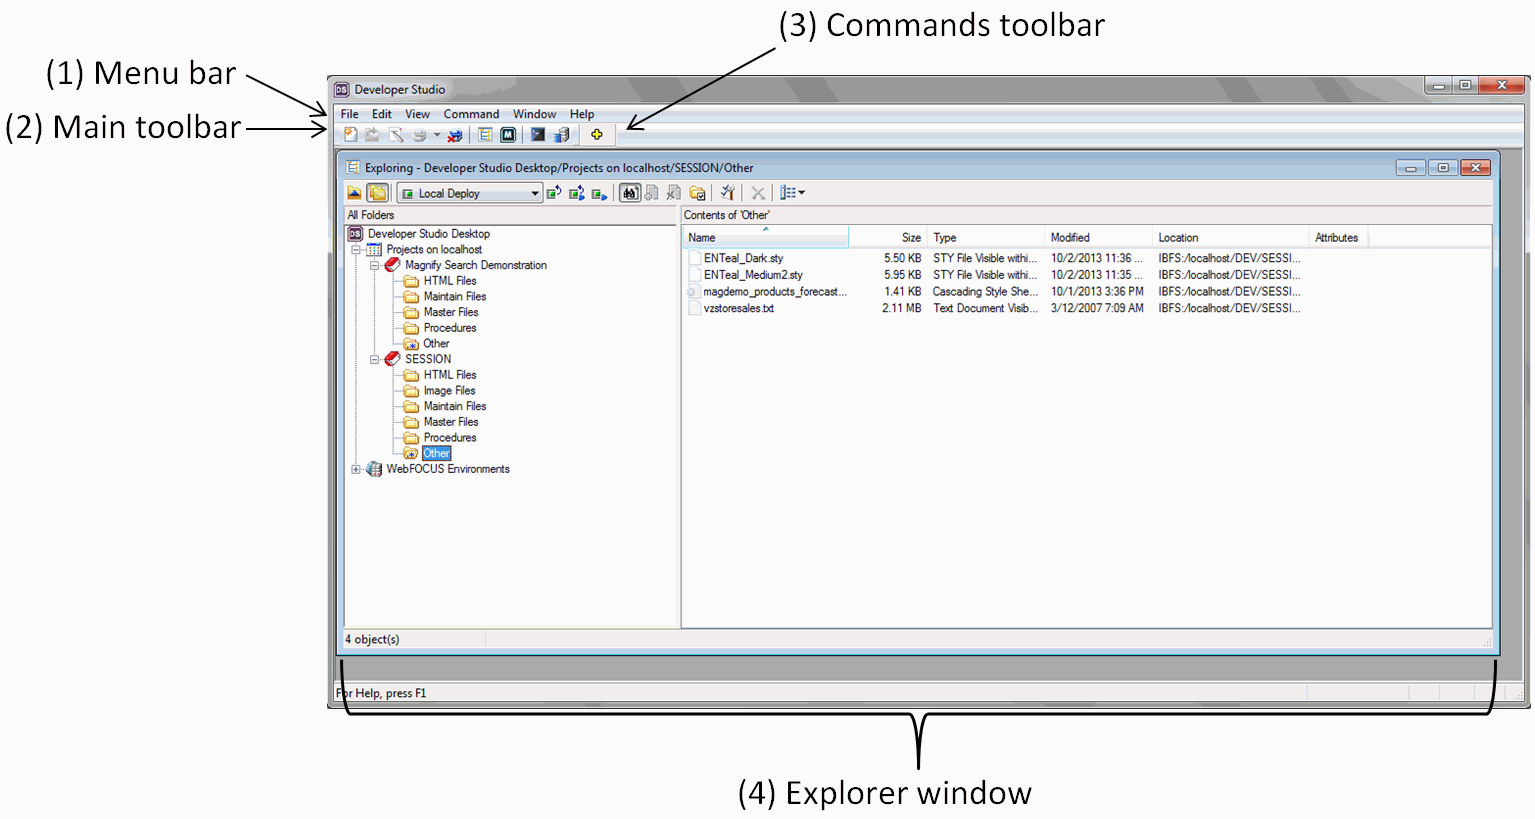
The following image shows the default Developer Studio interface, and highlights the Menu bar, Main toolbar, Commands toolbar, and Explorer window.

Menu bar. Displays pull-down menus. The menus and options are context-sensitive, and are determined by the active window or selected object.
Main toolbar. Provides quick access to commonly performed functions. These buttons always appear on the toolbar, but their behavior is determined by the active window and the selected object.
Commands toolbar. Provides quick access to any external program added in the External Tools tab of the Developer Studio Options dialog box. When you add an external program, it appears as an additional icon on the Commands toolbar.
Explorer window. This window is based on the Microsoft Windows Explorer tree structure, and provides access to development tools so you can quickly build and deploy web-based reporting applications.
To begin creating content in Developer Studio, you need to know what tool to use, and where to create it. Some development areas do not allow you to create certain file types.
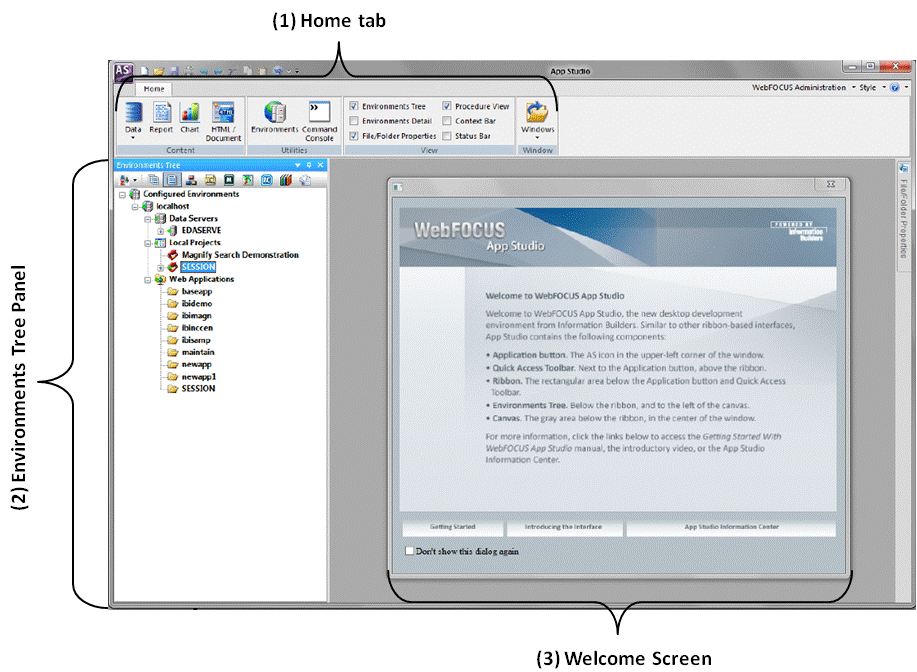
The following image shows the default App Studio, and highlights the Home tab, Environments Tree panel, and Welcome screen.

Home tab. Enables you to access the features and functions necessary to build an application, create new components, open existing components, run existing components, and edit components.
Environments Tree panel. Displays the WebFOCUS Environments, Data Servers, Local Projects, and Web Applications nodes, as well as the content contained in these nodes.
Welcome screen. Provides you with quick links to the Getting Started With WebFOCUS App Studio manual, introductory video, and App Studio Information Center.
To begin creating content in App Studio, you simply need to know what type of file you want to create. For example, if you know you want to create a report, click Report on the Home tab to begin creating your report.
| Information Builders |